BrightServer Instances
Contents Hide
BrightBuilder has the ability to register and connect to instances of BrightServer. Registered instances of BrightServer are contained in the Servers window.
You can connect to each instance of BrightServer and manage servers remotely. For instance, you can monitor the Online Users, view the list of Licensed Devices, view live Remote Tracing and view and request Client Logs.
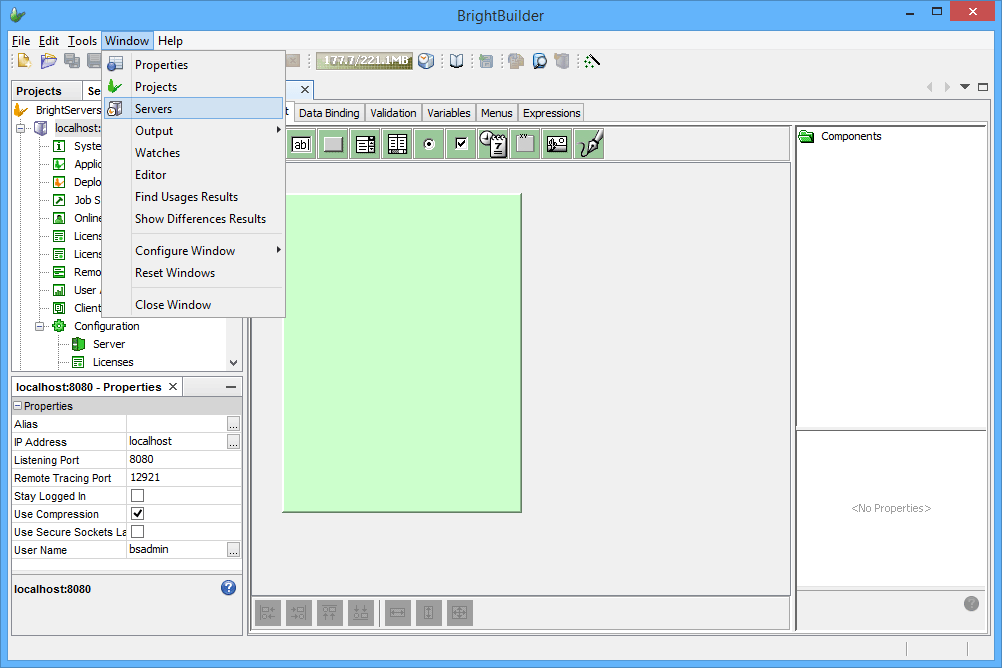
Open the Servers window via the Window menu in BrightBuilder as shown.
Register a Server
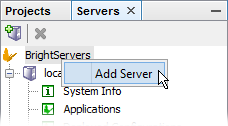
Register a BrightServer instance by right clicking the 'BrightServers' node in the 'Servers' tab, and then selecting 'Add Server'. Alternatively, this may be achieved by tapping the 'Add Server' button on either the panel or BrightBuilder toolbar.
Complete the server connection details in the Add Server Wizard to register the BrightServer instance.
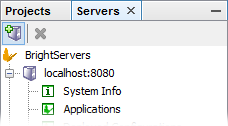
 By
default, a 'localhost:8080' server will be registered in the Servers
panel, which may access a BrightServer instance after installing
and starting it on the local machine with default ports.
By
default, a 'localhost:8080' server will be registered in the Servers
panel, which may access a BrightServer instance after installing
and starting it on the local machine with default ports.
The IP Address and Listening Port and required fields. The User Name is not mandatory at this point but will be required to connect to the server at a later stage. For the other options, see below sections for detailed descriptions.

Connecting and Disconnecting to a BrightServer Instance
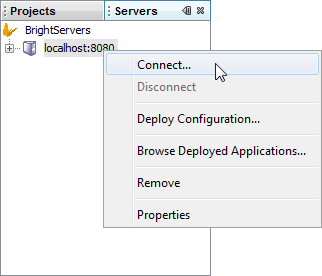
Once a BrightServer instance has been registered, you may connect to and disconnect from it. Simply right click the server and select the desired action.
When connecting to the server, BrightBuilder will ask for authentication details as shown below.
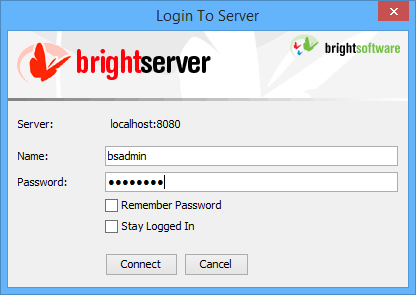
If the Remember Password option is selected, then the password entered will be kept and automatically entered in this field until BrightBuilder is restarted.
If the Stay Logged In option is selected, the connection to the server will kept alive. For this option to work, you must select the Remember Password option as well.
Server Properties
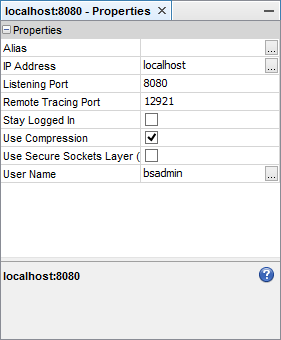
Server properties (sorted by property name) include:
| Property Name | Description |
Alias |
Optional string value which will appear next to the server IP address in the Servers panel. Use this as a reminder of the server's purpose. |
| IP Address | IP address the server instance is running on. |
| Listening Port | TCP port the server instance is listening on. |
| Remote Tracing Port | TCP port to connect to the server instance for Remote Tracing |
| Stay Logged In | When set to true, the connection to the server will kept alive. Note that the Remember Password option must be enabled when logging in the first time. |
| Use Compression | When set to true, data sent to the server will be compressed. |
| Use Secure Sockets Layer | When set to true, communicates data securely |
| User Name | Default username to use when connecting to the server |
Changing server properties
To change the properties of a server,
Select the server, the properties will be listed in the Properties window
Select project property by clicking on the right hand side of the property name.
Type an entry or select from the options.
Server Elements
There are several server elements which may be accessed by expanding the server instance's node. They are as follows:

System Info: view server info including server version, OS info etc. See System Info.
Applications: Displays a list of applications and releases which have been deployed to BrightServer instance, which may be viewed or downloaded remotely for opening as BSP files. See Deployed Applications.
Deployed Configurations: Displays a list of server configurations and releases which have been deployed to the BrightServer Instance, allowing viewing, activate/deactivating and downloading as BEP files. See Deployed Configurations.
Job Status: Monitor and control the execution of job scripts contained in active server configurations, or uploaded to the server via the Configuration > Jobs panel. See Job Status.
Online Users: view users who are currently connected connected to the BrightServer instance. See Online Users.
Installed Licenses : view licenses deployed to server, whether they are current, expired or valid licenses. See Installed Licenses.
Licensed Devices: view devices which have connected to the BrightServer instance and received a license. See Licensed Devices.
Licensed Web Users: view users who have connected BrightServer instance in web mode and received a license. See Licensed Web Users.
Remote Tracing: view a live event logging from the BrightServer instance. See Remote Tracing.
User Activity: view user activity logs stored on the server. See User Activity.
Client Logs: request and view logs from client devices. See Client Logs.
Configuration: view and edit the current configuration details from the BrightServer instance and backup configurations to file. See Server Configuration.