Configuring BrightServer
Contents Hide
As covered in earlier chapters, initial setup and configuration of a BrightServer instance is done by creating a BEP project such as configuring sync points, mappings, scripts etc. and exporting or deploying the configuration. However further configuration changes need to be carried out while the server is running with the configuration deployed. These configuration changes include server settings, managing users and licenses etc. To carry out these configuration changes, you need to connect to the running server instance and directly modify the server configuration remotely.
In order to connect to the server using BrightBuilder, you need a valid user name and password. BrightServer Mobile Data Gateway has a built-in user account with the user name bsadmin and the password changeit. You can use this account to connect to server initially and start creating users, adding new licenses and changing server configuration parameters. This default system account cannot be deleted or deactivated. For security reasons, it is highly recommended to immediately change the password after installing BrightServer.
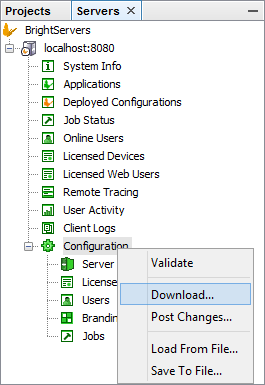
The Configuration node of a BrightServer instance allows you to connect to a running server, download the runtime configuration, make modifications and upload the changes back to the server.
In addition to downloading and uploading from a live server, runtime configurations can be saved and loaded from a file. This allows snapshots of the server configuration to be saved at any given time.
Server elements which can be modified include the Server settings, Licenses and Users. Note that sync points, scripts, tables and mappings cannot be edited at runtime. These can only be modified by changing the BEP project and redeploying the configuration to the server.

Modifying Configurations
Using Configuration nodes you can :
Configure server settings using Server node
Deploy licenses using Licenses node
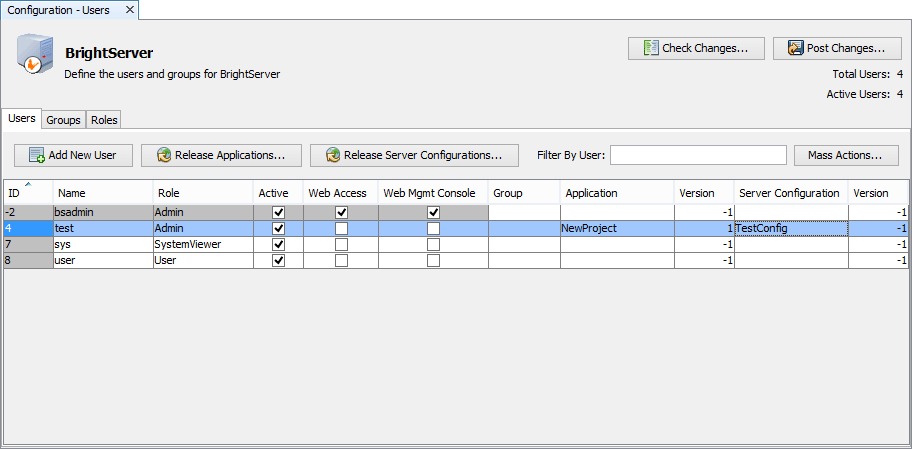
Manage users accounts, and user groups, release applications using Users node.
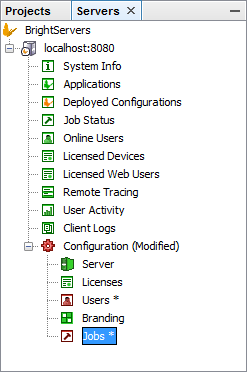
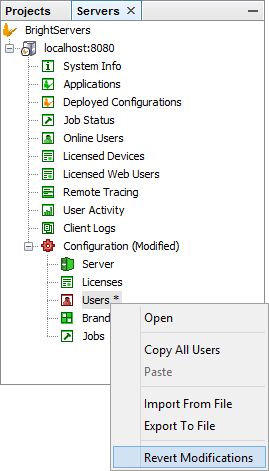
Changes made to any of these nodes will result in a change in the Configuration node graphic to red, as shown below.
Changes are also represented by each configuration node's working panels via the following colour code:
Blue - Denotes a modification to the row. Can be reverted via selecting 'Revert Modifications' in the row's context menu.
Green - Denotes a created row. Can be reverted by deleting the row.
Red - Denotes a row to be deleted. This may be reverted by the 'Undo Delete' function in the context menu.
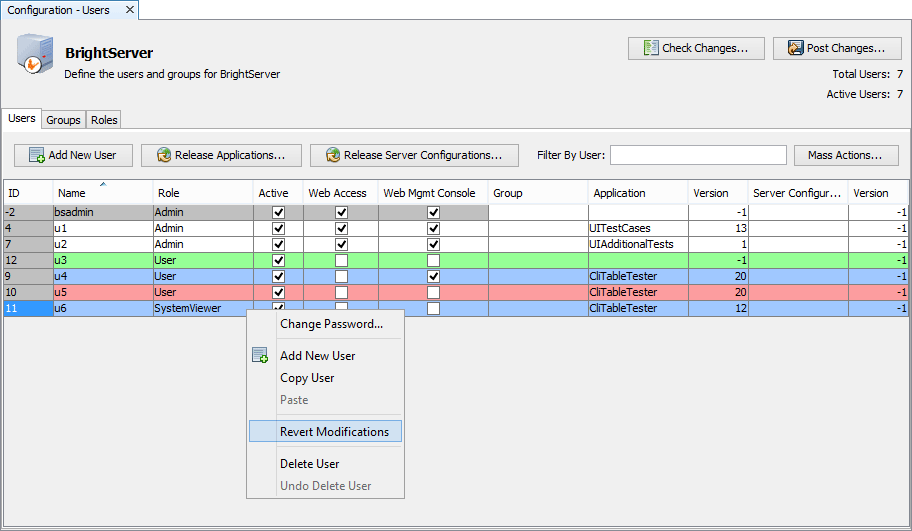
Any modifications made to any of the nodes may be reversed by right clicking the node and selecting 'Revert Modifications' in the context menu. This will reset all the values in the node to the server image of the configuration last downloaded.
Once the configuration is uploaded, the modification colouring will disappear, signalling the upload's success and the current state of the server's configuration.
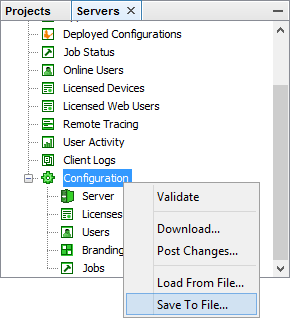
Download and Upload
To download a runtime configuration right-click on the Configuration node and click Download.... This will load the runtime values into the Server, Licenses and Users panels.
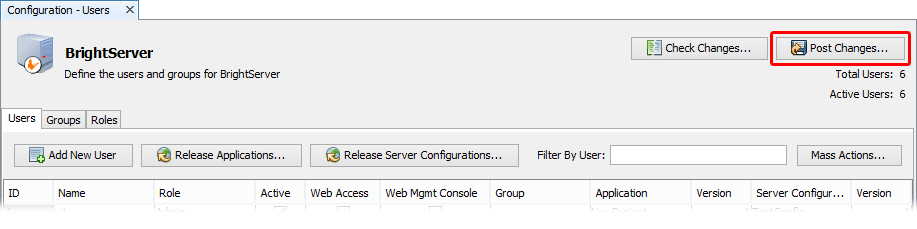
After editing, the runtime configuration may be uploaded to the server or saved to file by clicking the corresponding action from the Configuration node context menu. Alternatively, changes may be uploaded using the 'Post Changes ...' button in the user, server or licenses workspaces.
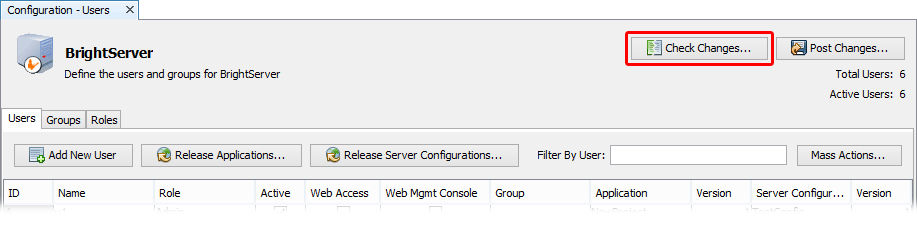
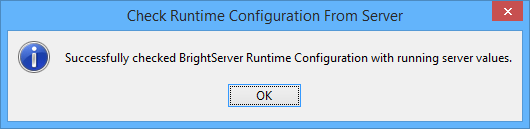
As changes may occur between downloading the configuration file and uploading the new configuration, the 'Check Changes ...' button may also be used to reassess the server configuration, and display the most up to date changes, if any.
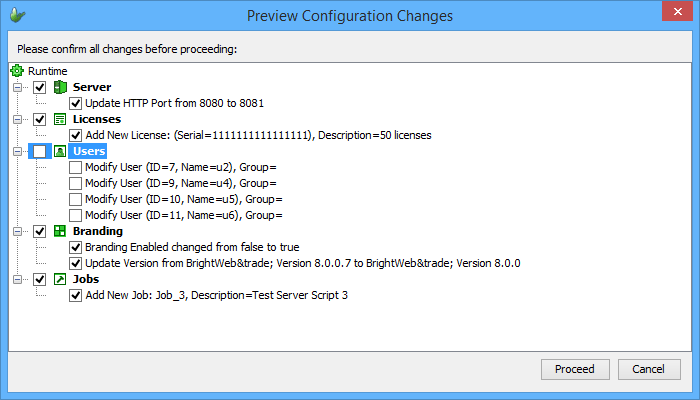
When uploading configuration changes to the BrightServer server instance, a preview dialog will show the changes to be made for user confirmation. Configuration changes may also be verified by using Validate context menu option to prevent incorrect configuration data from being uploaded to server.
Each of the nodes and individual items in the preview configuration changes window may be toggled, such that proceeding will not commit the changes to the server. The changes will remain edited for the server, once this dialog closes.
Load From File and Save To File
To load a runtime configuration from file right-click on the Configuration node and click Load From File.... This will load the runtime values into the Server, Licenses and Users panels.
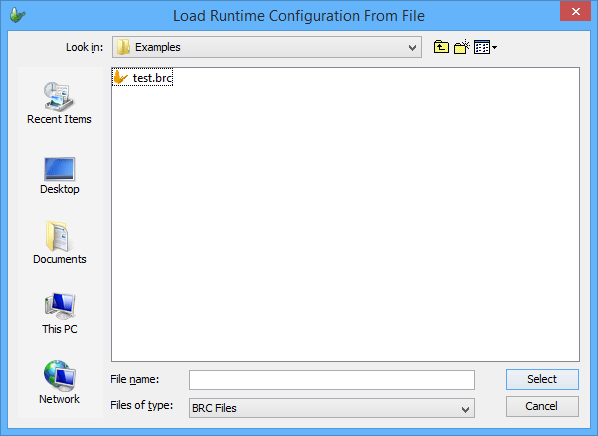
At any point thereafter the runtime configuration may be uploaded to the server or saved to file by clicking the corresponding action from the Configuration node context menu. The runtime configuration is saved to files with the BRC extension. When uploading the configuration server a preview dialog will show the changes to be made for user confirmation.
By using files, you can configure your server entirely offline. This is the ideal way creating and managing user accounts and groups in bulk. This task can even be carried by someone with no access to the live server environment.