BrightForms on Android
Contents Hide
- Installing BrightForms on Android Devices
- Android Device Buttons
- Android Screen Size
- Cursor Forms in Android
- Using the Camera Interface
- Using Combo Boxes
- Resizing ListViews
- Project Settings
- Local SQLite Database
- Pixel Density Scaling
- File Document Viewer
- Launching Applications via URI and Action
- Barcode Scanning
- Displaying Device Notifications
- Form Panning and Zooming
- How to Launch BrightForms Using an Intent
 Please note that BrightForms on Android is only compatible with BrightServer
6 or above. Previous versions of BrightServer are not supported.
Please note that BrightForms on Android is only compatible with BrightServer
6 or above. Previous versions of BrightServer are not supported.
Installing BrightForms on Android Devices
Installation via Google Play Market
BrightForms is available to download and install freely via Google Play App Marketplace. To do this, perform the following steps:
Locate the 'Play Store' application on the device (previously known as "Android Market".

Once the Play Store application has been loaded, search for 'BrightForms' in the search bar. BrightForms will appear in the results for 'Apps'.
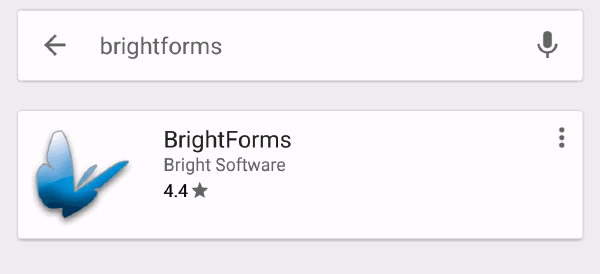
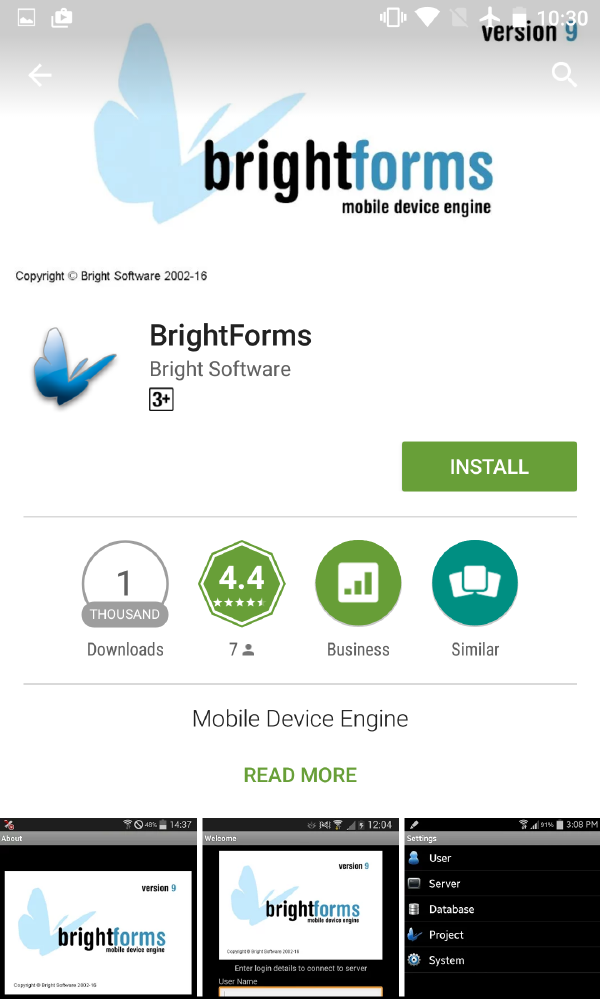
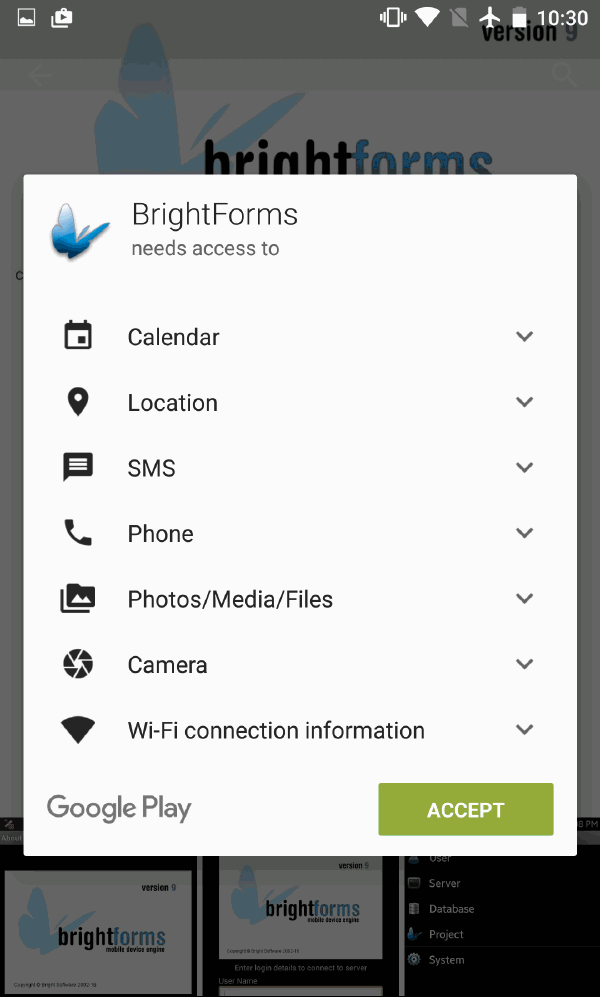
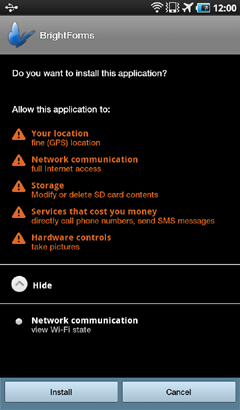
Tap on the result to enter BrightForms' application overview page. Tapping 'Install' will display the necessary permissions BrightForms needs to run on the device. Accepting these will install BrightForms to use on the device.
Installation via APK
To install BrightForms on an Android device:
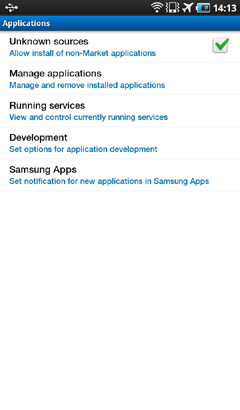
Ensure that non-Market applications may be installed on the device.
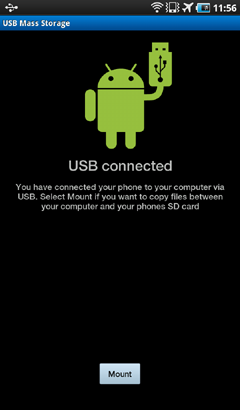
Set up the device's USB file transfer mode.
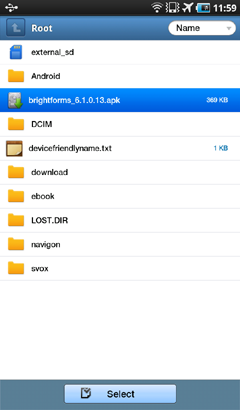
Copy the BrightForms Android Package (APK) file to the device.
In the device's file explorer, locate and execute the APK by tapping on it.
Follow the on screen instructions to complete the installation to the device.
Installation via APK on Symbol Devices
Installation of BrightForms on Android OS (4.1 and above) Symbol devices must be performed via the specific Symbol APK from the Downloads page of the BrightXpress website.
Before installing this APK, the device must be configured with the following pre-installation, otherwise the installation procedure may not succeed:
- Unzip the "Symbol EMDK Device Runtime Deployment" zip file to a local folder. This file may also be found under the Downloads page of the BrightXpress website.
- Connect the device to the PC using the USB cable.
- In the local folder from Step 1, execute the Deployment.bat file. This will open a command prompt window.
- Hit any key to continue.
- This process will deploy the device runtime and reboot the device automatically to finish the OS update.
Installation via BrightBuilder
BrightForms may also be installed and run on Android devices via BrightBuilder's execution option. This is mainly used for development purposes, and is not advised to be used for production systems. For more information, please refer to BrightBuilder > Running Your Application > Execute on Android Device for more details.
Managing BrightForms in Android
After it has been installed, BrightForms will appear in the device's set of applications.
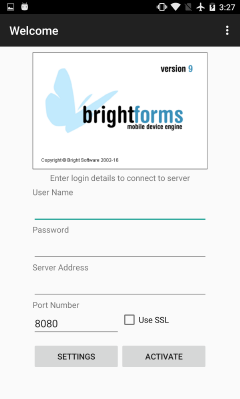
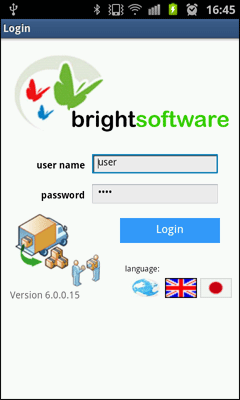
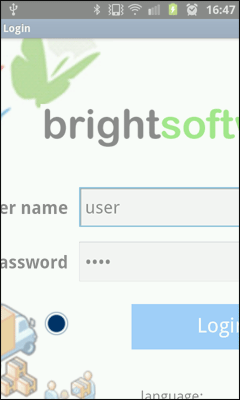
Opening BrightForms after an install will prompt the user to enter a server and login details via activation screen. Once entered, the 'Activate' button may be tapped to synchronise the device to download an application with the server specified.
These, and other settings may be managed via a Mobile Device Management server for devices running an 'Android For Work' profile on Android 5.x or greater. For more information, please refer to the Support for Managed App Configuration topic.
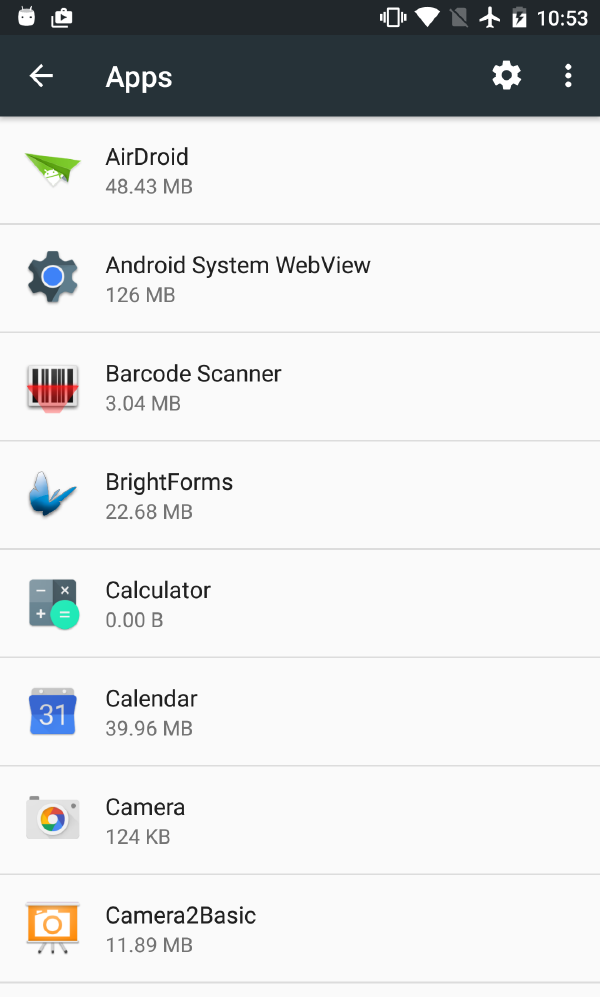
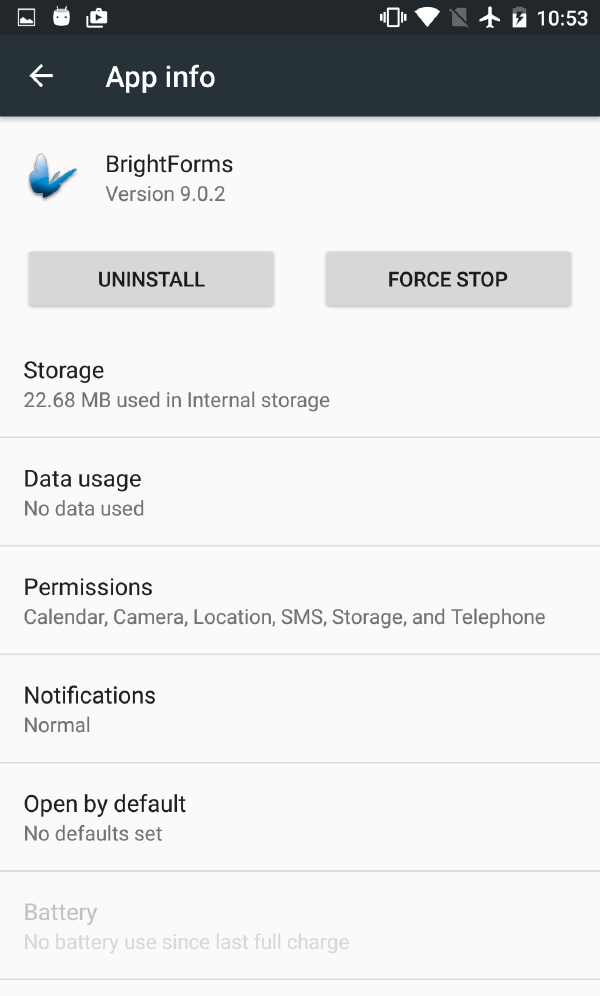
BrightForms may be stopped, and/or have its application data cleared via the 'Applications > Manage Applications' panel in the Android device's settings. BrightForms may also be removed completely from the device via this menu.
Android Device Buttons
The buttons present on Android devices are vital for BrightForms' operation. The following section details how these buttons are used within a BrightForms application's execution/
Home Button - Run in Background
Runs BrightForms in the background, and return the user to the device's home screen. Timer and background operations will continue normally, and the device will return to the BrightForms instance when the application is reopened.
Back Button - Closing Forms
Pressing the back button will close the currently opened form. If this is the only form open, BrightForms will close on the device. It will also close any combo box or date time selection screen open, cancelling the operation.
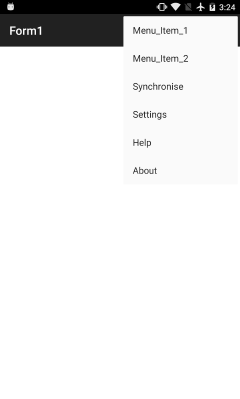
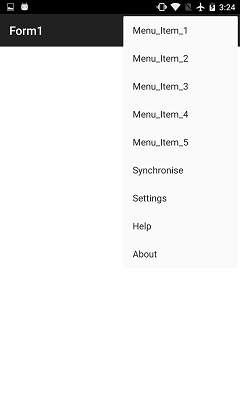
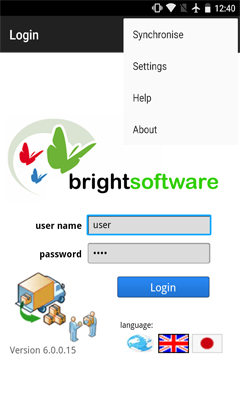
Menu Button - Project Menu

In all forms, pressing the Menu button will open the project menu, enabling access to Settings, Sync, Help and About commands. On devices with physical buttons, but without a physical or software menu button, this button is often replicated by holding the multitasking button.
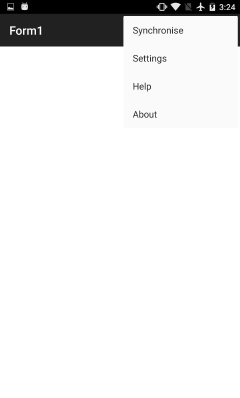
If user defined menus are present, their options will be displayed when pressing this button.
Android Screen Size
Due to the nature of Android and the range of pixel densities available, the area which may be used for form layouts may vary from device to device.
To determine the size forms must be for the device, open the BrightForms menu and view the 'About' screen. At the bottom of this screen, values for the device's screen height and width in logical BrightBuilder pixels will be displayed.
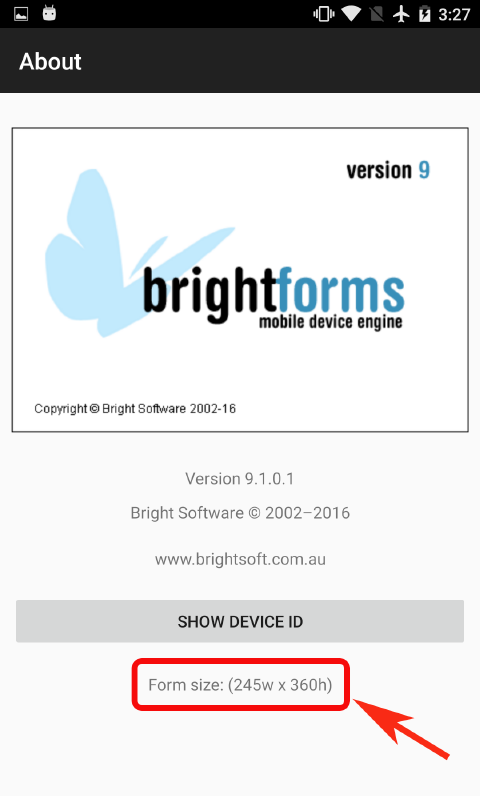
Use these values when defining the dimensions for the layout targeting this device.
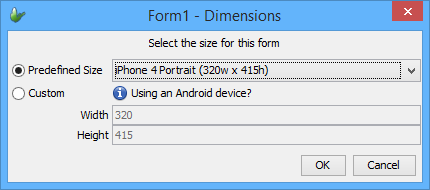
By default, if no exact size form is found, Android will check the proportion of all form or aspect sizes defined, then select the one closest matching the screen. This layout is then scaled up or down on the device. This is known as the 'Auto-Zoom' feature in BrightForms on Android.
This 'Auto-Zoom' feature is disabled if the 'Enable Form Panning' option is turned on. With form panning on, this will pick the closest matching form size or aspect for the device, and display it 1:1. If a form is larger than the device's screen size, the form layout may be panned by swiping on the device.
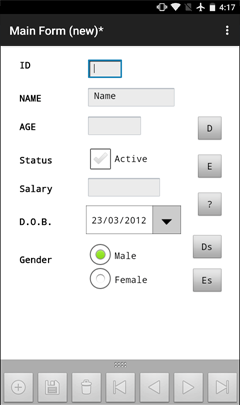
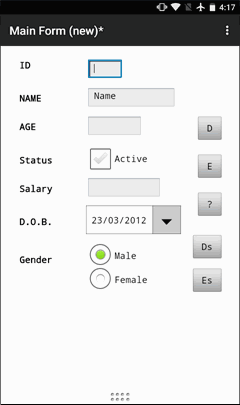
Cursor Forms in Android
If the 'Has Cursor Form' or 'Has Navigation Pane' settings of a project are checked in a form's Data Binding panel, the following icon will appear at the bottom of the form when it runs on Android:
Tapping on this button will toggle the Cursor form navigation panel for the user, which is as follows:
![]()
Operations (left to right): Create, Modify, Delete, MoveFirst, MovePrevious, MoveNext, MoveLast
Depending on the record, and the functions available to the user, some elements of the panel may appear greyed out. Tapping the top button once the pane is open will also subsequently collapse the cursor navigation panel.
Using the Camera Interface
When Camera.Capture() is called in BrightForms on Android, the device camera application will appear on the device to preview and capture the photo.
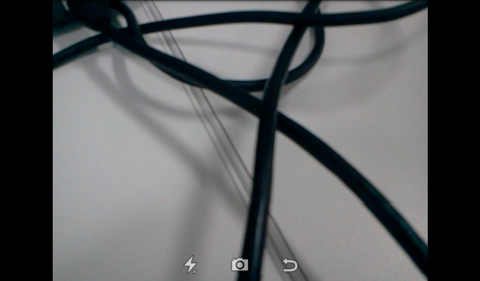
The functionality availably all depends on the device camera applications capabilities. However most modern camera applications will be able to focus, set its flash settings, cancel capture and return to BrightForms (alternatively, the device's Back button may be tapped).
Once the capture button is tapped, the captured image may be discarded and retaken, or confirmed via the 'Accept' button on the right. Accepting the image will return the user to BrightForms with the image saved to the device. Use the GetFileName() method to retrieve this image.
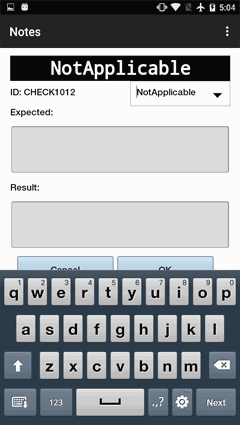
Using Combo Boxes
- Clicking within a combo box's editable area
will bring up the SIP for input. Clicking on the arrow to the
right will activate the drop down menu component of the control.
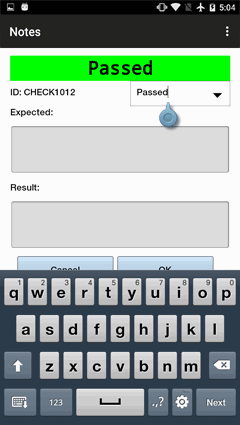
- The drop down component will display all items
on the screen for the user to select, with the current item highlighted
within the list. If the list contains many items, it will also
be scrollable via swipe gestures. Tapping the back button on the
Android device when on this list will cancel the selection.
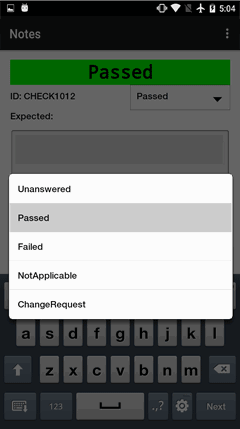
- After the user selects an item, the combo
box control is updated. If no selection is desired, the user may
tap the device's 'back' button to return to the form.
Resizing ListViews
Listview columns may be adjusted in Android as follows:
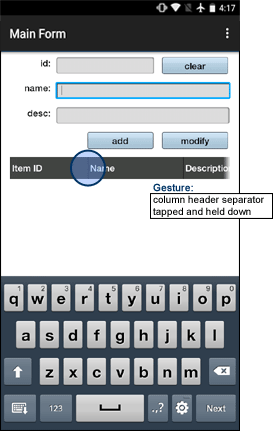

When the header is selected and held, the device will vibrate, signalling that the column widths may be adjusted. Once adjusted, release the tap from the screen, and the listview will save the new width changes for future sessions.
Project Settings
The settings menu may be accessed by BrightForms' project toolbar,
accessed by pressing the Android Device's menu button ![]() .
When tapped, the settings menu will appear at the bottom of the form.
.
When tapped, the settings menu will appear at the bottom of the form.
Clicking on the 'Settings' button in this toolbar will bring up the settings menu, where BrightForms' settings may be changed.
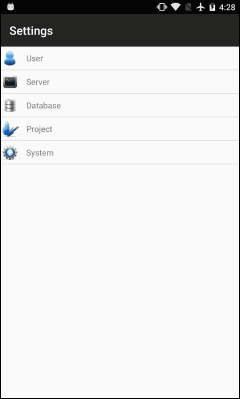
Any changes made in these screens will be saved when edited and
the 'back' button ![]() is pressed on the Android device.
Like on Windows Mobile devices, a project's User,
Server, Database,
Project and System settings may
be changed, however Dial Up settings are not available as they are
not applicable to the platform. For more information on these settings,
please refer to the BrightForms
Help Menu Commands > Settings section of this documentation.
is pressed on the Android device.
Like on Windows Mobile devices, a project's User,
Server, Database,
Project and System settings may
be changed, however Dial Up settings are not available as they are
not applicable to the platform. For more information on these settings,
please refer to the BrightForms
Help Menu Commands > Settings section of this documentation.
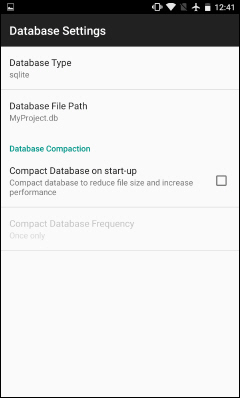
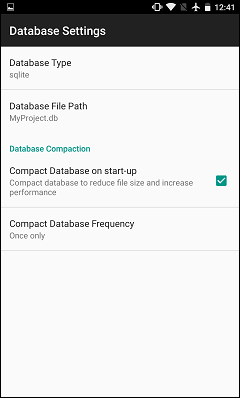
Local SQLite Database
BrightForms' SQLite database storage location may be changed via the Settings > Database > Database File Path values. By default, this is simply populated with 'MyProject.db' in the settings, which writes this file name to protected, non user-accessible storage on the device. Typically, for security and performance benefits of using the private internal storage, this is not changed from the default value.
However, if using a different path, the full path and file name may be changed via this field. This may be useful in instances where the database is to be user accessible, or when the device does not have sufficient storage. The effects of the new value will take effect one BrightForms on Android restarts.
 Please
note, on Android 4.3 and below, the database may be placed in
any location on the device. Please also note, that due to operating
system changes, for version 4.4 and onwards, this is no longer
the case - the file must be located within Android applications'
storage folders. Typically this is the 'Android' folder on both
local storage and external storage (such as on an SD card).
Please
note, on Android 4.3 and below, the database may be placed in
any location on the device. Please also note, that due to operating
system changes, for version 4.4 and onwards, this is no longer
the case - the file must be located within Android applications'
storage folders. Typically this is the 'Android' folder on both
local storage and external storage (such as on an SD card).
For example, to save files to an external SD card, in the BrightForms project folder, the following string may be used:
‘/storage/extSdCard/Android/data/au.com.brightsoft.android.application/MyProject.db’
But the following file and path will fail in Android 4.4+:
‘/storage/extSdCard/Temp/MyProject.db’
If the new database file, or sub-folders in the path do not exist, they will be created with the database file on startup, if they do not exist. If the database file or path is inaccessible, BrightForms on Android will not start, and display an error message. If displayed, the menu button may be tapped to correct the database path, or back may be tapped to exit BrightForms.
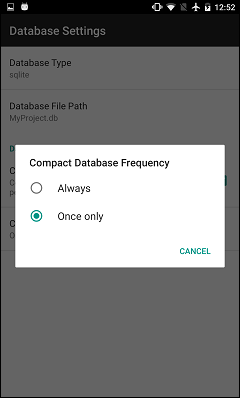
BrightForms can also 'Compact Database on start-up'. Doing this will reduce the file size and increase the performance of accessing and writing to the database. If checked, you can also set how often you want the database to be compressed on start-up. It can either be set to 'Once Only' or 'Always'.
Pixel Density Scaling
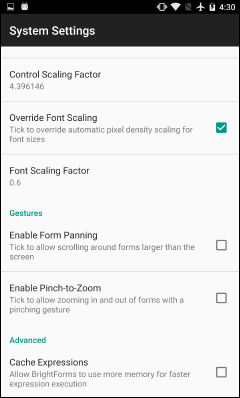
Projects are developed in BrightBuilder, and rendered on Android devices to match its design in the WYSIWYG editor. To ensure that this editor's contents are correctly rendered on Android devices, controls, fonts and images must be scaled by a factor determined by the device's pixels per inch. Scaling is automatically handled in BrightForms to give the optimal WYSIWYG transition between BrightBuilder and BrightForms, but these scaling values may be overridden via the Settings>System menu, under the heading "Pixel Density Scaling".
Typically this feature would only be overridden in the settings
if an existing project was to be used on devices with smaller/larger
screens and to render to accommodate this.

In this menu, both Control (controls and images/content) and Font (font sizes) scaling factors may be overridden and specified. Once selected to be overridden, the current values used for scaling will be populated in the Control/Font scaling fields.
After editing and the settings menu closed, forms subsequently opened in the project will exhibit the overridden scaling.
File Document Viewer
Files such as PDFs, images or Microsoft Office documents stored locally on devices may be opened on the device using the Form.ViewDocument() method.
For example, the following code would get an the file path of an ExternalBlob in a listview, and attempt to open it:
local.vExtBlobFile = listview1.GetCurrentRowColumnValue("FILE_PATH");
Form.ViewDocument(local.vExtBlobFile);
Calling this method with a local file will proceed to open an external application assigned to open the file based on its extension or MIME type. If more than one application has been registered for the file type, the Android application picker will appear for the user to select and/or set a default application to use for the file.
If no associated format can be found, an "Application not found" message will appear to the user.
Once viewing complete, the back button may be tapped to return to BrightForms.
Launching Applications via URI and Action
The System.RunProgram() method is used to launch external apps with BrightForms on Android.
Applications in Android are launched as an activity using Intents, which require data and an action to be performed. These calls are supported in BrightForms on Android by using the System.RunProgram method, with the data and action values specified as the first and second parameter respectively. The data supplied must be expressed as a valid URI, while the second action parameter is expressed as an activity action, based on a set of Intent strings from the Android API.
For
more information on Intents. URIs and actions, please refer to
the Android documentation http://developer.android.com/reference/android/content/Intent.html.
A list of supported activity action strings are also provided
in the section below.
When RunProgram is called, the Android operating system will determine the application to launch based on the data and the action supplied. If more than one application is available on the device, the default application will be used, else a selection will appear.
Using this method, a variety of applications may be launched via BrightForms. For example:
To view a map of Parramatta, NSW, Australia:
System.RunProgram("geo:0,0?q=Parramatta NSW", "android.intent.action.VIEW")
To open the browser at the Google home page:
System.RunProgram("http://www.google.com", "android.intent.action.VIEW")
Display a list of people, which the user can browse through:
System.RunProgram("content://contacts/people/", "android.intent.action.VIEW")
Insert a new contact to device or account:
System.RunProgram("content://contacts/people/", "android.intent.action.INSERT")
To view a PDF stored locally on device:
System.ResetObjectState()
System.SetObjectState("#bs-intent-mime-type#", "application/pdf")
System.RunProgram(“file:///storage/emulated/0/reports/Report1.pdf”, “android.intent.action.VIEW”)
Activity Action String
The values supplied for the activity action string are based on a set of Intent constants from the Android API. Examples of these are: "android.intent.action.VIEW" to display information to the user; or "android.intent.action.EDIT" to provide editable access to the given information.
A list of standard actions that can be used with RunProgram are as follows:
"android.intent.action.VIEW": Display data to the user
"android.intent.action.EDIT": Provide editable access to the given information
"android.intent.action.DIAL": Dial a number as specified by the data
"android.intent.action.CALL": Perform a call to someone specified by the data
"android.intent.action.INSERT": Insert an empty item into the given container
"android.intent.action.DELETE": Delete the given data from its container
"android.intent.action.SEARCH": Perform a search
"android.intent.action.WEB_SEARCH": Perform a web search. A valid web URI must be specified for this action. If the 'query' extra data starts with http or https, the site will be opened, otherwise if it is plain text, Google search will be applied.
Extra Information with the System Object
The application which launches based on the data and action supplied to RunProgram on Android may require extra information to launch. This is performed on Android via the 'Extras' information bundled with Intents to launch applications.
In BrightForms, this information may be supplied by calling the System.ResetObjectState(), System.SetObjectState() and System.SetObjectStateAsLong() methods, which are called to set the state before the System.RunProgram() method. States are set in property/value string pairs, with the property value corresponding to the launching application's specific 'Extras' constants to supply the extra information.
For example, the Google Calendar app requires start time and end time extra values when displaying an event:
// Open the calendar for a specific event
local.Uri = "content://com.android.calendar/events/"
local.EventId = "9"
local.Uri = local.Uri & local.EventId
// DateTime must be specified as milliseconds from epoch to the calendar
Local.strBegin = DateTime.GetMillisecondsAsString(dtBegin)
Local.strEnd = DateTime.GetMillisecondsAsString(dtEnd)
// Set the additional information, then launch the program
System.ResetObjectState()
System.SetObjectStateAsLong("beginTime", Local.strBegin)
System.SetObjectStateAsLong("endTime", strEnd)
System.RunProgram(local.Uri, "android.intent.action.VIEW")
This code segment opens the calendar event with "9" as its event ID. ResetObjectState() is used to initialise the state before we call SetObjectStateAsLong() to set the additional information. After this information is set, the URI and action via RunProgram() is called, with the launching application reading the values set previously.
With the Google Calendar API, opening a calendar event with start/end times populated requires two pieces of additional information, supplied by specifying extra fields with constants "CalendarContract.EXTRA_EVENT_BEGIN_TIME" and "CalendarContract.EXTRA_EVENT_END_TIME" prior to launching the application. The string values for these constants are "beginTime" and "endTime" respectively, are thus used as the property names when SetObjectStateAsLong() methods are called.
Please
consult the API of the launching application and/or the intent
action for any specific Extras required.
Extra Information for the Android Intent Object
When launching certain applications sometimes it is necessary to set attributes available to an Intent. In BrightForms we have pre-existing values used to indicate you would like to set the explicit MIME type, flags and/or package for the intent. You will need to use these values within an expression to indicate you would like to set a specific attribute through the SetObjectState() method.
#bs-intent-flags#
Proxy value for accessing setFlags() method within the Google API
Sets special flags controlling how this intent is handled.
#bs-intent-mime-type#
Proxy value for accessing setDataAndType() within the Google API
Sets the data for the intent along with an explicit MIME data type
#bs-intent-package-name#
Proxy value for accessing to setPackage() within the Google API
Sets application package name that limits the components this Intent will resolve to.
For example, to view a PDF file on an Android device, the following code snippet can be used.
System.ResetObjectState()
System.SetObjectState("#bs-intent-mime-type#", "application/pdf")
local.uri = “file://” & pdfpath_ctrl
System.RunProgram(local.uri, “android.intent.action.VIEW”)
ResetObjectState() is used to initialise the state before we call SetObjectState() to set addition information. In this case we want to set the MIME type, so we use #bs-intent-mime-type# and set it to “applpication/pdf” to indicate we want to view a PDF file. Using the RunProgram() method, it will launch an application to read the PDF specified in the URI.
Barcode Scanning
Camera Enabled Devices
Scanning barcodes is performed via a software scan. Requires the ZXing Barcode scanner off the Play Store.
https://play.google.com/store/apps/details?id=com.google.zxing.client.android&hl=en
Once installed, running Scan() will load the scanner, and once scanned or closed, the Action - Scan Complete expression will execute. The result may then be determined via the GetScanResult() method, such as with the code below:
local.vResult = Scanner.GetScanResult();
IF(local.vResult == 0)
{
edtBarcode = Scanner.GetBarcode();
}
Opening and closing the scanner prior to and after calling the Scan() method is not required. Methods other than Scan() and GetScanResult() are not supported with the software scanner, but both 1D and 2D scanning is supported.
Symbol and Honeywell Devices
BrightForms supports hardware scanning via Motorola Symbol Devices' scanning capabilities. This functionality is available on Symbol devices running Android 4.1 or above, such as the MC32, MC40, MC67, TC55 and TC75. To use this within BrightForms, a set of pre-install steps, and a Symbol specific APK must be installed on the device - See the Installation via APK on Symbol Devices section above for more details.
Honeywell devices are compatible with the standard Android APK and release from the Google Play store.
In order to scan barcodes on these devices, the scanner object must firstly be opened with the OpenScanner() method prior to scanning with the device's in-built scanner. Scanning is then performed either by holding the device's scan button, or by using the Scan() method within BrightForms. Once the scanner is no longer being used, the CloseScanner() method may be used to close the scanner.
Note: Due to limitations in Android, the scanner object may only remain open for the current form on the form stack. Closing a form with the scanner open will also close the scanner. Therefore, each form requiring the scanner must activate it within their own logic, as opposed to relying on it remaining open after navigating away from parent forms. It is thus recommended to explicitly close the scanner before opening any child forms. After these forms are closed, if the scanner is still required to be used in the parent form, it must also be re-opened accordingly. For example:
// Close the scanner
IF(System.GetOS() == OS_ANDROID)
{
Scanner.CloseScanner();
}
// Open form
Form.OpenChildForm("frmChild");
// Re-open the scanner
IF(System.GetOS() == OS_ANDROID)
{
Scanner.OpenScanner();
}
Alternatively, if form opening is managed by the Form Open dialog, this code would be present in Pre-Open or Post-Close expressions of the definition.
When scanning is completed once a barcode is found, or stops when the scanner has timed out. Once the scanning is complete, the Action - Scan Complete expression will execute for the current form. This expression may utilise the full range of Scanner methods to attain and process the barcode.
Displaying Device Notifications
Notifications may be displayed on Android devices, using the System.DisplayNotification() method to notify the user.
This will display a customisable notification title and message in Android's notification area, which may be tapped to bring BrightForms into focus, if BrightForms is running in the background.
This notification behaviour can be used in conjunction with Push and/or Background Sync functionality in expressions, to alert the user if the server has sent new data to the device. It may also be used on a timer, to alert the user within the application if required.
BrightForms must be open and running in the background with the 'notifying' form open in the stack for notifications to display on the device. It will not work if the user has closed BrightForms by tapping back on the parent form, or closed BrightForms via multitasking.
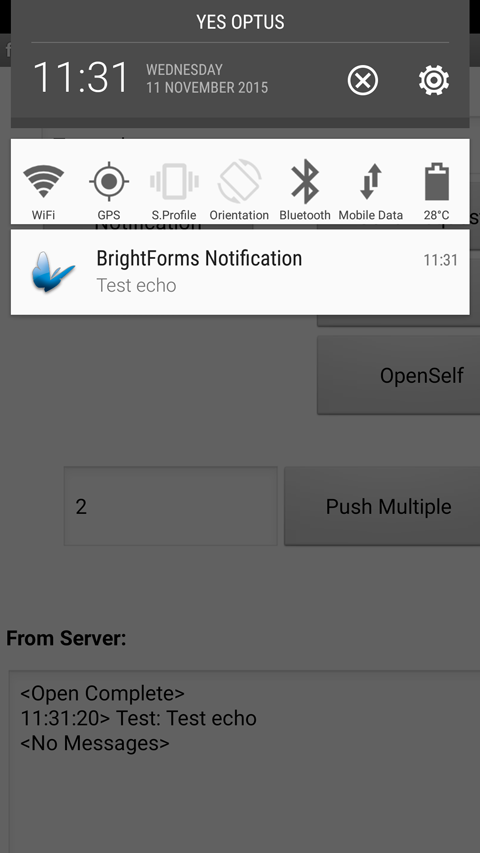
If this method is called more than once, only the latest message will appear in the notification area.
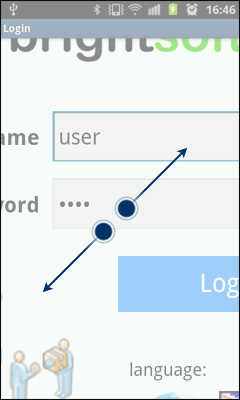
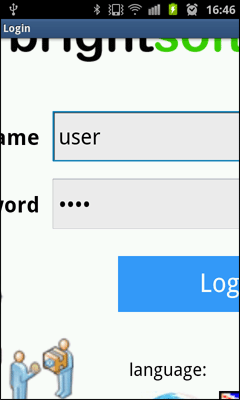
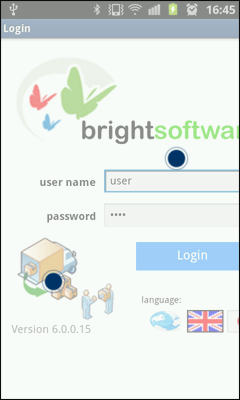
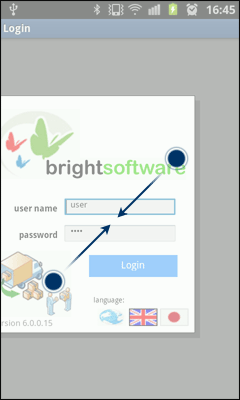
Form Panning and Zooming
When a form initially renders in BrightForms for Android, it will abide by the Pixel Width scaling options defined in BrightForms' settings. However, via form gestures, the size of fonts and controls may be zoomed in and out, and the area of the form viewable may be adjusted by the user in real time, and are persisted through screen orientation changes. However, any changes to the form and its zoom factor/panned area will not be saved when it or the project is reopened.
Gestures may be enabled or disabled via Android BrightForms' Settings > System Settings menu. By default, Form Panning and Pinch-to-Zoom options are disabled for each project. This will thus Auto-Zoom form dimensions to the device's screen size, as detailed in the Android Screen Size section.
When disabled, the form will abide by the Pixel Width scaling for its zoom factor, and cannot be panned.
System Pinch-to-Zoom
Zooming in and out are achieved by the two finger 'pinch' and 'reverse pinch' multi-touch gestures.
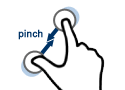
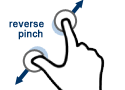
Zooming in may be achieved by multiply touching and then reverse pinching the screen. The form and its controls will be enlarged based on this reverse pinch gesture, and any areas of the form which aren't shown in the view may be scrolled to using Form Panning (see the section below). The maximum factor that can be zoomed is scale factor 15.
Zooming out may be achieved by performing a pinch gesture on the screen. Zooming smaller than the device's screen size will automatically adjust forms such that the whole form may be seen on the screen.

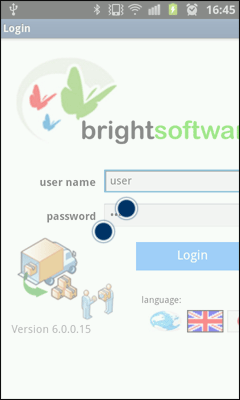
System Form Panning
Panning the viewable area of the form may be achieved by tapping and holding a point on the screen, and then swiping in the direction the point is to move in. The displacement between the initial 'tapped/held' location and the 'released' location will determine how much the form will scroll within the view. This gesture may only be used if the form's size exceeds the form's viewable area.

If the swipe results in the forms bounds being exceeded, the form will adjust such that its exceeded edge returns and is aligned to the edge of the screen.

If the dimension to be panned is smaller or equal to the direction of the swipe, no panning will take place. In the following progression, the movements marked in red have no effect on the final panned result.
How to Launch BrightForms Using an Intent
BrightForms on Android supports the ability to be launched using an (implicit) intent. This can be done by setting a specific action on the intent - "RunBrightForms".
Here is some sample code that will launch BrightForms on the Android device:
Intent intent = new Intent();
intent.setAction("RunBrightForms");
ComponentName componentName = intent.resolveActivity(getPackageManager());
if (componentName != null)
{
startActivity(intent); // this will launch BrightForms
}
else
{
// Could not find the BrightForms app - it is probably not installed
// ...
}
As an additional feature, BrightForms also supports the ability to set the values of specific global variables before BrightForms launches. In this way, the app that is launching BrightForms can provide some contextual information that BrightForms can interpret when it first opens.
This is achieved by specifying a set of name-value pairs in a Bundle and attaching the bundle to the intent. The value in each pair must always be a string. Finally, the bundle itself must have the special key - "GlobalVariables".
The following sample code demonstrates this capability, where we imagine that the target BrightForms app has got two global variables, "gVar1"(string) and "gVar2"(int).
Intent intent = new Intent();
intent.setAction("RunBrightForms");
Bundle bundleGlobals = new Bundle();
bundleGlobals.putString("gVar1", "someValue");
bundleGlobals.putString("gVar2", "123"); // We must always set the value as String regardless of data type
intent.putExtra("GlobalVariables", bundleGlobals);
...
<launch intent as above>
...
The global variables can be any type (string, int, double, boolean, dateTime, binary) but the values in the intent bundle must always be the string representation.
For dateTime, the string representation must be in ISO format - "yyyy-MM-dd'T'HH:mm:ss.SSS'Z'"
For binary, the string representation must be in base 64 encoding.