Project Deployment
Contents Hide
To make application distribution easy, BrightBuilder has a built-in feature that deploys and stores projects to a BrightServer instance. Any BSP project created in BrightBuilder can be deployed and saved to the server. This in turn can be released to the end users in the mobile field force. Thus allowing for a seamless release and update of project applications. If there are 50 mobile field workers, it is not necessary to ask all of them to return with their mobile devices (PDA, laptop) to the main office for an application update. Your business does not have to stop for updates to your system.
Each time a mobile user synchronises with the server, the Sync Engine will check if the mobile user is running the latest application release, if not, the BrightServer instance will automatically send the newest release version to the mobile user, thus updating the project application in the client side seamlessly.
Additional files may also be sent during this process, including files which may be used to update the BrightForms engine itself, therefore providing a powerful, robust and efficient system to facilitate project distribution.

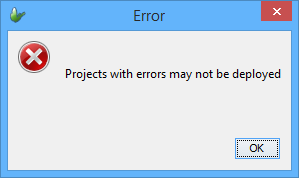
Before projects are deployed to the server, it must be ensured that the project definitions are validated and error free. On attempting to deploy a project that contains errors, BrightBuilder will not allow the deployment and will display the following error message.
Deploying an Application To Server
If a BrightServer instance is running, a project may be deployed to it via web services. This process may be achieved as follows:
Right-click on the BSP project and select Deploy To Server.... A server selection window will be displayed. The drop down list contains all BrightServer server instances which have been registered in BrightBuilder.
By default, projects deployed to BrightServer are registered on the server under the BSP's project name - for example, if NewProject.bsp was deployed to a server, it would be done so under the name 'NewProject'. The 'Deploy As' checkbox and edit fields in this dialog may be used to specify a name which is different to this value, allowing incremented release numbers if the project name specified exists on the server.

Select a server or click on New Server... to register a new BrightServer instance.
If registering a new server, complete the server details in the Add Server wizard and click Finish.

After 'Select' is clicked, a login dialog will appear, requesting login credentials for the server selected. Enter in these details, then click 'Connect' to continue.

 If
there are any issues connecting to the server, a dialog box
will appear, and the project may not be deployed. Please refer
to the BrightServer
Troubleshooting section of this document to assist in
diagnosing any of these issues.
If
there are any issues connecting to the server, a dialog box
will appear, and the project may not be deployed. Please refer
to the BrightServer
Troubleshooting section of this document to assist in
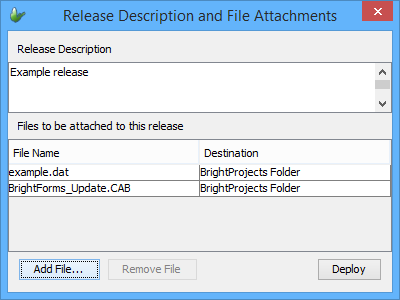
diagnosing any of these issues.Enter a release description in the Release Description and File Attachments dialog as shown below. The release description is used to annotate deployments for reference, and is referred to when browsing previous deployments on the server.
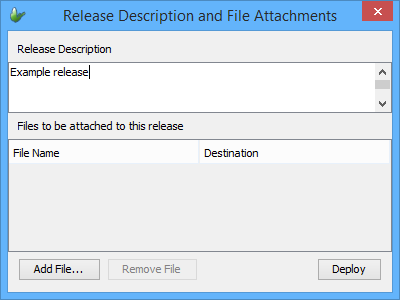
At this stage, files may also be attached to the deployment. This will result in the files being retrieved to the specified destination for users when they synchronise their application to the server. For more information, refer to the following section, File Deployment.
Once the description and files are added, click on the deploy button to initiate project deployment.If successful, a success dialog will be displayed with the version as shown below. The version number is automatically generated by BrightBuilder depending on the number of releases under the same name already deployed to the server. If there were previous versions already deployed, then it will be deployed as the next version.
The dialog also gives an options to navigate BrightBuilder to BrightServer's Configuration > Users node.
Tapping 'Upgrade current users' option will navigate to the users screen and update the version number for any users using the latest version of the application. These changes may then be applied through the users panel. The "Let the server auto release' will update the version number for any users using the latest version of the application automatically on the server without the need for going into the users screen and uploading the user changes to server manually. This button will let the server handle auto release of the new version automatically for the users who are on the previous version of the application that has just been deployed to server. The 'Go to Users screen' will navigate to the users screen from the dialog, but without these updates. Finally, tapping on the 'Not now' option will dismiss the dialog.

File Deployment
When deploying applications, files may also be deployed simultaneously in this process. When distributed in this fashion, users may receive files attached to deployments upon synchronising their BrightForms executable to the BrightServer instance.
There are two type of files that may be deployed during this process; general files and engine updates which are implemented on top of any application updates. The former being a useful tool for new or additional resources to applications, and latter being a vital tool to provide seamless engine updates to all users automatically.
File attachments are performed in the 'Release Description and File Attachments' dialog in the server deployment process.
To attach files to a deployment, perform the following steps:
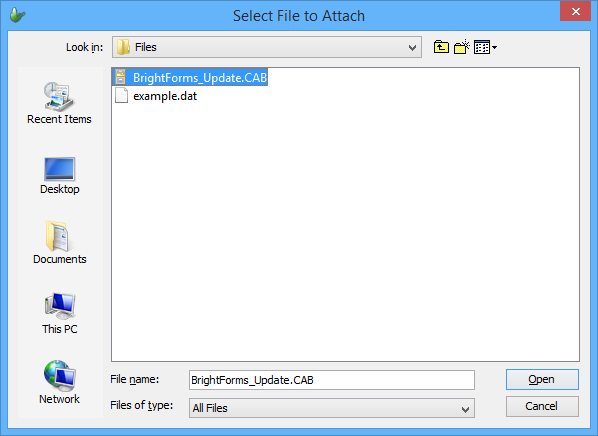
Click on the 'Add File ...' button. The file selector dialog will open.
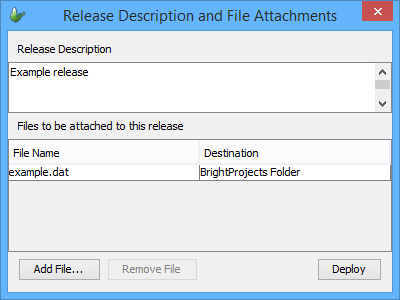
Select the file you wish to attach and click the Open button. The file's name will then be listed under the 'File Name' heading. The destination, will also be populated as the default 'BrightProjects Folder'.
To change the destination of deployment, click on the field of the respective file. A drop down menu will display listing the possible options for the file's destination.
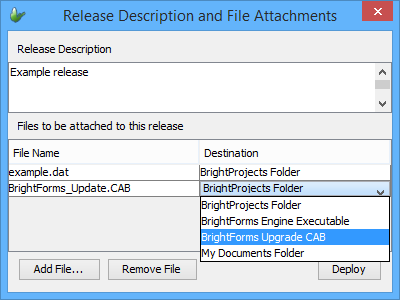
A description of these options are as follows:
BrightProjects Folder - the folder projects are released to, as defined by the server's deployment directory.
BrightForms Engine Executable - if the file selected is to be distributed as an update to the existing BrightForms Engine on the device, this option should be selected. Selecting this option will download the file to the device on synchronisation and once restarted, the device's BrightForms executable will be updated to the attached file. This will be ignored on non-Windows Mobile devices.
BrightForms Upgrade CAB - similar to the BrightForms Engine Executable distribution process, this will send a upgrade CAB file on synchronisation, which will upgrade the BrightForms Engine when the application is restarted on the device. This will be ignored on non-Windows Mobile devices.
My Documents Folder - the default My Documents directory on the Windows Mobile device.
If at any stage a file needs to be removed from this list, select it and then click the remove button. The file will then be removed from the list.
Once all the files to be added are listed, with their destinations correctly defined, project deployment may proceed as required.