Publishing Applications
Contents Hide
This section will detail how easy it is to publish your BXP projects onto servers and allow devices to connect to this server in order to download your published projects.
One of the main purposes of the BrightServer is to make publishing developed applications in BrightBuilder easy and simple to upload and deploy to devices. However with the BXP designer, projects deployment is made even easier through simple and easy steps. By pressing a single button, all the required steps and information for publishing your applications will be shown through an easy to use wizard. Through these steps, applications developed in BrightBuilder can be deployed onto a BrightServer instance where mobile users can connect to in order to download the deployed application. Mobile applications created in BrightBuilder require the BrightForms app to run on devices. Through BrightForms, users can enter the required login details in order to download and execute applications on mobile devices out in the field. Through BXP projects however, this process is further simplified without the need of any server instance creation in BrightBuilder or any user account management. By going through the provided wizard to deploy projects, the required login details to be entered on BrightForms and execute the published application are shown automatically without any complicated user account administration.
If the application requires synchronisation, the Data Flow element within the BXP project must be defined correctly for synchronisation to take place correctly. The Data Flow element in BXP projects can be used to outline the flow of data between client and server. Through the Data Flow Panel, the server configuration to allow data flow can easily be defined in a graphical method. Hence if synchronisation is required as part of the application, the Data Flow element must be set accordingly to allow for the correct flow of data between their intended client tables and back-end information sources. In addition to the Application element, the Data Flow element of the BXP project will need to be deployed when publishing the application on the server.
The project should also be deployed onto a BrightServer instance. BrightServer is a lightweight server solution that allows mobile workers to connect to back-end information systems. Through BrightServer, developed projects in BrightBuilder can be deployed onto BrightServer where mobile workers can connect to in order to download and execute these deployed projects allowing for mobile applications to be distributed easily and fast. Additionally, BrightServer is equip with the synchronisation engine that allows synchronisation between the client devices and back-end information systems to take place. Hence BrightServer provides an avenue for mobile users access to server-side data sources hassle free without any complicating programming. For more information refer to the BrightServer chapter.
Configure Default Server
Server Publishing Options
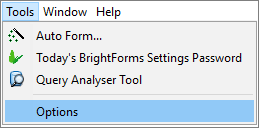
When the 'Publish' button has been pressed, the 'Publish Project' wizard will prompt the user to enter the correct details of a BrightServer instance where the application will be deployed to. However BrightBuilder comes with a convenient option of being able to configure default values for the BrightServer instance. Through the Options windows of BrightBuilder, the default values can be entered in order to initially populate the 'Publish Project' wizard whenever opened allowing for further simplification and time efficiency when deploying applications. These options can be found through the Options windows that can be opened by going through 'Tools > Options' menu item in BrightBuilder.
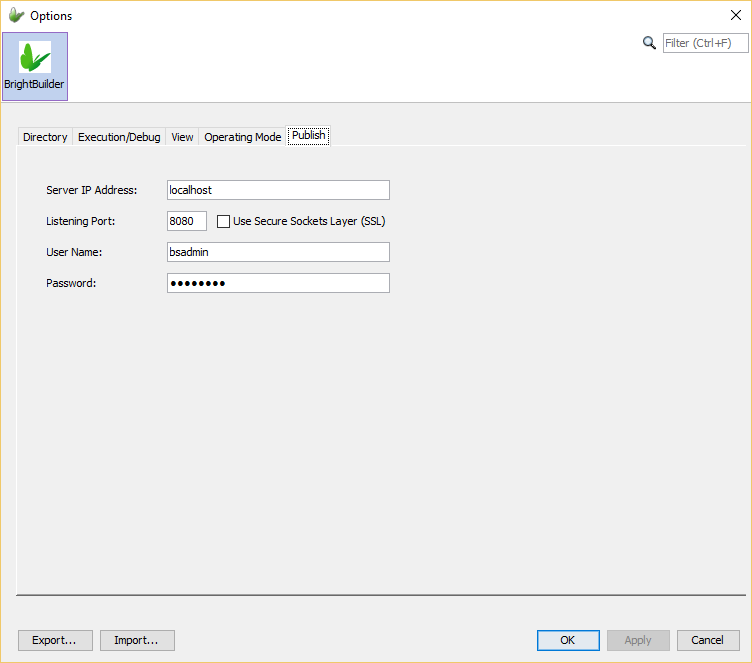
By going to the 'Publish' tab, the details of the server can be edit and changed. Initially, these fields will have default values to locate the BrightServer instance on localhost on the computer. The required details are:
Server IP Address: The IP address of the server running the instance of the BrightServer. Default value will be 'localhost'.
Listening Port: The listening port of the BrightServer instance. Default value is '8080'. The Secure Sockets Layer (SSL) protocol can also be used by ticking the checkbox. Ticking the checkbox will ensure traffic between the server and devices are encrypted using this protocol.
User Name: The user name to log into the BrightServer instance. Every BrightServer instance will have an existing admin account with them. The user name for this account is 'bsadmin' which is also the default value for this option.
Password: With the user name and password, these credentials are checked to log into and access the BrightServer instance. With every BrightServer instance there will exist an admin account 'bsadmin'. The default password to this account and the default value for this option is 'changeit'.
By clicking 'Ok' these details will be saved and whenever the 'Publish Project' wizard is opened, these details will populate the required fields and prompted the user to confirm the details of the server. These options will need to be checked and configured before any deployment of licenses and applications to ensure deployment is success and uploaded to the correct server.
Publish and Run your Applications
Once the application has been developed, the project can be published to the BrightServer, ready to be used and deployed onto mobile client devices.
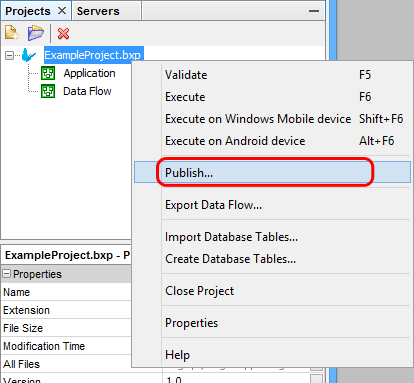
By simply right-clicking the desired BXP project and pressing on the 'Publish' menu item, the project will be validated to ensure the application has no compilation errors. The 'Output - Validation' window will appear showing the result of the validation. The window will list all the errors or warning within the application. If any errors exist within the project, publishing of the project will fail. If there are no errors then the 'Publish Project' wizard will appear. This wizard is responsible of taking the user through all necessary steps of ensuring the correct server details and project elements are deployed correctly.
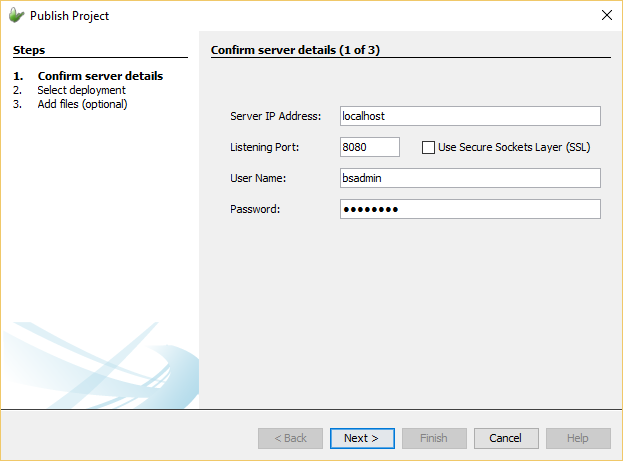
When first opened, the 'Publish Project' wizard will display the server details the project will be published to. The wizard will initially be populated with the default values set in the Options window of BrightBuilder. How these default values can be configured can be read about above in the 'Configure Default Server' section. Through this step, the details of the correct BrightServer instance to deploy the project to can be entered.
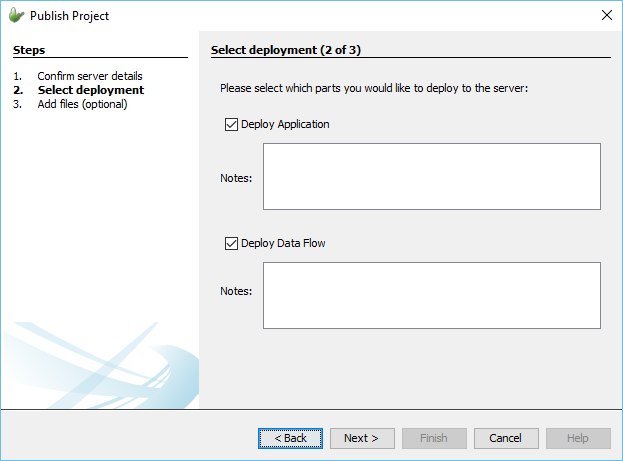
The next step in this process is to select the project elements within the BXP project that are to be deployed to the server. BXP projects are bundled with two project elements. The Application element that contains the definition of the application itself that will be executed on the device. There is also the Data Flow element which dictates the flow of data between sync points on the client and server side. If the application to be deployed does not require synchronisation to take place, then only the Application element of the project can be deployed onto the server. However if the application requires synchronisation of data between mobile client devices and back-end server side information systems, then the Data Flow element must be defined and deployed alongside the Application element. Through this step, the application can be deployed onto the server with a given descriptions for each element of the project.
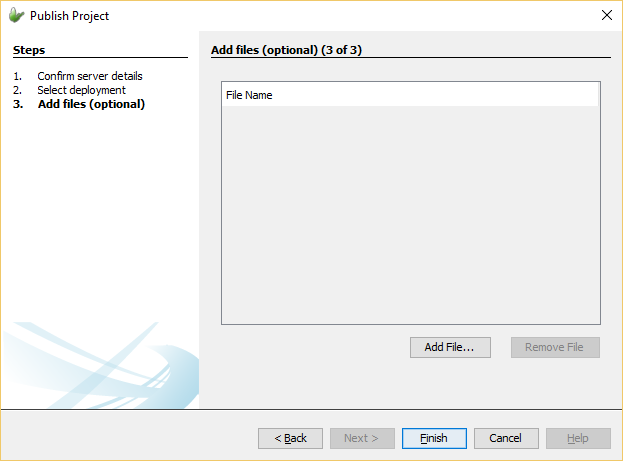
The last step is an optional one where additional files can be uploaded to the server as well. An instance where this is advantageous would be if a file data accessor was defined within the Data Flow element, the file can be uploaded and stored on the server as well ready to be used for synchronisation. By pressing 'Finish', the wizard will take all entered details and attempt to publish the application onto the indicated server.
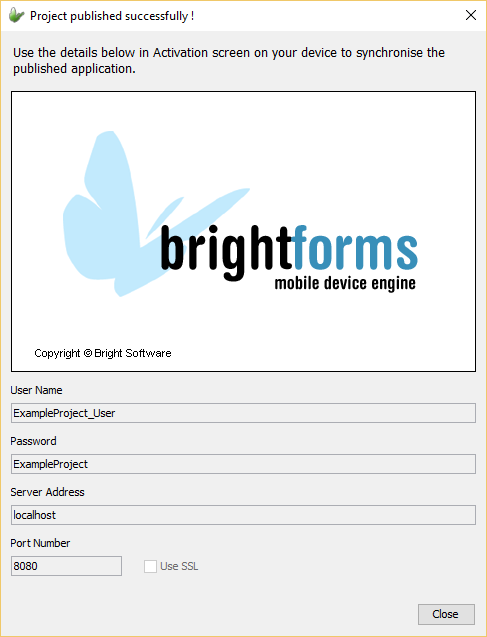
The following window will display the required details to be entered into BrightForms, indicating publishing was successful.
BrightForms is the form execution engine that is used to download and process the application definitions created through the BXP projects. For more information, please refer to the BrightForms Introduction chapter.
A published application may be loaded on a newly installed BrightForms application by simply opening the app and entering the values shown on BrightForms' activation screen. The device will connect to the BrightServer and acquire the published application for the entered user name and password. The user may then run and use the application in the field.
 When
publishing to a remote BrightServer Instance in BrightBuilder,
or connecting to a server instance with BrightForms, the IP address
and the port number must be accessible. For more information,
please refer to the Using
BrightServer > Connecting to BrightServer topic of the
BrightServer section of this document.
When
publishing to a remote BrightServer Instance in BrightBuilder,
or connecting to a server instance with BrightForms, the IP address
and the port number must be accessible. For more information,
please refer to the Using
BrightServer > Connecting to BrightServer topic of the
BrightServer section of this document.
There can be instances when an application will need to be further developed and updated on existing running devices. BrightBuilder and BrightServer handles all of this for you without any hassle. If the project has been updated, simply publish the project again as stated above. Once the latest version of the application is published, users will simple need to go into the options menu in BrightForms and press 'Synchronise'. By doing this, the application will be updated with the latest deployed version, with changes taking effect when BrightForms is restarted.
If more users are required, the Configuration > Users panel of the BrightServer instance may be edited to add more users with the same application and data flow (server configuration). For more information, please refer to Configuring Brightserver > User Configuration.