Job Configuration
Contents Hide
Each server configuration contains a 'Jobs' node, which may be used to add and configure added server jobs to run on the BrightServer instance on a schedule. These jobs are uploaded to the server as Javascript files, and are structured and function the same as BEP projects' Run Scripts, but exist and run independent of the BEP.
After uploaded, Server Jobs on BrightServer instances may be monitored and even manually driven by the server's Job Status node.
The assignment of jobs is handled by the Jobs panel, which may be used to manage the adding and removing of jobs to the server, then applying these changes to the server. They may then be accessed and monitored via the 'Job Status' node of the server.
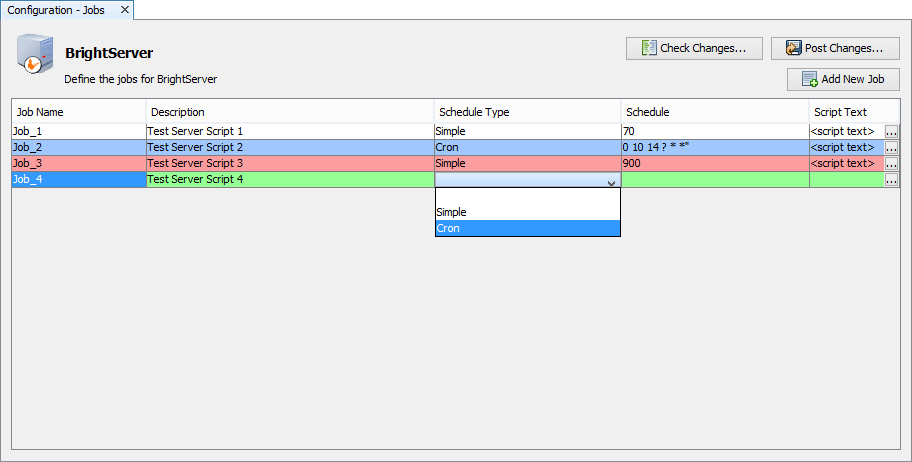
The table will display the effect of changes to the system, with added records highlighted in green, deleted records in red, and modified records in blue. The 'Check Changes ...' button may be used to evaluate the current configuration based on the server state.
Adding New Jobs
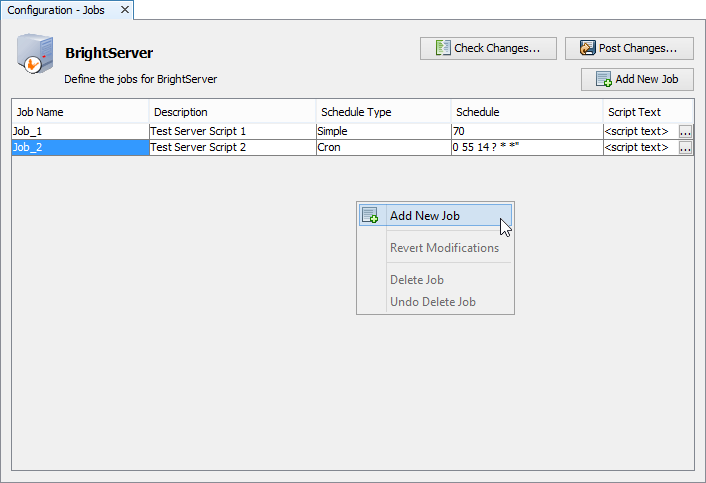
Jobs may be added in the jobs table either by selecting 'Add New Job' after opening the context menu in the table, or by tapping the 'Add New Job' button.
A new Job will be created called Job_n where n is the number of jobs - inclusive, with the 'Job_' prefix. It will be highlighted in green, signifying that it is to be created when the configuration is posted to the server.
Modifying Jobs
Jobs my be modified simply by double clicking within each field in the jobs table.
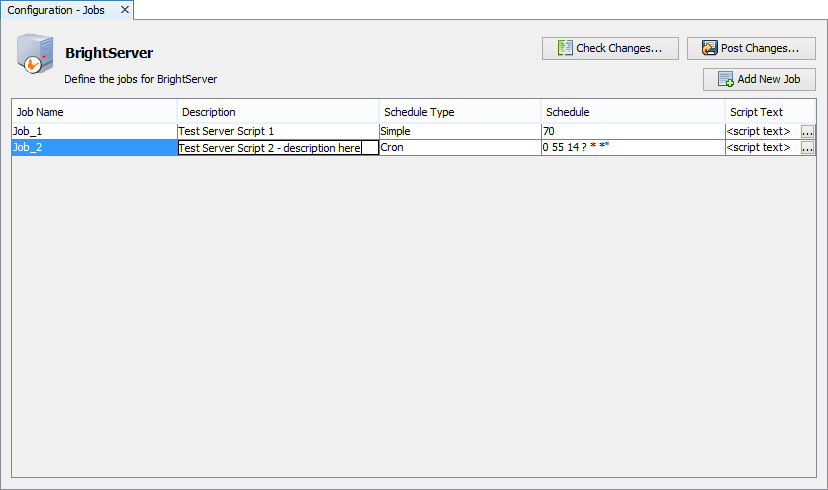
The editable fields are as follows:
Job Name : Name of the job to be added, shown on the Job Status screen for identification. For this reason, names must be unique and contain more than one character.
Description : Description of the job which has been added, which will be displayed on the Job Status screen.
Schedule Type : This is a drop-down list containing cron and seconds options for script execution. Use seconds for simple, or cron for more complex scheduling. For more information on the Cron format, please refer to the Appendix > Cron Expression chapter of this document.
Schedule : The frequency or schedule to which the script will be invoked on the server, in the format expected by 'Schedule Type'. Validation errors will occur if this is left empty or does not match the expected value type.
Script : The script to be run on the server. The script may be assigned by tapping the ellipsis, opening the script preview dialog.
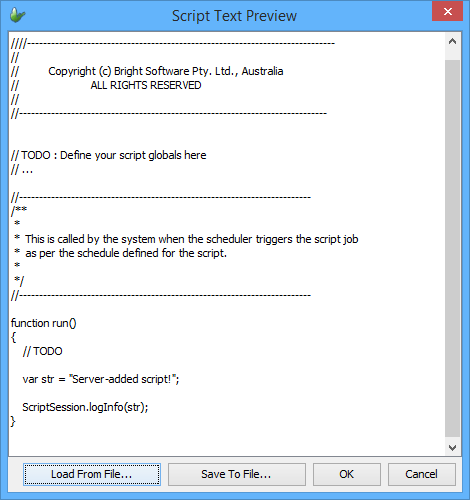
Here, any scripts currently on the server may be viewed and downloaded with the 'Save To File ...' button. A script may be uploaded to replace any current script with the 'Load From File ...' button. Tapping 'OK' will save these changes, while 'Cancel' will discard any changes made. Scripts assigned must be of the 'Job' type - when invoked, the run() function will be executed.
Any job which exists on the server and has been modified will display in the table with a blue background. Any record which has been created and thus is not on the server will appear in green.
Deleting Jobs
Deleting jobs may be performed by right-clicking a specific job and selecting 'Delete Job'.
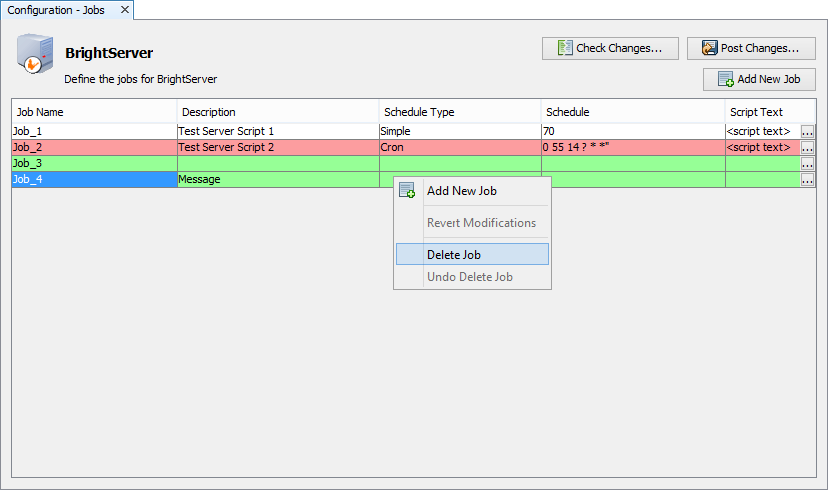
The user will be prompted with a dialog asking confirming the deletion. Once confirmed, the record will be flagged to be deleted when the configuration is uploaded, or removed completely if it does not exist on the server.
Records flagged to be deleted on the server will be marked in red.
Deploying and Running Jobs
When editing is complete, the configuration may be checked or posted to the server via the 'Check Changes ...' and 'Post Changes ...' buttons respectively.

Once posted to the server, jobs will be accessible to enable, disable,
start and monitor via the 'Job Status' node of any BrightServer instance.
Jobs which are newly created are registered in this panel in the 'disabled'
state, marked with the ( )
icon. Similarly, if jobs are enabled but are modified through the Job
Configuration panel, they will be set to 'disabled', and must be activated
in this panel.
)
icon. Similarly, if jobs are enabled but are modified through the Job
Configuration panel, they will be set to 'disabled', and must be activated
in this panel.
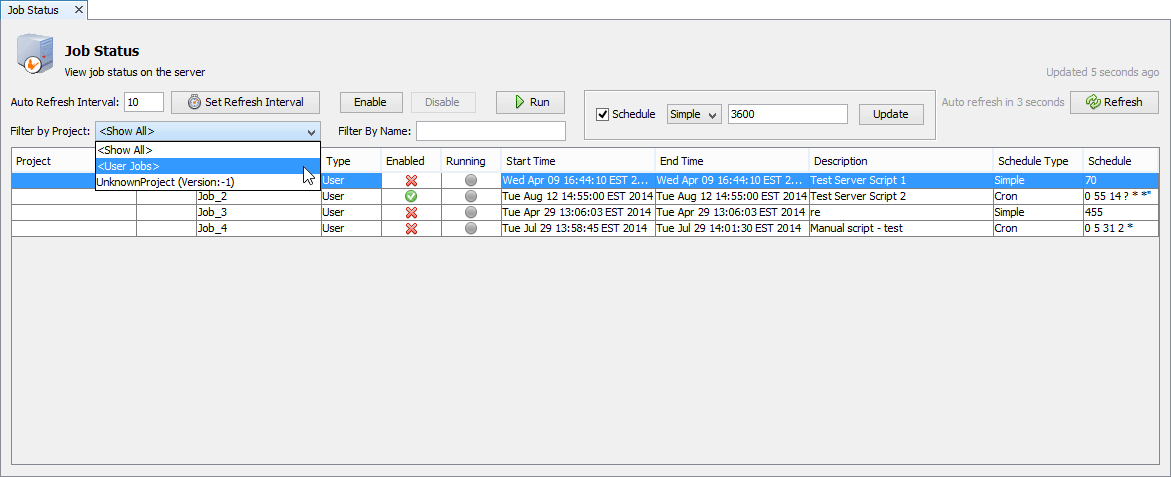
Jobs originating from the server will be in the list of jobs without a project or release number, and under the 'User' category. A complete list of server jobs may be viewed via filtering jobs by the 'User Jobs' category.
For more information on this panel, please refer to the Job Status chapter of this document.