Quick Tutorial - Queries in Bright Builder
Description
Create the basic foundation for information retrieval from databases in BrightBuilder.
Resources
Introduction to Queries
Queries retrieve information from a database specified by BrightBuilder tables as rows. Any information to be viewed, changed or analysed from the database needs to be handled by queries, and thus they are vital for application development.
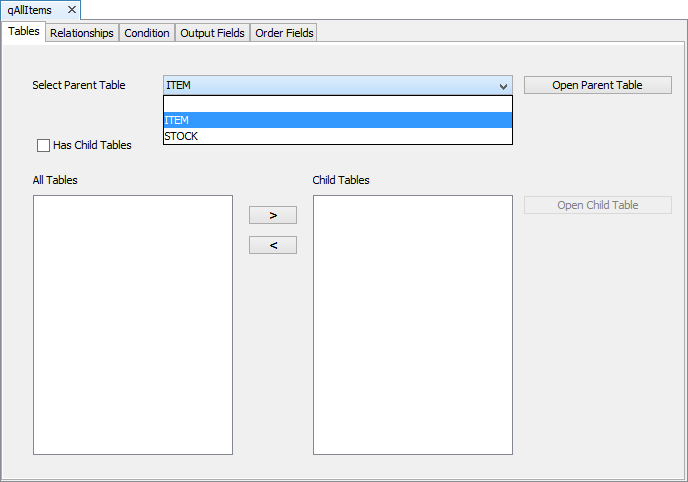
A query in BrightBuilder consists of several sections which help refine the rows returned, and how they are displayed. The only necessary definition is which table’s rows need to be retrieved, and this is specified by the ‘Select Parent Table’ drop down menu in the ‘Tables’ tab. Please note that any changes to the parent table at this tab will reset all other tabs’ definitions.
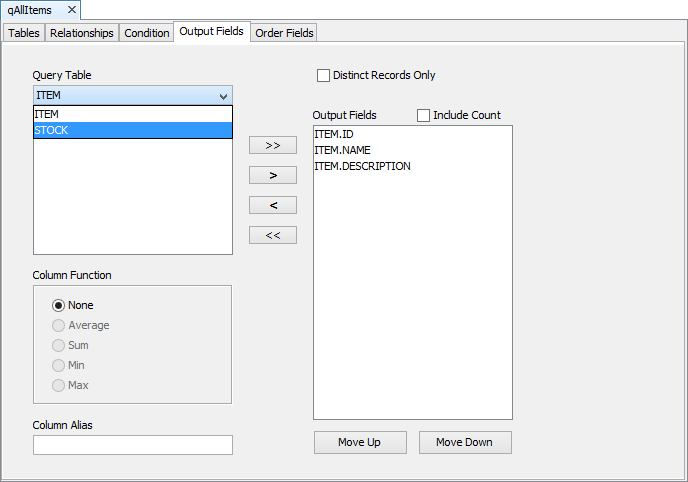
The ‘Outputs’ tab is also important as it specifies the particular columns for the query to return. The columns which can be selected are located on the right under ‘Query Table’, which is used to select the source table. In order to set a column as an output field, you must add it to the ‘Output fields’ column to the left, using the arrow buttons.
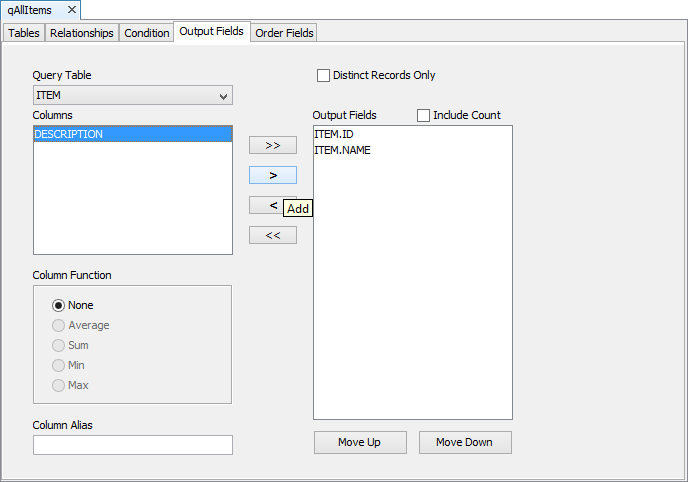
The order of these columns may also be defined by the ‘Move Up’ and ‘Move Down’ buttons, and this is useful, but not necessary, when assigning queries to listviews. There are also several other options you can choose to define and refine your output at this point. For more information, please consult the Bright Software User Manual.
The ‘Order Fields’ tab may also be used to sort the ordering of rows in each column. If there is nothing defined in this tab, the default will be to output these fields in descending order, and in the order the columns are defined in the ‘Output Fields’ tab.
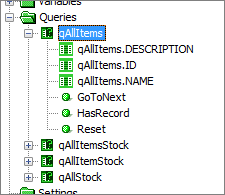
The rows returned by a query may be referenced by a listview control, by specifying the name of the query with the ‘List Query’ property. The columns will appear in the layout editor if successfully linked, in the order of the query’s ‘Output Fields’ tab. The rows and fields returned by the query may also be iterated through via using the query object, or query node in the DST.
Joins
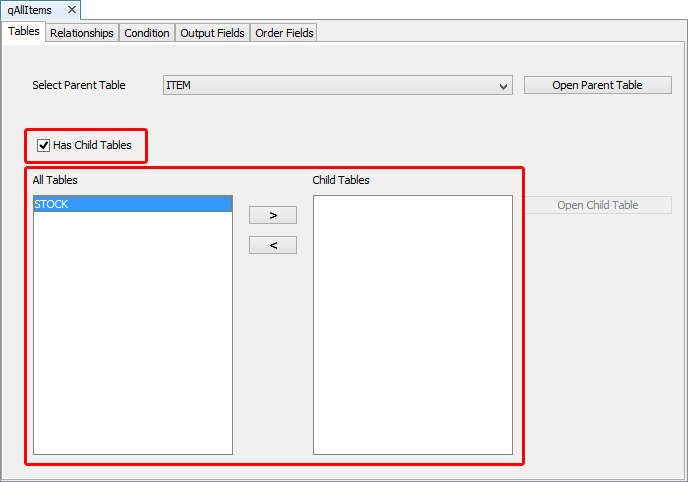
Joins are used when rows need to be retrieved which contain data across a number of tables. If you require a query that will have at least one join, select the ‘Has Child Tables’ checkbox in the tables tab. This will then list all available tables under the ‘All Tables’ heading, which can be moved and thus defined under the ‘Child Tables’ heading with the [ > ] button.
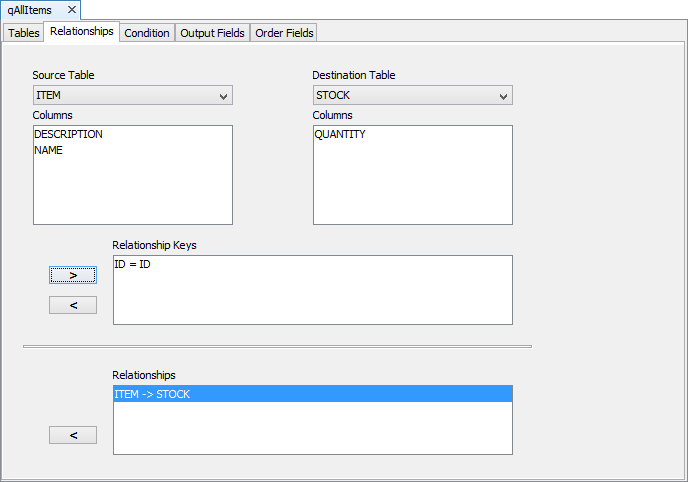
Once a child table has been set, the relationships tab can be used to define the condition to which the join occurs.
Joins are created where the left ‘Source Table’ column matches the right ‘Destination Table’ column in the relationships tab. Once these are selected and the [ > ] button is clicked, the relationship should be added in the ‘Relationship Keys’ column, and a new relationship will be made if the join is valid. Also note the population of tables in the ‘Output Fields’ tab’s drop down menu.
Parameterised Queries
Parameterised queries are queries with a condition that is dependent on a variable, set by the application. This variable is known as a parameter, and is set in the ‘Condition’ tab of the query. These types of queries can be used for dynamic runtime based data retrieval.
The conditions tab itself is used to filter rows based on a certain condition, whether constant or variable. To set this condition, first specify the column whose values you want to check, enter in the value in the ‘Value’ section of the expression (or check NULL) and then click the ‘Insert Expression’ button. The condition will be added in the ‘Condition’ table.

A parameter is added in a similar way; however a name needs to be specified. When the ‘Insert Expression’ button (which changes to ‘Update Expression’) is clicked, the condition will be listed as “<operator> ?” (in this case, “ = ?” which signifies that the condition is parameterised. Once set, this parameter can be assigned and accessed at subsequent stages of application development, such as when Data Binding.
Exercise
Try to create the three following queries from the QueryStart.bsp project. There are several expressions and controls which are provided to test if they are implemented correctly. Along with this, you can also observe and verify these modifications in database file created by BrightForms.
Create a qAllItems query which returns all the values in the ITEM table. Also create a similar one for STOCK, called qAllStock. You may test these queries by assigning them to a listview and clicking the “Populate” button. The “Reset” button should now work too, using these queries that return all records to delete them.
Make a joined query where ITEM.ID = STOCK.ID. Name it qAllItemStock and have it output ID, NAME, DESCRIPTION and QUANTITY. Also test it with a listview.
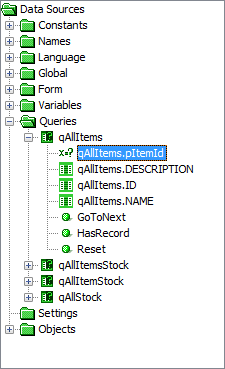
Finally, create a parameterised query which filters rows based on the parameterised condition ITEM.ID = pItemID. It has the same join and output fields as qAllItemStock.
Note, it is important to name the queries qAllItems, qAllStock, qAllItemStock and qFilterItemStock for the provided functions to work.