BrightServer and ODBC Data Sources
Contents Hide
Description
Tutorial showing how to create a local ODBC data source in Windows, configure BrightServer to access it, and how to test it with a simple BrightBuilder application.
Resource
- ODBCTutorial.bsp (BrightBuilder Project)
- ODBCTutorialStart.bep (Initial BrightServer Project)
- ODBCTutorialFinished.bep (Completed BrightServer Project)
- ODBCTutorial.mdb (Sample Microsoft Access 2000 Database)
Preface
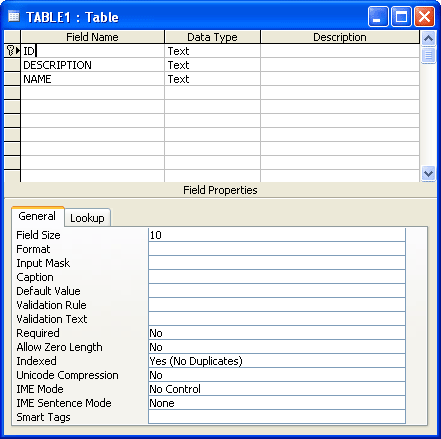
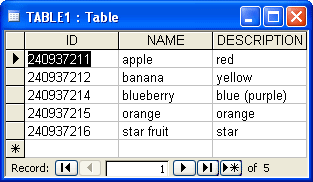
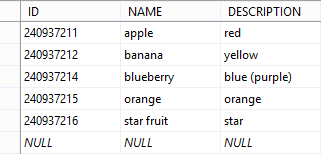
Download and open ODBCTutorialStart.bep. This is the starting point of this tutorial. The file is a simple BrightServer project, with TABLE1 copied from the ODBCTutorial.bsp application. The ODBCTutorial.mdb file is a Microsoft Access Database file, with the equivalent table definition, as well as 5 records.
This tutorial will show how to configure ODBC access in BrightBuilder, and the necessary steps in Windows to connect to a MS Access database. At the end of tutorial, we should have a fully functional application that synchronises entries both to and from the ODBC data source.
Creating and Configuring a new ODBC data source in Windows
First, access the ODBC Data Source Administrator. This is done as follows:
Windows XP: Control Panel -> Administrative tools -> Data Sources (ODBC).
Windows Vista/7: Control Panel -> System and Security -> Administrative Tools -> Data Sources (ODBC).
Alternatively, search for “ODBC” -> "Set up data sources (ODBC)".
This will bring up the "ODBC Data Source Administrator" dialog, listing various data sources on the system.
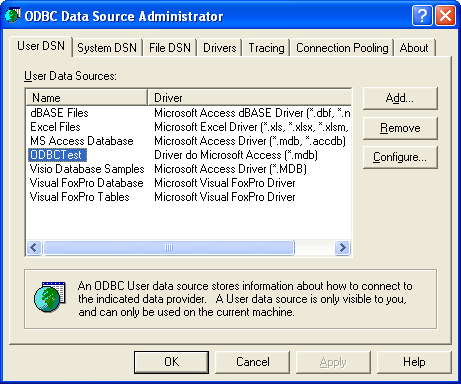
From this dialog, create a new user data source with the ‘Add…’ button. Choose the Microsoft Access Driver (*.mdb) as the type when prompted by the "Create New Data Source" dialog.
 Note: Depending on the permissions of BrightServer and machine
user permissions, 'System DSN' may need to be used as opposed
to 'User DSN' pictured.
Note: Depending on the permissions of BrightServer and machine
user permissions, 'System DSN' may need to be used as opposed
to 'User DSN' pictured.
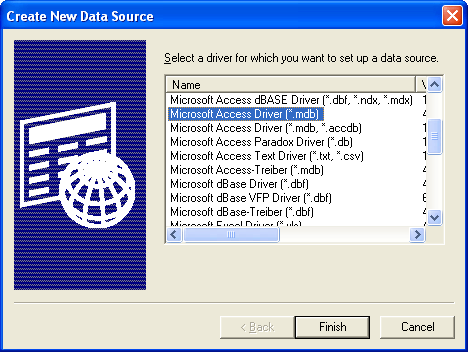
Click finish. A new dialog - " ODBC Microsoft Access Setup" will appear. On this form, complete the following fields:
Name: ODBCTutorial*
Description: (anything)
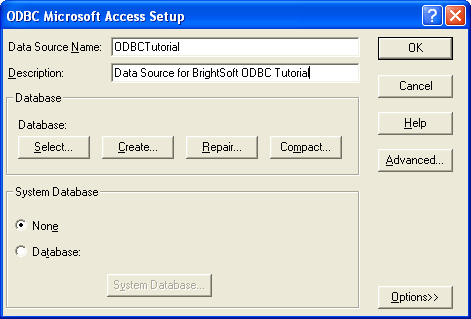
Under the database groupbox, click the Select button to choose an existing .mdb file. Select ODBCTutorial.mdb from the path you saved it to.
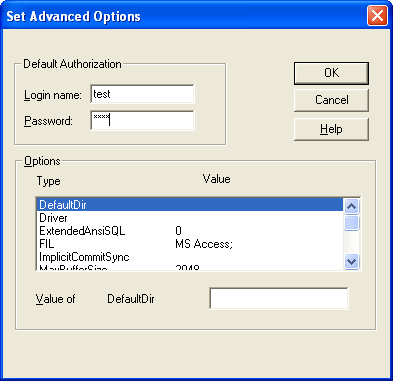
Click on the 'Advanced' button and enter in the following values:
Login name*: test
Password*: test
Note that these (*) values will be referenced when defining sync points in BrightBuilder, explained in the section below.
Altering Sync-Points in BrightBuilder
With these values set up you have created a new ODBC source. To read from/write to this source via BrightBuilder, you need to modify the .bep project file as follows:
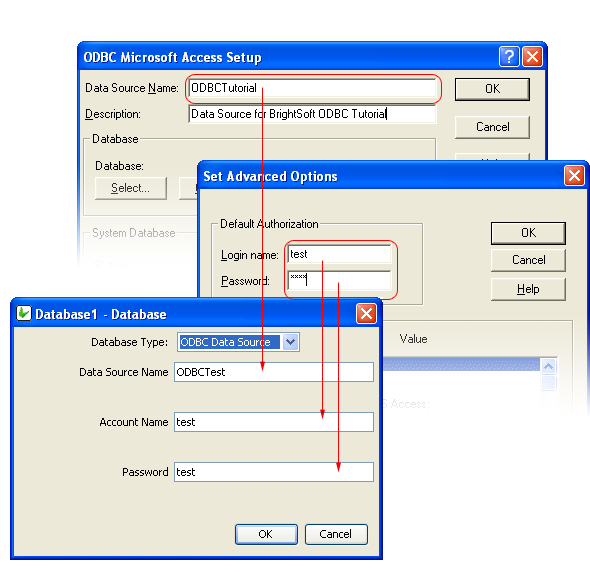
Sync points – Default custom data source; we want to specifically define the type as an ODBC database, and fill in the respective values. Do this by clicking on the Database property of the Database1 data source, and inputting the following:
Database Type: ODBC Data Source
Data Source Name*: ODBCTutorial
Account Name*: test
Password*: test
Note, the Data Source Name, Account Name and the Password all should be the equivalent of the ‘creating and configuring’ section above.
Executing the BEP and BSP
Execute the BEP as follows:
Execute the BEP configuration locally (using defaults, the server should be localhost:8080).
Execute the ODBCTutorial.bsp and change settings in BrightForms as follows:
Set the login/password for BrightForms as the one specified when creating the server instance (default is User1/User1).
Set the address as localhost:8080 to connect to the database.
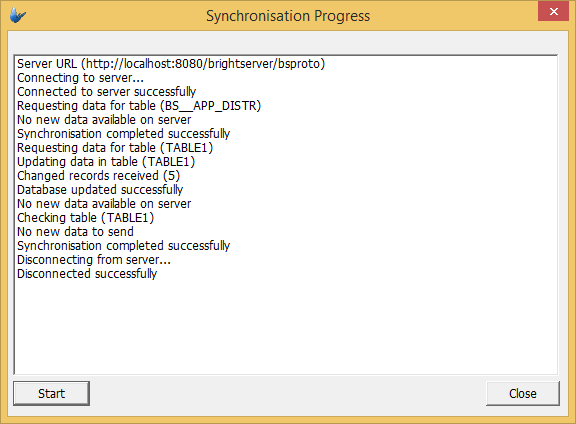
Synchronise the application. There should be no errors listed in the dialog.
Testing
Below is the Microsoft Access Database, and the entries within it.
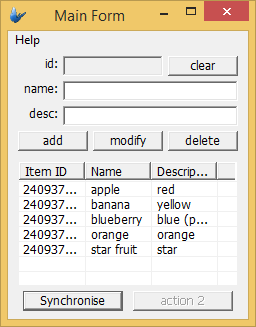
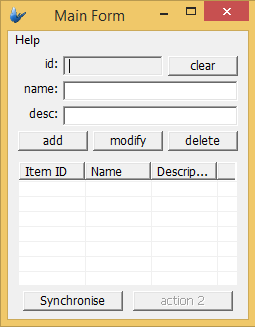
Upon loading the application in ODBCTutorial.bsp, there will be no values in the listview. Press the synchronise button.
After pressing the synchronise button, the sync dialog should appear. Once the synchronisation has finished, close the dialog.
If successful, the data in the table should successfully sync into the listview.