Quick Tutorial - Using the Camera
Description
This tutorial will demonstrate the fundamentals of using the camera in BrightBuilder, and how to incorporate this functionality into your application.
Resources
The Camera Object
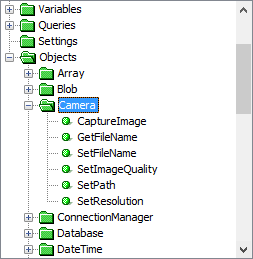
The camera in BrightBuilder is controlled using the Camera object, found in the Objects > Camera folder in the data source tree. Using the methods in this folder, the device’s camera application may be launched and configured to settings defined in BrightBuilder, and the picture may be retrieved to display in controls and to write to the database.
The device’s camera application is launched using the Camera.CaptureImage() method. This method will launch the camera application where the image can be captured and previewed. When this application closes, the remainder of the expression after the method call executes.
The camera object can also set the filename and also the directory path where it stores captured images. You may set these via the SetFilename() and SetPath() methods respectively, and may retrieve the full path and filename (set or otherwise) of the image via the GetFileName() method.
SetResolution() and SetImageQuality() may also be used to change the type of image that is captured. The set of resolutions and quality settings available on each device may vary, so if using these methods, consult the camera application on your device. If the resolution or quality is not available on your device, then the device’s defaults will be used.
Calling Format
The CaptureImage() method will return 0 if a photo was successfully captured, or another value if there was an error. We use this in an expression to ensure file operations are robust, as if an image is not captured successfully, Camera.GetFileName() will return NULL.
If an image is captured, we can use the Camera.GetFileName() method to retrieve the file for use in an expression, for example, loading it into an image or a scribble control. Using these controls with captured image files will be described later in this tutorial.
Generally, the file created by the camera should be treated as a temporary file, and thus, when access to it is complete, it should be deleted via the File.DeleteFile() method, located under Objects > File in the data source tree.
An example of this progression may be observed below:
local.result = Camera.CaptureImage();
IF(local.result == 0)
{
local.filename = Camera.GetFileName();
local.image = File.LoadBinary(local.filename);
image1 = local.image;
File.DeleteFile(local.filename);
}
Loading into Images 
The example above shows how to load the photo into an Image control. Loading a photo into an image allows the scaling of proportions via the ‘Style’ property of the control. If the binary image in the control needs to be assignable to another control or saved in the database, ensure that the ‘Cache Image’ property of the image is enabled. If this is not enabled, then an expression such as: “local.binary = image1” will result in a NULL value being assigned to the local.binary variable.
Loading into Scribbles 
Loading a photo into a scribble allows it to become editable; however as scribble resolutions and brush sizes etc are set, scaling options are not available. Scribbles can be made uneditable via the ‘Read-Only’ property, but using an image control is usually favourable in this case. When loading from the camera’s file, use the Scribble.LoadFile() method found in the Objects > Controls > Scribble folder in the data source tree.
Exercise
Complete the camera form by having it capture an image when the ‘Take Photo’ button is clicked by the user. If a picture is successfully captured, load the image into the form’s scribble. As the control is a scribble and thus images are not scaled, have the resolution of the camera set to match that of the scribble.
A completed solution may be found in the CameraFinished.bsp file. Also try to use an image with appropriate properties instead of the scribble.