Synchronising from an SQL Database
Contents Hide
Description
This tutorial describes a step-by-step guide demonstrating how to synchronise records from an SQL database.
Steps
Create a new DEMO_CUSTOMER table in the SQL database to match the fields defined in DemoCustomer.bsp’s table. This may be achieved by using the 'Create Tables' method in BrightBuilder, selected from the table's context menu.

Create 2 records in the SQL database’s DEMO_CUSTOMER table.
Start BrightBuilder.
Open TestBrightXpress.bep.
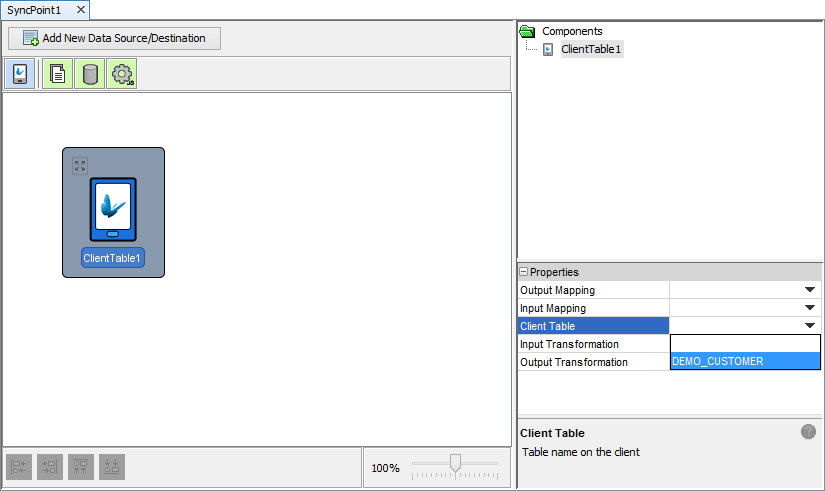
Create a new Sync Point by right clicking on the 'Sync Points' panel.

Drag a Client table sync point (
 ) from the toolbar on
to the Sync Point panel.
) from the toolbar on
to the Sync Point panel.Select the new SyncPoint and set DEMO_CUSTOMER as the Client Table.
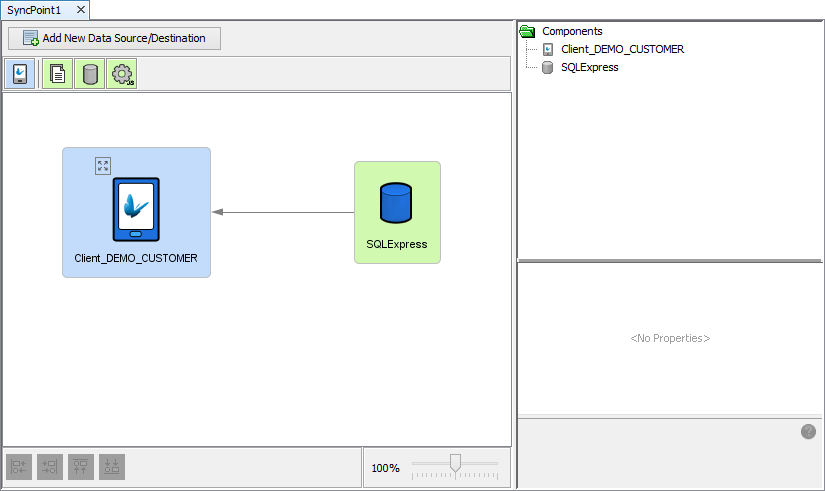
Drag a Database data accessor (
 ) to the panel. Rename
it to 'SQLExpress'.
) to the panel. Rename
it to 'SQLExpress'.Set up the database’s properties to match the previously created SQL database.
Create a data flow by holding the keyboard CTRL button, and dragging the mouse from the Database SQLExpress point to the Client DEMO_CUSTOMER sync point. Release the mouse once the two are attached.
Run the modified TestBrightXpress.bep on a debug server instance by right clicking it and selecting “Execute”. This may also be achieved via (
 )
or by pressing F6.
)
or by pressing F6.Open DemoCustomer.bsp and execute it in BrightForms.
Within BrightForms, ensure the username, password and server IP address information for the debug BrightServer instance is configured correctly.
Click 'Get' button to download records from server.