
Introducing BrightWeb
Contents Hide
Description
Step by step guide demonstrating how to create a self-contained mobile web application, deploy and release it to a BrightServer instance, then access it through any browser via BrightWeb.
Creating an Application
BrightBuilder handles both the creation of the application's screens and the deployment and configurations of the servers which they run on. Following the steps below, create a simple application that responds to user button clicks/taps for deployment and execution on BrightWeb. An example application which exhibits this behaviour - 'IntroBrightWeb.bsp' may be found in this tutorial's resources for review.
Open the BrightBuilder IDE.
Locate the 'New Project' button in the BrightBuilder toolbar, or projects panel. Click on this button to open the 'New Project' dialog.


Within the 'New Project' dialog, select the BSP project type and form size, then click the Finish button.
 An
application is defined via a BSP, containing definitions
for project elements such as tables, queries, sync rules
and most importantly, forms. These may be created by right
clicking on the specific element and selecting the 'New'
option.
An
application is defined via a BSP, containing definitions
for project elements such as tables, queries, sync rules
and most importantly, forms. These may be created by right
clicking on the specific element and selecting the 'New'
option.
A file dialog will appear. Select the folder and enter in the project's file name, then click on the Create button.
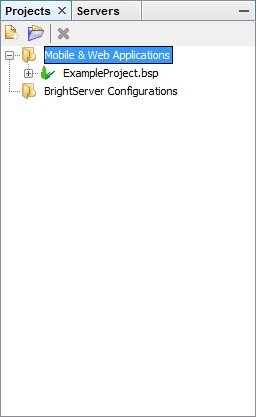
The new project will be created and opened Projects panel of BrightBuilder. Click on the [+] to expand the project elements.
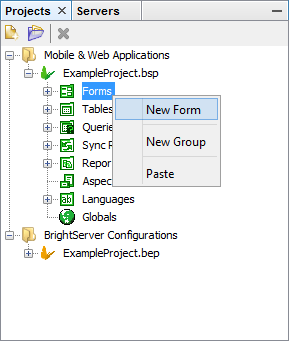
Locate the Forms node. Perform a right click action, opening the context menu for the node.
 Note: Creating, deleting, and modification of project
elements, as well as other specific functionality may
be accessed via the right click context menus within BrightBuilder.
Note: Creating, deleting, and modification of project
elements, as well as other specific functionality may
be accessed via the right click context menus within BrightBuilder.Select the New Form option. A new form will be created and opened for editing, named 'Form1'. This element may be found in the Project tree by expanding the Forms node.
The new project will be created, and a new form will be added for editing using the Form Layout Editor, detailed below.
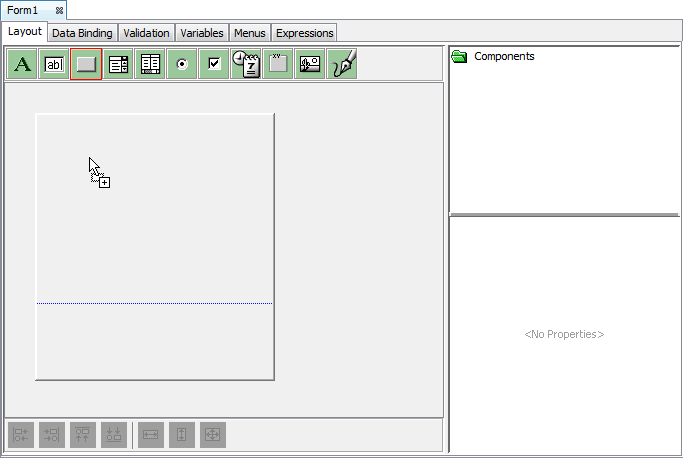
Form Layout Editor
Designing forms is handled via the Form Layout Editor in BrightBuilder. This screen allows users to modify and preview the visual look of the form, via dragging and dropping form controls in the 'What You See is What You get' - WYSIWYG editor. Follow the steps below to add a label, edit control and button to the form.
There
exists a number of control types which may be added to a form,
which are used display and capture input/information from
the user, for example:
Label - Displays a single user string that may be changed via assignment expressions.
Edit Control - Accepts user text entry.
Button - Accepts user tap action event.
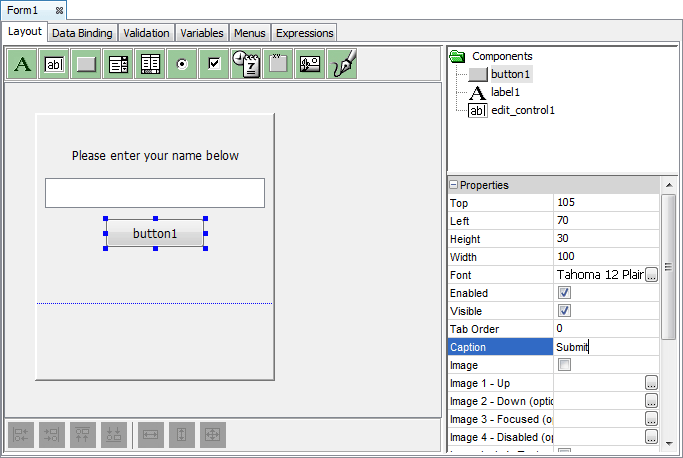
Locate the Label, Edit Control and Button controls in the controls toolbar, dragging and dropping them into the form layout. Once included, they will be located in the 'Components' panel of the form editor, and may be repositioned also via drag and drop.
Click on the Label control added. Locate the Caption property of the control in the Properties panel, and change the value to "Please enter your name below". Click out of the value field to save the value, and have it reflected in the form layout.
Each
control has properties, which may be edited via the properties
pane once the control is selected. Using these properties,
characteristics such as the caption on buttons or labels
may be altered, or acceptable range of results from a
user in an edit control may be specified.
Similarly, click on the Button control added, and change the caption to "Submit"be reflected within the form layout.
Form Expressions Editor
Expressions in BrightBuilder are used to specify application behaviour, typically based on user interaction with the screens. These may be assigned via the 'Action' properties of each control.
Alternatively, controls without expressions may be double clicked to automatically create an expression. This will create a new expression, and open it in the form's Expression Editor tab. Other expressions of the form may also be reviewed and edited through this tab. If a control with an existing action is double clicked, its associated expression be opened.
In order to define an action associated with the button 'button1', perform the following:
Double click on the control, opening an 'Assign Action' dialog for the control. Choose the 'Run Expression' option in this dialog.
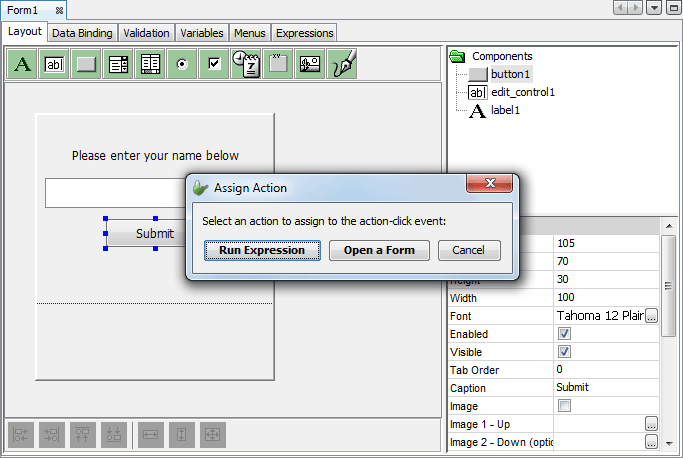
This will create a new expression and open it in the form's expression tab within the form editor.
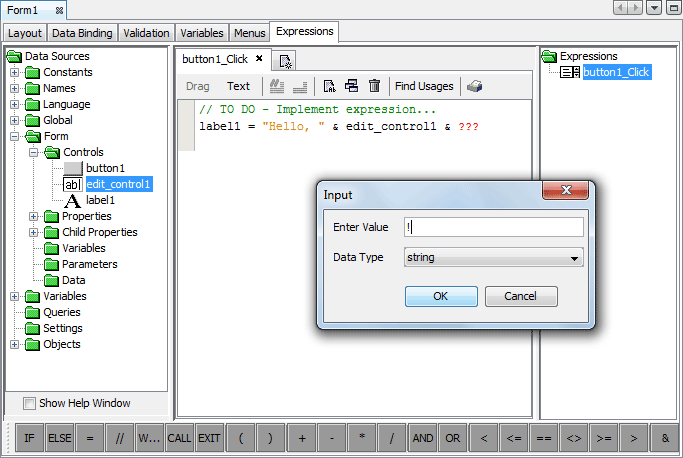
Notice the filler "TODO: ..." comment at the top of the expression. Select this line and press the DEL button to delete it from the expression.
Locate the Form > Controls folder in the Expression Editor's data source tree to the right. As we wish to have the label control change on button click, locate label1 control in the data source tree, under the Form > Controls folders.
*note on DST*Drag and drop the control into the now blank window. The text displayed in the editor will now be
label1 = ???
Double click the ??? field. Enter in the string value "Hello, ". The value assigned to the label will now be:
label1 = "Hello, "
Under the operands toolbar, locate the concatenation operand ('&') and drag it at the end of the line. The text assigned will now be:
label1 = "Hello, " & ???
Locate the edit control created on the form, also under the Form > Controls folder. Drag and drop it to the ???.
Continue to add another concatenation operand after the edit control data source, and finally set the value of the ??? created to the string value "!".
Constructing expressions themselves is also performed via the dragging and dropping of data sources, using the Data Source tree and operators, as seen below. Placeholders also exist, such that constants such as strings may be easily defined via double clicks. To begin constructing an
Deploy and Release
Project Deployment
Projects must be deployed to a BrightServer instance in order to run via BrightWeb. Before completing the following steps, ensure that a BrightServer instance is running and its login credentials are available.
Right Click the project created in the previous steps, opening the project's context menu.

Select the option 'Deploy to Server' in this context menu. This will save and attempt to validate the project, displaying any errors in an output panel.
Projects
with errors may not be deployed to a BrightServer instance.If validation passes with no errors, the 'Select Server' dialog will open. Select a server listed, or the 'New Server' dialog to follow the short wizard to register a new server.
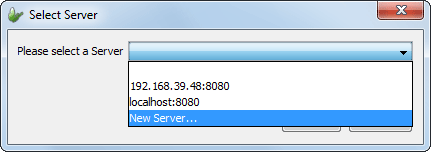 Through
this dialog, a server may either be selected or created,
and then connected to for the deployment. Servers displayed
in the list are populated from those registered under
'Servers' pane of BrightBuilder, with any new servers
able to be added via the 'New Server ...' option.
Through
this dialog, a server may either be selected or created,
and then connected to for the deployment. Servers displayed
in the list are populated from those registered under
'Servers' pane of BrightBuilder, with any new servers
able to be added via the 'New Server ...' option.Once a server is selected, click the Select button in the dialog. The Login to Server dialog will display.
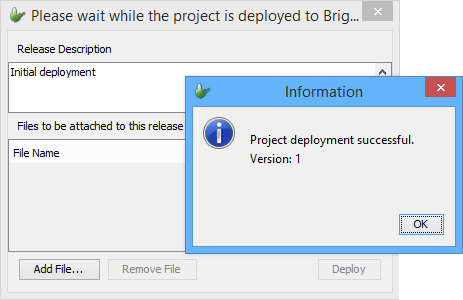
Enter in the server's login credentials, and click the Connect button. The dialog will close, allowing the user to continue, and the Release Description and File Attachments dialog will open.
Enter a description if necessary, then tap 'Deploy'.
BrightBuilder will proceed to deploy the application to the server specified. Once deployment is complete, a deployment confirmation dialog will be displayed with release number, indicating success. Note down these values in order to release the application to users.
Use the servers panel to access the BrightServer instance. Applications are assigned to users individually, based off the project name and release number observed in the previous step. A server may run any number of applications, with any previously deployed project may be accessed on the server. A list of available deployments may be accessed by right clicking the node of a specific server and selecting 'Browse Deployed Applications ...'.
User Configuration
Once deployed, the application may then be released to users, which is done via the Configuration - Users panel.
Locate the Users node under the server configuration. Right click and open, or double click this node.

A message will display prompting a download from the server. Click the 'Download ...' option to proceed, entering server login details where necessary.
If successful, a dialog will appear confirming the download. Continue by clicking the OK button.
The users panel will display to users of BrightServer. Right click within the table and select 'Add New User'.
In
this screen, users may be also be added, deleted or modified
via the context menus. The changes take effect after the
configuration is validated, initiated when the 'Upload
Changes' button is clicked.
A new user will appear in the table. Locate the Web Access column in the table, and ensure it is selected to enable BrightWeb usage.
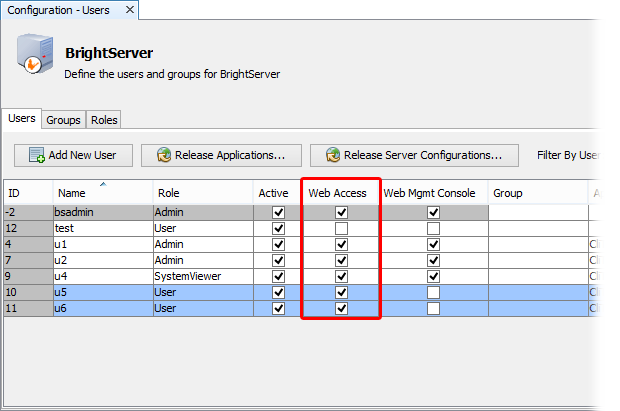
Double click the Application and Version fields in the table for the user, and enter in the values displayed after deployment confirmation.
Click the 'Post Changes ...' button to preview the configuration changes made.
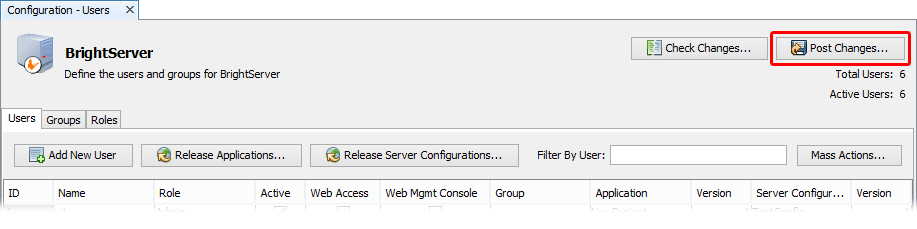
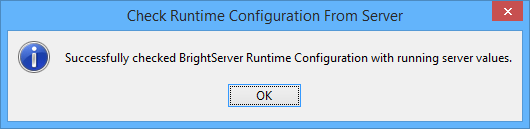
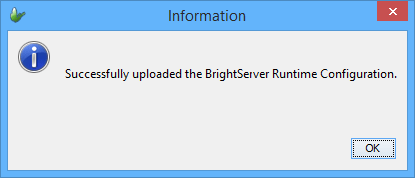
Click the Proceed button when prompted with the preview dialog. This will validate the configuration changes, and if successful, will proceed to upload the configuration to the server, and display a message indicating success.

Application Access
Applications may be run in BrightWeb via the BrightServer URL which is located at the URL of its address, followed by the path './brightserver/web' For example, the BrightWeb portal of a server running on the IP address 127.0.0.1, on port 8080 would be:
http://127.0.0.1:8080/brightserver/web/
Open the BrightServer Data Gateway Login page in a compliant browser by using this URL format for the BrightServer instance used.

Enter in login details and click the OK button.
If logging in to web the first time with the user account,
one BrightServer web license will be consumed. If no licenses
are available, then the user may still log on, but only
perform tasks in web demo mode. For more information on
web licensing, please refer to the BrightServer
> Licensed Web Users chapter of the BrightSoftware
User Manual.
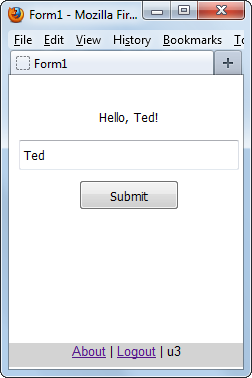
The application will load and display on the screen

Try out the application created using the steps above, by typing in your name and clicking the submit button.
Once finished using the application, the 'logout' command in BrightWeb's toolbar may be used to return to the initial login screen for BrightWeb.
