The Truck Inspector demo details implementing a truck inspection record system, called Rent-A-Truck. With this application, inspections with markup may be made on devices by users, with the inspection records sent to a server database.
This tutorial will show you how to utilise various form controls, use data binding to save records, create synchronisation rules and create expressions.
This document assumes that the user knows how to create tables, forms and queries. For further help regarding these BrigthBuilder concepts, please refer to their chapters in the User Manual, or Tutorials exploring these features.
Create a project and name it DemoRentATruck.
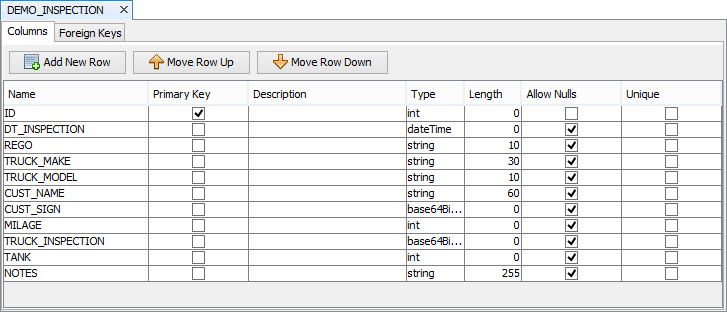
Create the following table with the specifications shown:
· DEMO_INSPECTION – Table of inspection records in the server database.
Create a query called qAllInspections that will return all inspection records, with the following specifications:
Parent Table: DEMO_INSPECTION
Output Fields: All
Order By: ID (ascending)
Create a new Sync Rule SyncSendInspections with the following specifications:
Direction: Client to Server
Query: qAllInspections
Create a form called Main that has the following components:
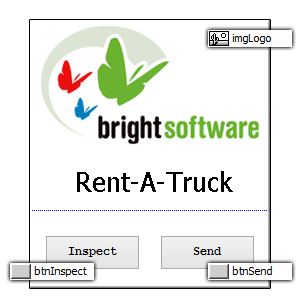
Note: Set the form background colour to [255,255,255]. This property can be found on the form properties. bmpLogo is a bitmap.
Create another form called Inspect. It has 4 tabs: Details, Visual, Notes, Sign. To add new tab, right click outside the form area, and select Add New Tabs.
Details Tab
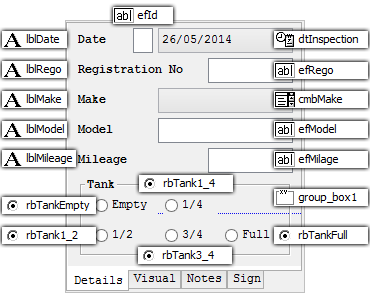
The radio buttons' component names are called rbTankEmpty, rbTank1_4, rbTank1_2, rbTank3_4, rbTankFull (change their value property to 0,1,2,3,4, respectively). The image shows their Caption value.
Staring with efID, assign the following tab orders: efID - 0, dtInspection - 1,
efRego - 2, efMake - 3, efModel - 4 and efMilage - 5).
Change the style property of dtInspection to Custom, and enter dd/MMM/yyyy in the Style-Custom Format.
Visual Tab
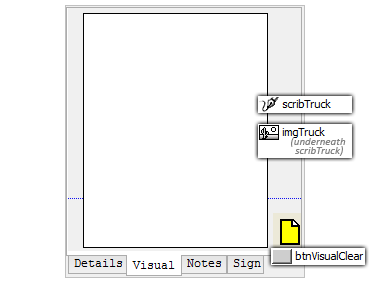
The white area is a scribble (component name is sgnTruck), set the pen color to
Red [255,0,0] and pen Width to 2 on the scribble property. The yellow page is a
button (component name is button2, caption is C, set Bitmap to True and specify
the image path). In the same area as sgnTruck there is another control
bmpTruck that is a bitmap image of a truck.
Notes Tab
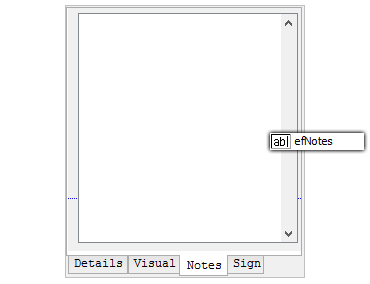
This tab only consists of a single edit control. Enable the Multi-line and Scrollbar
– Vertical properties.
Sign Tab
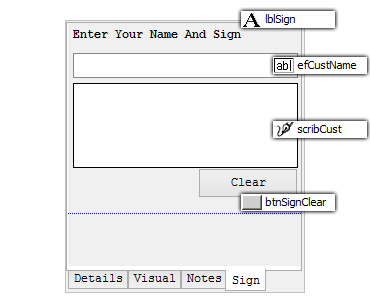
Set the tab order of efCustName to 6. sgnCust is a scribble.
Go to the Data Binding tab of the Inspect form and modify according to the following:
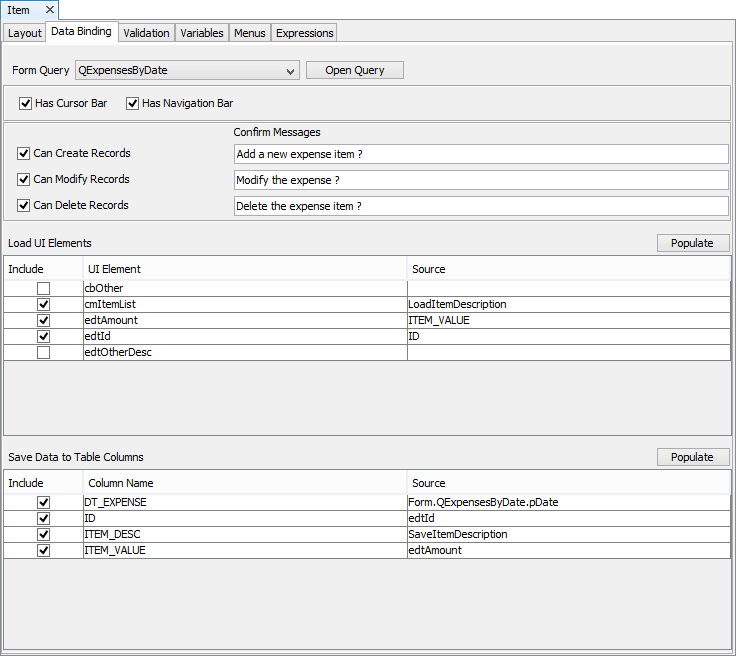
Note: Only the controls shown in the image above need to be included. There are other fields that do not need to be loaded or saved.
While still in the Inspect Form, create the following expressions:
ClearInspectionSheet
IF Form.MessageBox("Warning", "Do you really wish to restart ?",
MB_YESNO) == IDYES
{
sgnTruck.LoadBitmapBinary(bmpTruck)
}
ClearSignature
sgnCust.Reset()
OnNew
// Inspection is done today !
dtInspection = DateTime.Now()
// Reset all the required fields
sgnCust = ""
cmMake = ""
efCustName = ""
efModel = ""
efMilage = ""
efNotes = ""
efRego = ""
// Get a new unique id for the inspection report
efId = NumberGenerator.GetUniqueNumber()
// Tank is full (i.e. 4=full)
rbTankFull = 4
// Reload the reference bitmap for new changes
sgnTruck.LoadBitmapBinary(bmpTruck)
On the Main Form, create an expression called Sync:
Synchroniser.DisableAll()
Synchroniser.EnableSyncRule("SyncSendInspections", true)
Form.ShowSyncDialog(false)
Go to Main form and do the following:
Assign the Sync Expression to btnSend button Action-Click property
In the btnInspect Action-Click property, click the “…” button and select
Inspect under the OpenForm drop down list.
Go to Inspect form and do the following:
Go to Visual tab, and on button2, assign the ClearInspectionSheet expression to the Action – Click property.
Go to Sign tab, and on button1, assign ClearSignature expression to the Action-Click property.
On the form Action-New property, assign the OnNew expression.
Assign the Main form to the Main Form Name property of the project.
Execute the project form BrightBuilder.
Click in Inspect to open the Inspection form.
Click on the New icon at the bottom to start a new inspection.
Enter the vehicle details and complete the rest of the inspection data. Click on the save icon at the bottom.
Close the form. To send the inspection records on the local database to the server click Send button on the initial menu screen.