Application Deployment in BrightServer
Contents Hide
Description
This tutorial demonstrates how to deploy an application to BrightServer and release it to its users.
Introduction
Application deployment is a built in feature of BrightBuilder that deploys and stores projects to a BrightServer instance. Any BSP may be deployed, and BrightServer may hold any number of different applications and their iterations.
Once an application has been deployed, it may be assigned to the server’s users. Each user may be assigned a different application or version of an application. Application distribution can be done while the server is still running; there is no need to start and stop the server for changes to take effect.
Both deployment and assignment of applications may be performed remotely. The benefit of this is if there are many mobile field workers, it is not necessary to ask all of them to return with their mobile devices for an application update. The users of the applications will have them updated automatically on BrightForms’ synchronisation to BrightServer.
Application Deployment in BrightBuilder
An application may be deployed by right clicking on an open project in the Projects pane and selecting the ‘Deploy Application to Server …’ option. Once this is selected, the project will then be validated; if errors are present, the deployment process may not proceed.
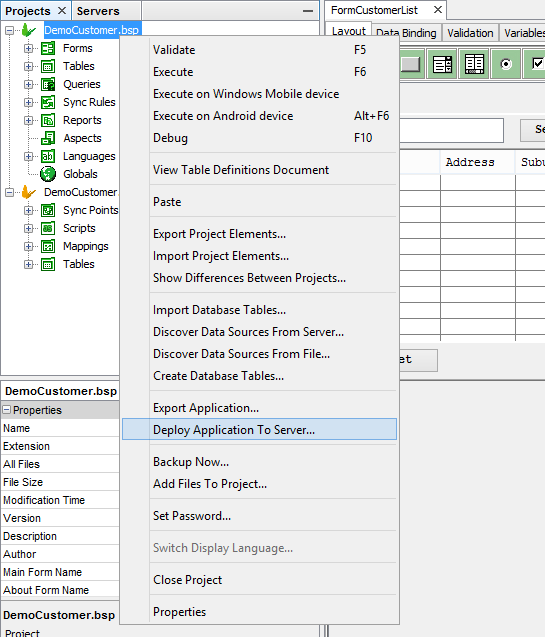
However, if successful, a server dialog will be displayed with a selection of servers. These servers are those registered under the Servers panel. Alternatively, a new server may be connected to through this dialog via the ‘New’ option.

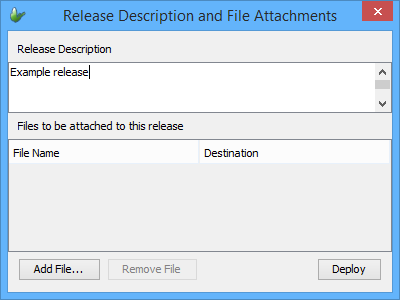
Once a server is specified, a description dialog will then appear. This is a short description that will help identify versions of applications when browsing and assigning them to users.
If the deployment is successful, a success dialog will be displayed. Based on the project name, and previous deployments of the application on the specified server, a server generated version number will indicate how many versions have been previously deployed and are present on the server.

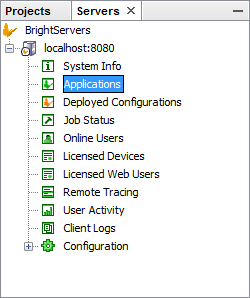
As mentioned before, applications are stored and managed on the server. To check what applications have been deployed to the server, the 'Applications' node of the server may be opened to open the applications dialog. Within this dialog, all applications deployed to the server may be viewed, with the time deployed and descriptions given. Furthermore, previously deployed versions may be retrieved and stored locally through the ‘Get Selected Version’ button.

Assigning Applications to Users
You may check which applications and versions are assigned to users by first downloading the server configuration and then opening the Configuration – Users tab, which displays a user table with this information.

The application names and versions for users are displayed in this table under the Application and Version columns. The fields for each user may be altered by double clicking and entering in values manually. Alternatively, the “Release Applications to Multiple Users” dialog may be used to retrieve this information, accessible through the button of the same name.

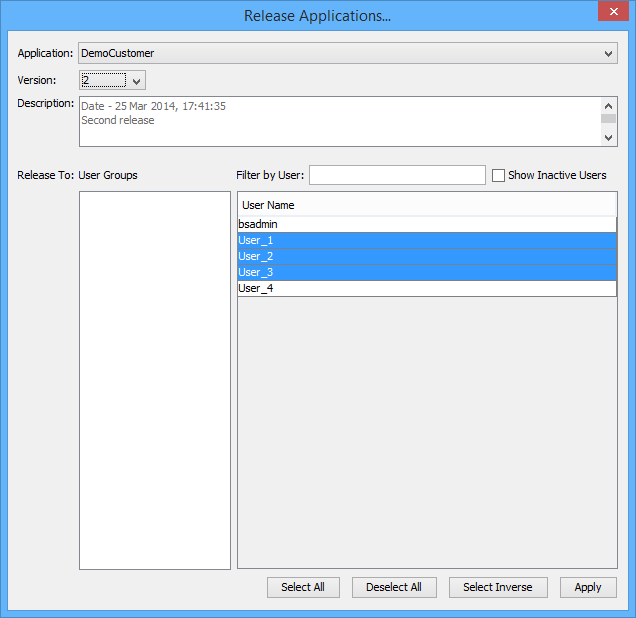
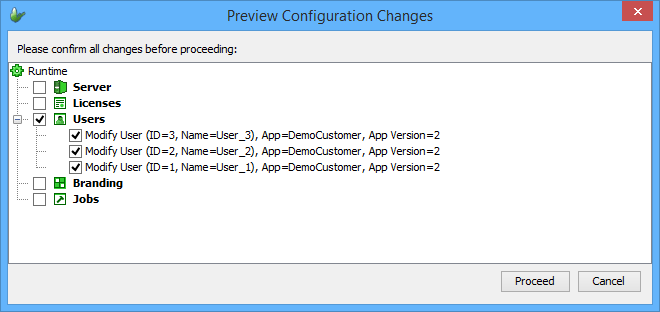
Once changes are made, the configuration needs to be applied to the server via tapping the 'Post Changes' button, or by right clicking the Configuration node and selecting the 'Post Changes ...' option from the context menu. The Preview Configuration Changes dialog will appear detailing the changes to the user’s application release. Once the Proceed button is clicked, the assignment will be complete.
Synchronising Applications from BrightForms
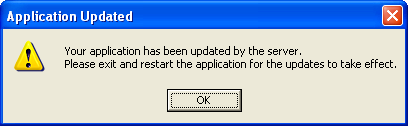
New applications are distributed to users when they synchronise with the server with the appropriate username and password in BrightForms. If the application currently stored on the BrightForms client is not the latest release, their application will be updated. The user will be notified when their application has been updated and they can access it by restarting BrightForms.

Exercise
Have a running BrightServer instance.
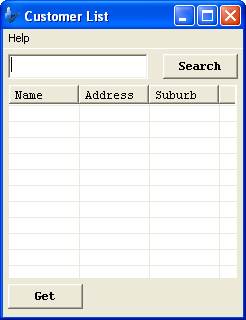
Deploy the DemoCustomer.bsp project.
Download the configuration from the server. Set User_1’s application and version to “DemoCustomer” number “1”.
Open BrightForms. Configure the settings to those of the server and log in with the username User_1, and password User_1.
Synchronise BrightForms to the server with the new settings. A dialog should appear if the synchronisation was successful, and prompting the user to restart BrightForms to have the updates to take effect.
Restart BrightForms. The DemoCustomer project should now be open.