BrightServer Project Deployment
Contents Hide
Multiple Configurations
When a BrightServer project is successfully deployed to a BrightServer instance, it gets placed in the server's configuration repository.
At any point of time, there may be any number of configurations from the repository active and running for a BrightServer instance. The definition used to determine which configuration to use on each device is dependent on the run-time configuration specified in the server's Configuration > Users node - which consists of an application and a server configuration with release numbers for each user. Therefore, the server configuration may be assigned specifically to an application release, and vice versa across the BrightServer instance's users.

With this model, vastly different applications may be set to run concurrently on the same server, and deployment models for testing and staged rollouts may also easily be realised by managing the server's users and user groups for application releases.
The following topics detail the steps to manage multiple configurations - deploying and activating them for BrightServer, then releasing them to users on the system. It also details the ability to establish a default configuration, in the event that no configuration, or an incorrect configuration is present.
Configuration Deployment
BrightServer Projects (BEPs) with no errors may be deployed to BrightServer using BrightBuilder's 'Deploy to Server' option on the project node.

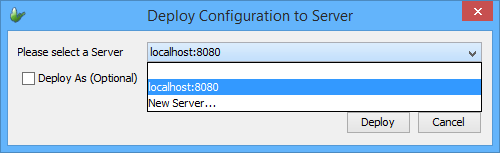
Selecting this option, a dialog will appear to select target server to deploy to. The drop down box in this dialog will be populated with all the BrightServer instances which have been registered under BrightBuilder's Server panel. Alternatively, 'New Server ...' may be selected to register a new server.
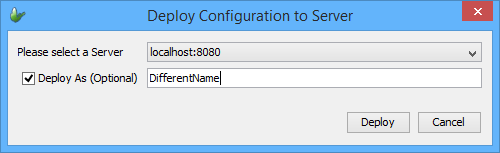
The configuration will be deployed as-is, using the BEP's file name. For example, 'ExampleProject.bep' would be deployed and assigned a version number under the 'ExampleProject' configuration group in the configuration repository. An alternate name may be specified using 'Deploy As' option in this dialog. In the image below, the project would be deployed under the 'DifferentName' group.
Once a server is selected, and any necessary aliases specified, if not authenticated to the server, the server login dialog will appear. Enter in server credentials for an admin user, or user with deployment privileges to continue.

 If
there are any issues connecting to the server, a dialog box will
appear, and the project may not be deployed. Please refer to the
BrightServer Troubleshooting
section of this document to assist in diagnosing any of these
issues.
If
there are any issues connecting to the server, a dialog box will
appear, and the project may not be deployed. Please refer to the
BrightServer Troubleshooting
section of this document to assist in diagnosing any of these
issues.
After this, the configuration description dialog will appear, which allows the inclusion of free text to the deployment. Typically, this would describe the incremental changes the BEP contains, such that configurations in the deployment sequence may be easily identified. Below this field, placeholders for any BrightServer Configuration File values detected in the BEP will also be included. This may be assigned by specifying a text file with the expected values. For more information on this option, please refer to the Configuration Property Files chapter of this document.
This dialog also provides deployment options for the BEP - 'Replace the latest version', or 'Deploy as a new version'. Where possible, it is recommended to use the default 'Replace the latest version' option of this dialog, to keep client images in-tact on deployment. In order for the latest version of the BEP to be replaced, the latest version should first be disabled in the Deployed Configurations panel. If the server configuration is currently active, a prompt will appear verifying the replacement.
If significant or staged rollouts are necessary, the 'Deploy as a new version' should be used. This will clear the client images for all devices syncing to this configuration.
The dialog also features Automatically Activate and Set as Default options for deployment. Ticking these boxes before deploying the BEP will perform these actions automatically once the configuration has been uploaded to the server. If not activated, these steps must be done via the Deployed Configurations node of the server.

Once this is completed, the BEP will be deployed - stored in BrightServer's project repository, with a confirmation dialog of success and the corresponding version number. The dialog will also give an additional option to move to the server's 'Deployed Configurations' panel for configuration activation, if not performed via the previous dialog.

Activated Configurations
Once deployed, a server configuration will be viewable in the 'Deployed Configurations' panel of the server, in an 'inactive' state. In order to be assigned, it must be activated to be utilised when synchronising to the server.
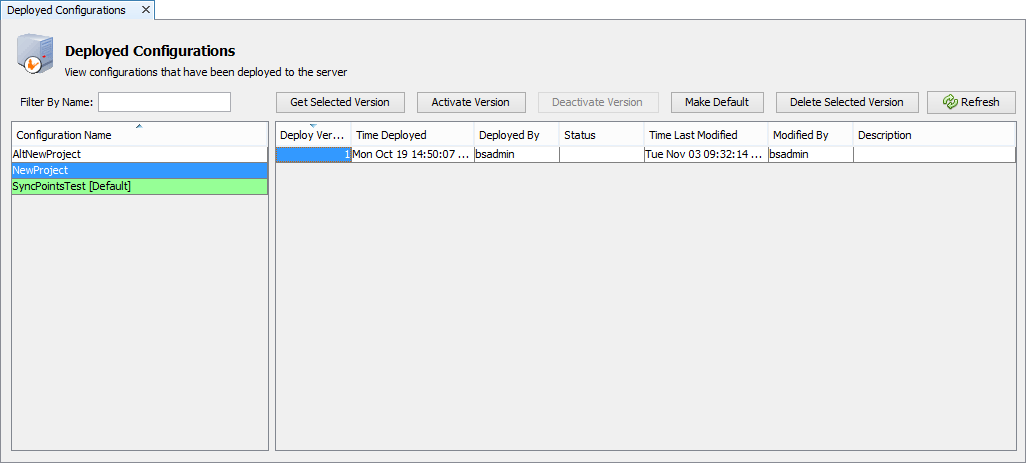
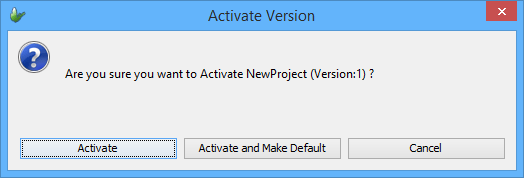
To set a configuration as active, simply locate the inactive configuration and release number in the 'Deployed Configurations' panel, select its row, and then tap 'Activate'. A dialog box confirming this choice will appear.
Activating will load the BEP for use, applying any changes required for the BEP, including client table alteration for replaced BEPs. A BEP which has successfully been activated and is running will be signified by green highlighting. If the configuration is not able to run, this state will be reflected in red. Furthermore, any jobs scripts contained in the BEP file will be activated on the server.
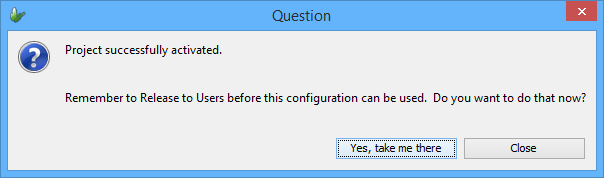
After activation, BrightBuilder will prompt the user if they wish to release the configuration to users in the system. Tapping on the 'Yes, take me there' button will open the Configuration > Users panel for this assignment.
Similarly, if a configuration is to be retired, the 'Deactivate' button may be used on any active configuration. If projects are still assigned to this configuration, they will be redirected to the server's default configuration.
Releasing Configurations
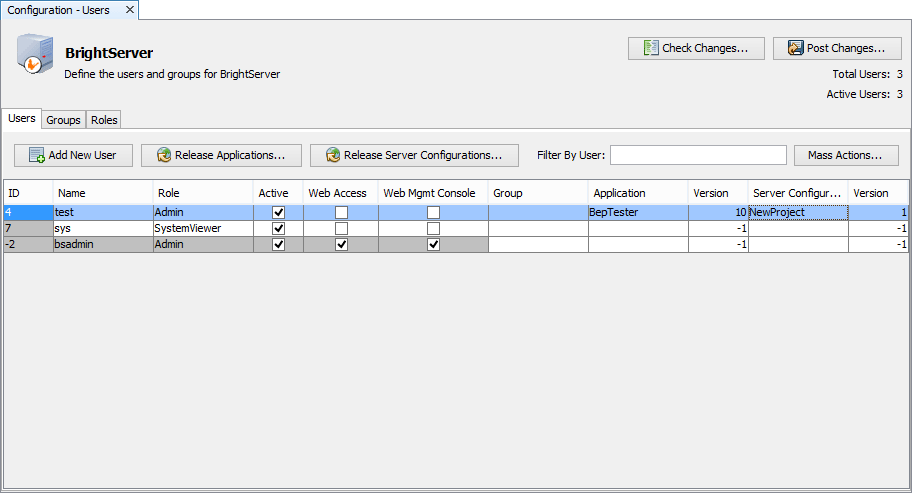
Deployed configurations may be assigned to users via the 'Configuration > Users' panel in BrightBuilder. Here, a deployed configuration may be assigned to be linked with a specific application and release number, to ensure compatibility between the two. This mode also provides flexibility, supporting multiple combinations of release revisions and projects.
Populating the 'Server Configuration' field in the table, specifying its release number, then applying changes will release the configuration for the user immediately for the next synchronisation. If a user is currently logged in to the server, the BEP's changes will take place after they log out.
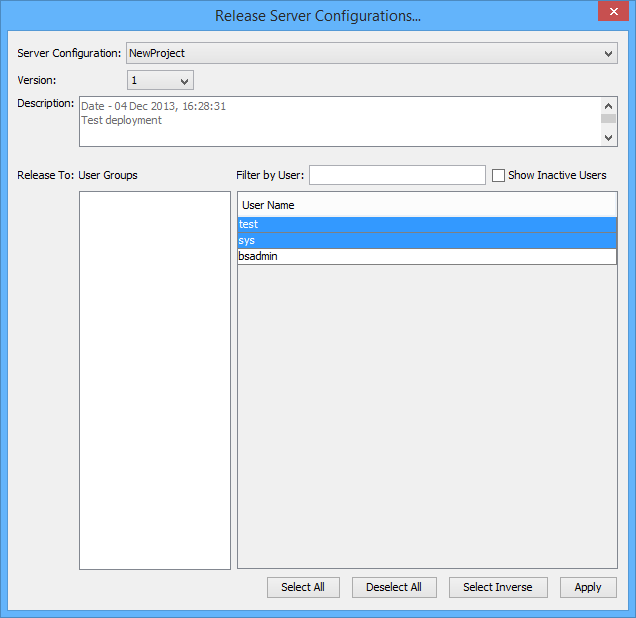
Instead of manually populating the fields for each user, the 'Release Configurations' feature may be used, which will contain a list of all activated configurations for the server instance. Releasing the configuration to groups of users may also be managed with this dialog.
Note: Retrieving records from a new BrightServer instance will re-initialise the device table state on the server. As a result, when performing a synchronisation with a new server configuration, devices will need to re-synchronise complete sets of records returned by database queries.
If reverting from one server configuration to another, it is strongly advised to clear the local database for affected devices.
Default Configuration
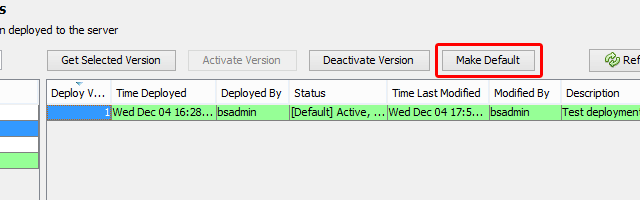
The default configuration is a single configuration out of all the configurations in the server's repository which will load for users with unassigned or invalidly specified server configurations. It is assigned via the 'Make Default' button on the Deployed Configurations node in the Servers panel of BrightBuilder, which will change the current default configuration to the selected.

The specific behaviour of the default configuration is as follows:
Users will be assigned to use the default configuration if their 'Server Configuration' value is empty, signifying to sync based on the default configuration.
The default configuration will also be used if the configuration name and release number specified for a synchronising user does not exist. In these scenarios, the server will attempt to sync in accordance to the default configuration after failing to retrieve the invalid configuration.
If no default server configuration exists, an error will occur in the event it is accessed. A default configuration must also still be active to run - if inactive, it will fail to be recognised or retrieved, also resulting in a server error. Setting an inactive configuration as a default will produce a server warning in the server's log.
If there is only one active configuration on the server, it will function as the default configuration.
A BEP replacing a default (disabled) configuration will retain the default status.
Initially, no default configuration will be present on a clean BrightServer install.
The deployment which is the server default will be marked by a [Default] postfix after its name, and prefix in its status column.