Configuring BrightForms
Contents Hide
BrightForms' Activation Screen
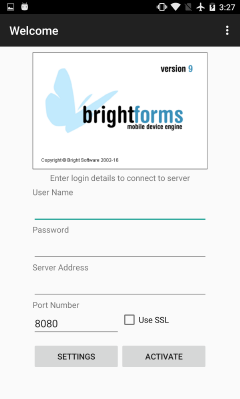
When opening for the first time on a device with no data, BrightForms will display an activation screen to the user. Here, basic settings to connect and authenticate with BrightServer may be entered, and 'Activate' may be tapped to initiate Application Distribution/Synchronisation. Additional settings may be accessed via the 'Settings' button, which will display the settings dialog.


Accessing BrightForms Menu Commands
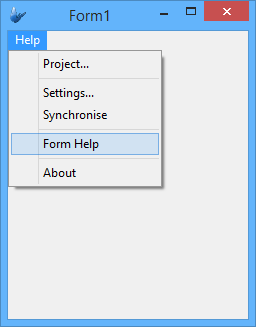
With a loaded project, settings and other BrightForms commands may be accessed by BrightForms' Help menus, or application bar, depending on the platform.

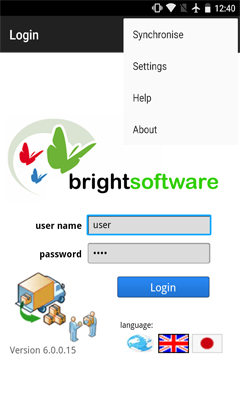
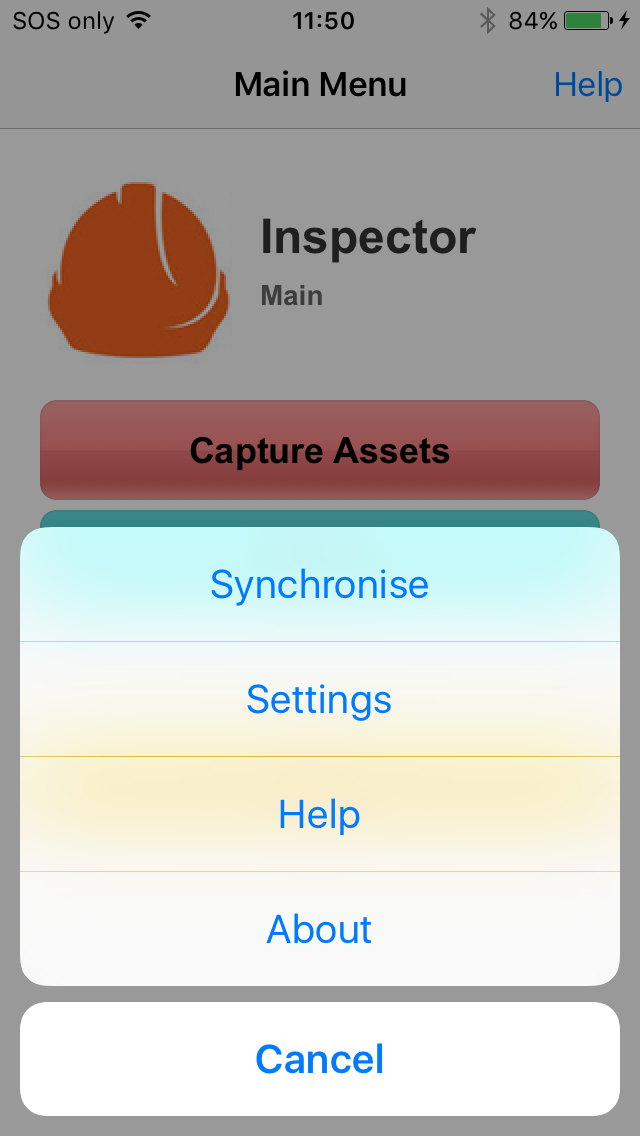
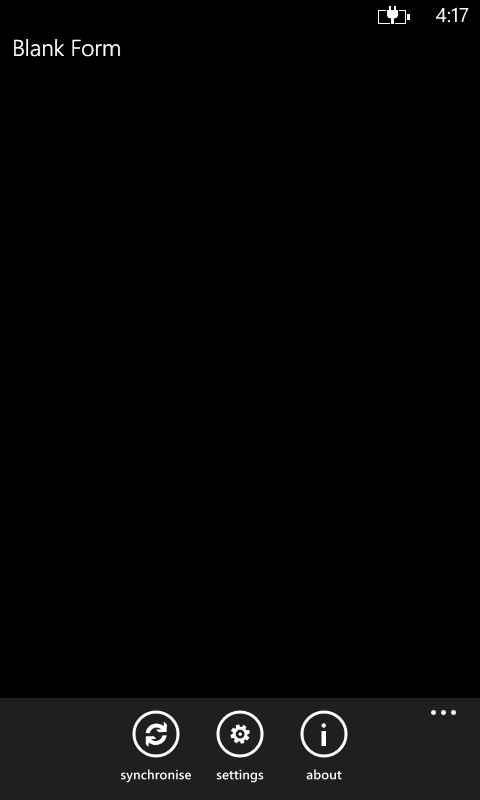
The commands available are as follows:
Project - Allows the user to select the BSS project to run in BrightForms. This option is only available on Windows Mobile, Windows Desktop and Android operating systems, and is typically used when developing projects using the 'Execute' buttons in BrightBuilder.
Settings - Allows the configuration of a range of advanced BrightForms options. This may also be accessed from the activation screen via the 'Settings' button. For more information on each configuration category, please refer to the 'Settings' section below.
Synchronise - Synchronises BrightForms to the server based on the details entered on the activation screen or settings dialogs. Any rules which have been activated via the Synchroniser.EnableSyncRule() method will run when this operation is executed.
Form Help - Displays text defined under the form's help property to the user. This option will not appear for Android, iOS, Windows Mobile/Store Apps if not defined for a form.
About - Displays the project's About form, otherwise BrightForms' device info screen.
Settings Configuration
BrightForms may be configured using the Help > Settings or Menu > Settings screens. These settings are able to be changed by the user, and affect how BrightForms runs and synchronises to BrightServer instances after the initial activation screen. These settings may be password protected based on the BSP which is running, via its Project Properties.
Furthermore, on iOS and Android devices, these settings may be changed and controlled via a Mobile Device Management (MDM) server. For more information, please refer to the Support for Managed App Configuration topic.
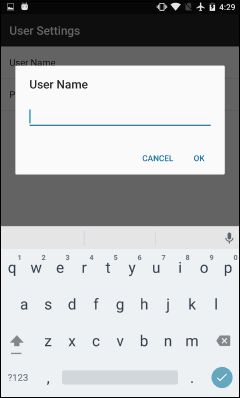
User
Settings under this category are used when logging into BrightServer. These details are used when synchronising to and from the server. If the user account is valid, and the password is correct, BrightServer will send/retrieve records based on any activated sync rules, based on the Server Configuration assigned to the user. If the application assigned to the user on BrightServer is not currently loaded on the device, BrightServer will update it prior to sync rule execution.
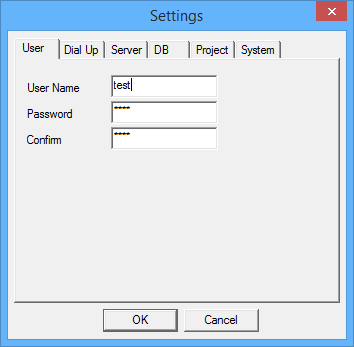
| Property | Description |
| Username | User name as configured on BrightServer under the 'Users' panel. |
| Password | Password as set for the user on BrightServer. 'Confirm' field also present on Windows Mobile platforms. |
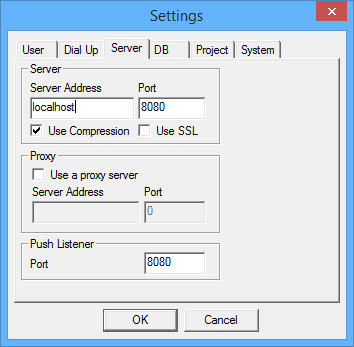
Server
This screen provides the address BrightForms will attempt to authenticate and synchronise data to/from when synchronisation is called in the application.

| Property | Description |
| Server | These settings tell BrightForms how to connect to BrightServer via TCP/IP |
| - IP Address | IP address of BrightServer. |
| - Port Number | Port number of BrightServer. Default is 8080. |
| - Use Compression | Compress messages sent to/from the server. Default is set to true. |
| - Use SSL | Use an SSL connection to the server. The default BrightServer SSL port is 8443. |
| Proxy | Fill out these settings if a proxy server needs to be used to connect to BrightServer |
| - Use a proxy server | Activate if necessary. By default, not activated. |
| - IP Address | IP address for the proxy server. |
| - Port Number | Port number of the proxy server. |
| Push Listener | This is the port BrightForms will listen for push messages coming from BrightServer. Requires a restart after being set. |
| - Port Number | Port number of push listener. Default is 8080. |
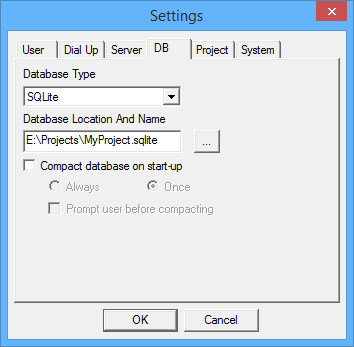
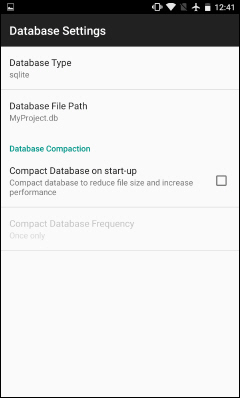
Database
Database settings specifies the local database's particulars for BrightForms. They may be found under the 'DB' tab for BrightForms on Windows Mobile/Desktop.
| Property | Description |
| Database | These settings tell BrightForms how to store its local data. |
| - Database Type | Choose database type for BrightForms. Restart is needed. SQLite is the default setting, and the only platform available for Version 9 of Windows/Windows Mobile, Android, iOS, Windows Phone and Windows Store apps. |
| - File / Database location and name | File name used for BrightForms' database on the device (full path for Windows Mobile, Desktop and Android apps). By default, the file is 'MyProject.sqlite'. |
| Compaction | Data compaction settings may be defined via this group of settings. It may be useful to compact the database to reduce file size and increase performance. |
| - Compaction on start-up | Setting to true will compact the database on startup, based on the frequency options - once or always. |
| - Once | This will compress the local database, then turn the 'Compaction on start-up' setting off. |
| - Always | This will always compress the database on start-up as long as the setting is activated. |
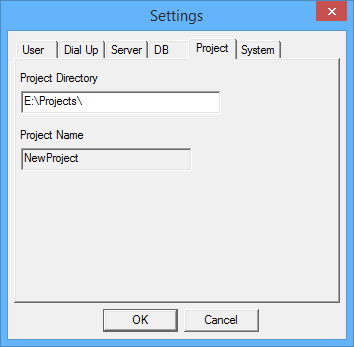
Project
These details specify the project's path directory and name. Typically, any changes to these values will be handled automatically by BrightServer or BrightBuilder. Changing these details may cause BrightForms to behave unexpectedly, as it may not be able to locate necessary configuration files.

| Property | Description |
| Project Directory | Directory which specifies project files deployed for BrightForms. Not applicable for iOS, Windows Phone, Windows Store App versions of BrightForms. |
| Project Name | The name of the project loaded. This is automatically populated after synchronisation/app execution. |
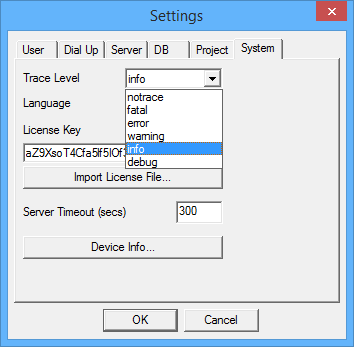
System
Provides additional settings for BrightForms which may be used for debugging, provisioning or enhancing the user experience when running the application.
| Property | Description |
| Trace Level | Defines the level of logging for BrightForms when running
the application on the device. This file is in plain text,
and is located in BrightForms' install directory for Windows
Mobile and Desktop, and in the logs folder of the Projects
directory for all other platforms.
The selectable levels of logging are No Trace, Fatal, Error, Warning, Info, Debug - with No Trace being the least, and Debug being the most verbose. Please note, that the higher the level of logging, the slower BrightForms will run on the device due to disk I/O. 'No Trace' is selected by default. The log file may be transferred off the device, or retrieved remotely via the Client Logs functionality on BrightServer. |
| Clear Trace | This is an option on iOS, Windows Phone and Store App BrightForms. This will clear the log files in the application's local store. This may be useful to reduce the amount of storage being used on the device, or to limit the amount of logging data sent to BrightServer. |
| System | Specifies additional server-to-client settings. |
| - License Key | License key of the device, unique to device/server combination. BrightForms will operate in Demo Mode if this key is invalid or not present. This key is typically assigned via synchronisation. |
| - Import License File ... | Specify a file for license key data on the device. This option is only available for Windows Mobile, Desktop and Android implementations. |
| - Server Timeout (secs) | Amount of time in seconds BrightForms will keep a connection to the server open before terminating with error. By default, this is 300 seconds (5 minutes). |
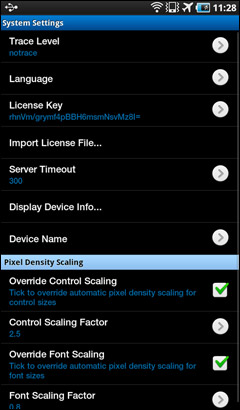
| - Display Device Info | This will display BrightForms' generic 'About' screen, with the version of BrightForms displayed. The 'Show Device ID' button on this screen may also be tapped to retrieve the unique device identifier for the device. |
| - Device Name | Android only option to set device name which is returned by the GetDeviceName() method. |
| - Keep Screen On | Android only option to override Android screen settings and always keep the screen on as long as BrightForms is running in the foreground. By default, this is turned off. |
| Scaling/Pixel Density Scaling | These settings allow the size of controls and fonts to be scaled by a fixed multiplier. This does not affect aspect detection on devices. |
| - Enable/Override Control Scaling | Turn on to scale control dimensions based on scale factor. Will take effect for any forms subsequently opened in the project. |
| - Control Scaling Factor | On Android, will be automatically calculated based on the device's PPI by default. |
| - Enable/Override Font Scaling | Turn on to scale font size based on scale factor. Will take effect for any forms subsequently opened in the project. |
| - Font Scaling Factor | On Android, will be automatically calculated based on the device's PPI by default. |
| Gestures | Android only options to enable scrolling in the form, and zoom in/out functionality. |
| - Enable Form Panning | Allows users to scroll forms larger than available screen space via tap and drag gestures. |
| - Enable Pinch-to-Zoom | Allows users to increase/decrease control size via pinch gestures. |
| Screen Orientation | iOS only options to lock the device to a particular orientation. |
| - Rotate Automatically | This is the setting by default. |
| - Lock to Portrait | Locks device to portrait orientation. |
| - Lock to Landscape | Locks device to landscape orientation. |
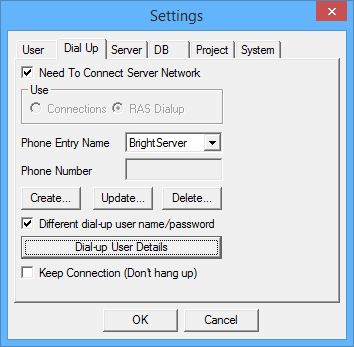
Dial Up (Windows Mobile, Desktop only)
These settings are usually used in devices such as PDAs and laptop, when one needs to connect to another system. If a direct network connection with the server already exists, leave Need To Connect to Server Network unchecked.
These settings are in BrightForms Version 8 and lower.
| Property | Description |
| Need to Connect to Server Network | Allows the user to use the connections defined in the Connection Manger or to use a RAS Dialup. |
| Use | Selects type of connection to be used. |
| - Connections | Not available for desktop. If selected, BrightForms automatically requests routes to an internal network (intranet) or a VPN when synchronising to the server. These settings are depenant on Windows Mobile's network connections configuration. |
| - RAS Dialup | Specifies to connect to a remote access server using PPP via dial-up. |
| Phone Entry Name | Select a defined RAS entry to use to connect to BrightServer. |
| - Create/Update/Delete | Create and manage entries listed under 'Phone Entry Name' drop down. |
| Different dial-up username/password | Used to specify that the dial-up username and password are different form the BrightForms' username and password. |
| Dial up user details | If user username/password is different to BrightForms' settings, this dialog is used to specify the dial-up username/password values. |
| Keep connection (don't hang up) | Used to make sure that BrightForms does not disconnect the connection on the device after a synchronisation process. This is best used in GPRS connections. |
Synchronising BrightForms
The Synchronise menu allows BrightForms to synchronise with the server, retrieving the latest application assigned to the user (if differing from the loaded application). If the application is the latest, BrightForms will then execute any activated sync rules which have been enabled in the project application session. It uses the server settings entered in the Server tab to determine which IP address and port number to use.
When this synchronisation occcurs, the following dialog appears, displaying the synchronisation progress. Records, if any, are then sent to the device in chunks specified by BrightServer. The activity indicator bar shows the users that the synchronisation is taking place.
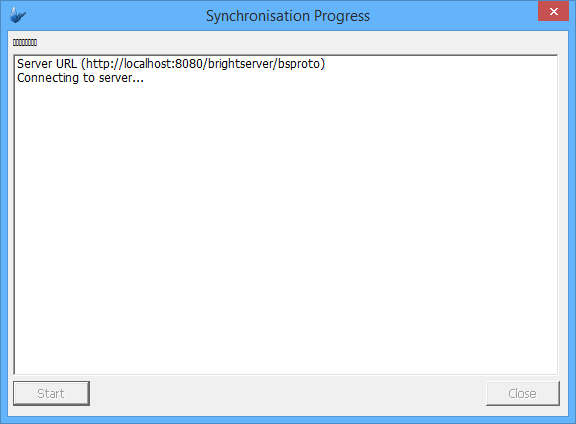
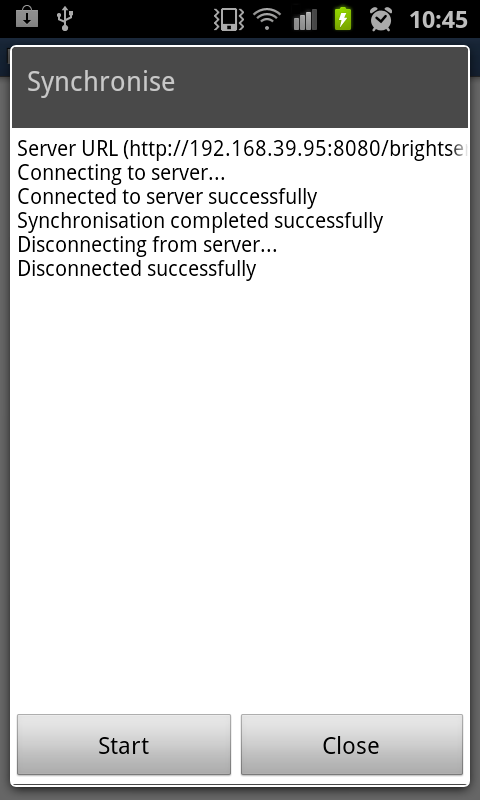
Synchronisation may occur via the interface by selecting the Help > Synchronise command in BrightForms. It may also be initiated via the Form.ShowSyncDialog(false) method within an application's expressions. This method may also be used with a 'true' flag to show a partial dialog when synchronising.
Sync Rules
The sync rules which execute are enabled or disabled programmatically in expressions using the Synchroniser.EnableSyncRule() as follows:
Synchroniser.DisableAll();
Synchroniser.EnableSyncRule("syncSomeRule", true);
Synchroniser.EnableSyncRule("syncSomeOtherRule", true);
local.vResult = Form.ShowSyncDialog(true); Synchroniser.DisableAll();
IF(local.vResult 0)
{
Form.MessageBox("Synchronise", "Some error message.", 0);
}
This dialog functions as an expression connecting with the server via the Synchroniser object. Executing the sync rules in the order above would be similar to executing the following methods programmatically without the interface via the Synchroniser.Connect(), Synchroniser.ExecuteSyncRule(), and Synchroniser.Disconnect() in expressions. For example:
Form.ShowBusyHourGlass();
local.vResult = Synchroniser.Connect();
local.vResult = Synchroniser.ExecuteSyncRule("syncSomeRule");
local.vResult = Synchroniser.ExecuteSyncRule("syncSomeOtherRule");
local.vResult = Synchroniser.Disconnect();
Form.HideBusyHourGlass();
Within a project Initially, all sync rules are disabled.
Syncing Applications from Server
When synchronising via dialog, or connecting to the server, the first step will be to connect to the server and check whether there is a new application for the user, assign any licenses and then perform any sync rules. If there is an application update available, BrightForms will exit the sync dialog with the code -10519.
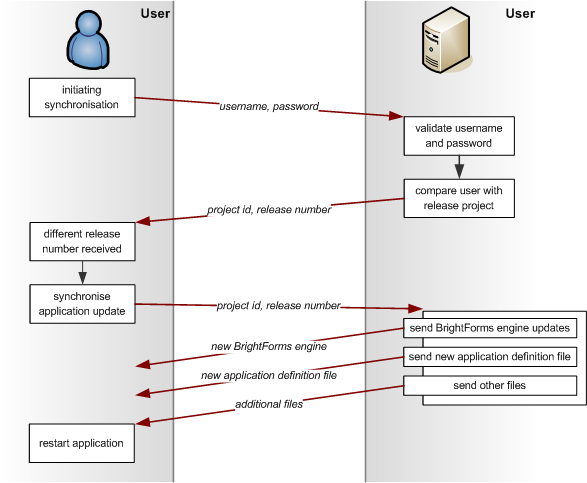
The above figure displays the data transfer protocol used by the Sync Manager for the app distribution process. Upon connection with the server, the client sends its user name and password to access the server. The server responds with the Project Id and the Release Number the user is supposed to have on the device. The difference will trigger BrightForms to synchronise new application updates.
Furthermore, any files that are attached to the deployment are received, including any changes to the BrightForms execution engine. After a successful application update, BrightForms prompts the user to restart the application. This will make any changes to the application or the BrightForms engine apparent.
 Important:
The user must restart BrightForms for the application and/or engine
updates to take effect.
Important:
The user must restart BrightForms for the application and/or engine
updates to take effect.
 Note:
The server also assigns BrightForms devices their license keys
during synchronisation. For more information, please refer to
the Appendix
> Mobile License Deployment chapter of this document.
Note:
The server also assigns BrightForms devices their license keys
during synchronisation. For more information, please refer to
the Appendix
> Mobile License Deployment chapter of this document.
Subsequent synchronisation requests will always check the application distribution and the sync rules that are enabled. Sync Rules are enabled in the user interface form through the use of expressions and the Synchronise objects. After the first enabling of a sync rule, it will stay enabled unless another expression is run to disable it. Thus you can use the Synchronise menu to synchronise your tables with that of the server after the first synchronise using the form interface.
In case of any synchronisation errors, the application update on application distribution will be halted by BrightForms while data will be rolled back as if no synchronisation happened.
 Please also note that BrightForms on Android is only compatible
with BrightServer 6 or above, and BrightForms on Windows Phone/Store
with version 8 or above.
Please also note that BrightForms on Android is only compatible
with BrightServer 6 or above, and BrightForms on Windows Phone/Store
with version 8 or above.
Form Help
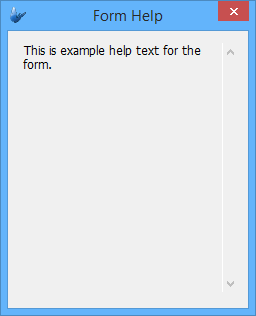
Custom text explaining the form functionality to the users may be set via the 'Help' dialog in BrightForms. This dialog may be accessed via the 'Form Help' option from BrightForms' menu, and will display the text defined for the form's properties.
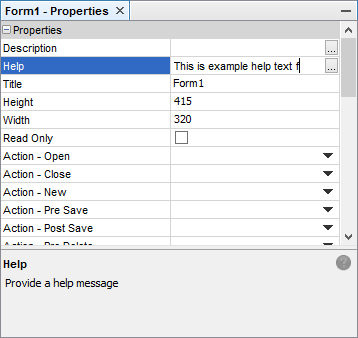
If there is a help message for the form, it will open in a separate dialog for the user.
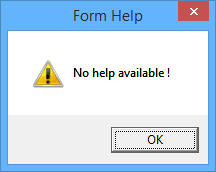
When there is no help message specified, the following message will be displayed on Windows Mobile and Desktop implementations. On Android, iOS, Windows Phone and Store apps, the 'Help' button will not be available if the Form's help property is empty.
About
The About menu will display the form configured under the project About Form Name property of the project.
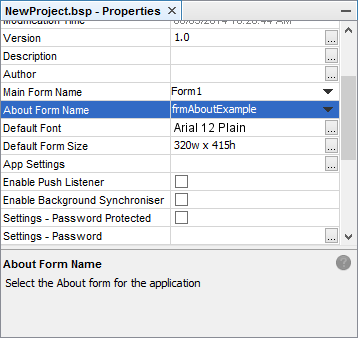
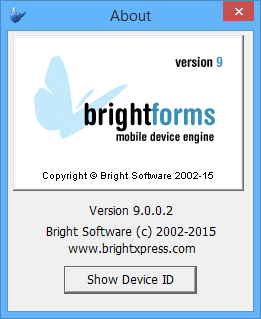
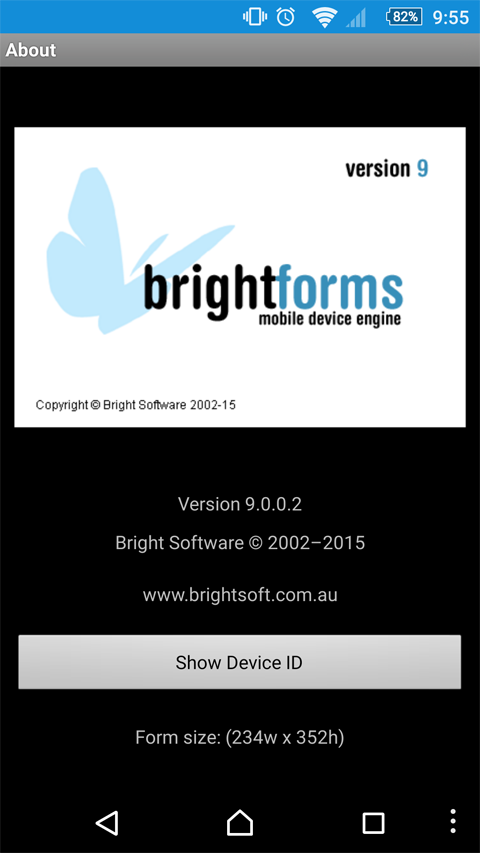
If no form has been specified in this property, this action will display the default BrightForms About form, which shows the product name, version number and company name. On Android, it will also display the usable screen size for the specific device in BrightBuilder. This is the same form which is displayed via accessing the System > Device Info option in BrightForms' settings.
It also has a Show Device ID button, once clicked; it will show the Device Id dialog such as the one below. This is for licensing procedure, since BrightForms is registered or licensed per device.
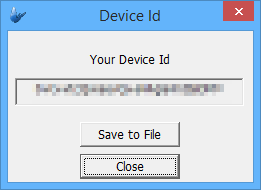
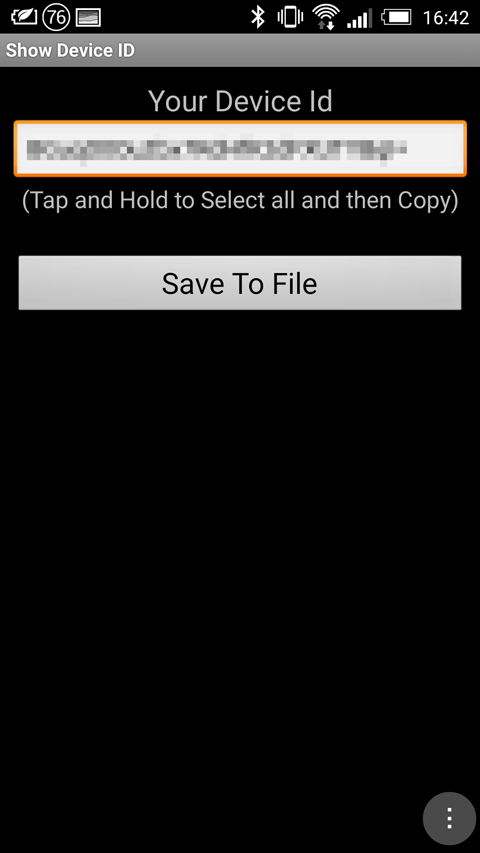
BrightForms License Management/Device ID: If the device does not
provide the unique device id (serial number), BrightForms generates
a unique id when it is used for the first time or at any time
that the device is hard reset.