Synchronise data from server using Sync Dialog
Contents Hide
Description
This section goes into detail about how to synchronise data from a server using Sync Dialogs and the Data Flow element in BXP projects.
Introduction
Synchronisation ensures that both server and device has the necessary data required and the integrity of the data is preserved throughout the server and device. The synchronisation engine in Bright products such as the BrightServer, is what carries out the sending and receiving of records from client to server and vice versa.
Synchronisation can be added to BXP projects through sync dialogs. Sync dialogs are tasked in providing synchronisation to applications by allowing users the ability to enable and disable synchronisation rules that facilitates the synchronisation of data. Sync dialogs allow this functionality through sync requests.
Sync requests provide the requests for synchronisation that encompasses the required details needed. Essentially a sync requests consists of a sync rule and query similarly to BSP projects. These sync requests specify all that is required in order for synchronisation to be completed such as a data table in which the synchronisation of records within that data table will take place. The direction in which data will be sent and received or the sync direction (send to server or download from server) will need to be detailed as well. Through sync dialogs users of the application will be able to enable and disable all the sync requests desired and carry out the synchronisation through simple checkbox and button presses.
The data flow element in BXP projects are also required in order for synchronisation to take place. The data flow element defines the different sources/destinations of data whether client tables or server side databases and files. It also defines the flow of data between these data sources/destinations hence is fundamental when executing synchronisation in order to dictate where data is sent and received.
In order for synchronisation to take place, a server that handles the management of business data between the server and devices is required. If a project created in BrightBuilder requires synchronisation, the BrightServer should be used to carry out synchronisation. With BrightServer, it allows mobile works to connect to organisation's back-end information systems in a easy-to-use lightweight solution. The BrightServer enables mobile devices running the BrightForms app to connect with server-side data sources hassle free without the need for complex server side programming.
Create a Sync Dialog
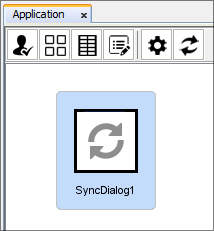
Sync dialogs can be created through the Application Panel in a easy
and simple way. The application panel lays out the application in
a visual representation through form dialog nodes and form links.
Each form dialog node corresponds to a specific instance of a form
dialog. In this case, a sync dialog should be added to the application,
by simply dragging and dropping the sync dialog icon (![]() ) onto the application canvas
a new sync dialog node will be created.
) onto the application canvas
a new sync dialog node will be created.
Add Sync Requests
Sync Requests contains the details of a request for synchronisation of data. They contain all the necessary information for synchronisation to take place. The requests needs to specify what table is to be synchronised with and the synchronisation direction (either send to server or download from server). The sync request also requires a query/filter for the data table to specify the data set to be sent or received in the synchronisation.
Through the sync dialogs, users of the application can decide which sync requests to enable and disable when synchronisation is executed. When synchronisation is started only enabled sync requests within the dialog will be performed
Sync requests can be added through the sync dialog editor which
can be opened by double-clicking on a sync dialog node in the Application
Canvas. Initially the sync dialog will have one button named 'SyncButton'.
This button is tasked with starting the synchronisation process to
execute the enabled sync requests in the sync dialog. Pressing the
 button will add a new
sync request to the dialog. By selecting on an individual sync request
in the list of sync requests, the properties for each requests can
be changed.
button will add a new
sync request to the dialog. By selecting on an individual sync request
in the list of sync requests, the properties for each requests can
be changed.
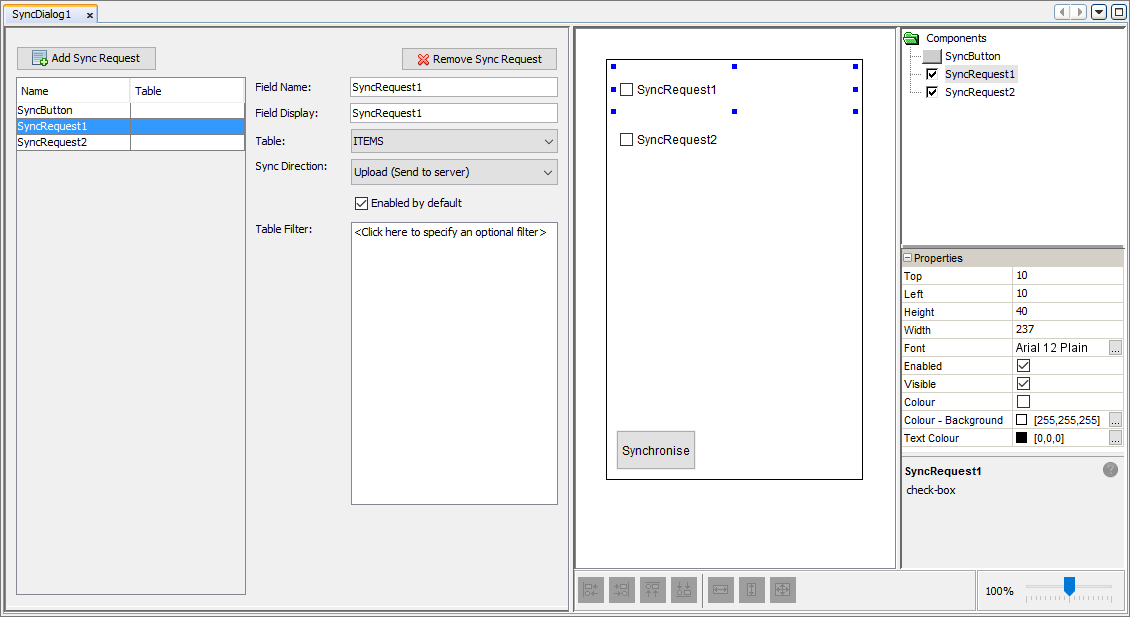
The sync request name can be renamed under 'Field Name' and the caption text shown in the checkbox control can be changed through the 'Field Display' property. An existing data table defined in the project must be set as the table to be synchronised. Initially the dropdown menu will appear red indicating it is an error to be left empty. The sync direction must also be specified. This direction indicates the flow of data between the server and device, either the device will upload the data set to the server or the device will download a data set from the server.
A table filter can also be specified to create the data set that will be sent in the synchronisation. If the filter is left empty, the entire table will be the data set used in the synchronisation. Essentially the filter is a query to find the specific records that match the laid out filter. Sync requests can also be set to be enabled by default.
Define Data Flow
The data flow element exists as part of BXP projects to define the flow of data between client devices and server side data sources. Through the data flow panel, a visual view can be shown of data flow. Defining the data flow is essential for synchronisation to be executed as they specify where the data is sent and received from.
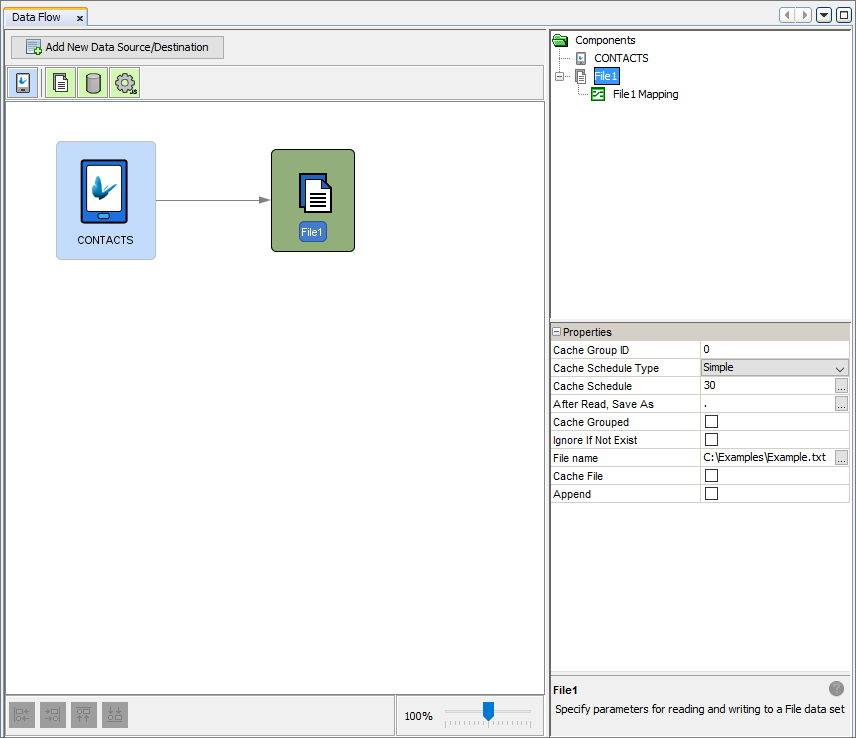
The data sources/destinations in the form of client table nodes and data accessor nodes can be defined with the necessary information to connect to them allowing synchronisation to be completed successfully. Client table nodes are used to represent the data contained within that client table on the devices running the application. Data accessors are data sources that can be accessed from the server which can either be a database source (database data accessor) and/or file sources (file data accessor). Hence if synchronisation is required as part of the application, the data flow element should be used to define the correct flow of data between client and server. Through the BXP designer, BXP projects provide all that is required for mobile applications to be developed and readily available for synchronisation through bundling of the definition of the application (Application element) and the details regarding server configurations for data flow (Data Flow element).
Publish and Carry Out Synchronisation
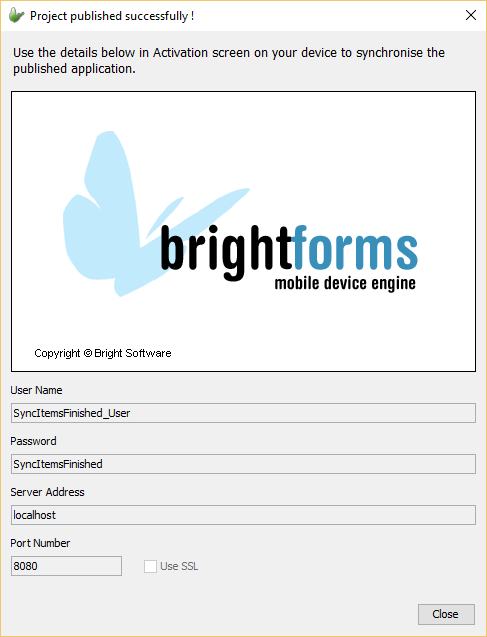
Once the application and all necessary elements (Application and Data Flow) are defined, the project can then be published on the server to be distributed and executed on mobile devices. The project should be published onto a BrightServer instance where applications can easily be deployed to mobile devices out in the field. Through the BXP designer, deployment of BXP projects is made easy through simple button presses. Begin the process by first right-clicking the BXP project desired to be deployed. In the context menu, select 'Publish' to open the 'Publish Project' wizard. In this wizard the steps will need to be followed in order to enter the details of the BrightServer and specifying the desire to publish both the Application and Data Flow elements of the BXP project. Both elements will need to be published as the Application element defines the mobile application itself and the Data Flow element lays out the client and server sync points and how data flows between them for synchronisation. Once published, the necessary user account to login into the BrightForms app will be displayed to the user. These user details will need to be entered into the BrightForms app for the published project to be download and executed on the device.
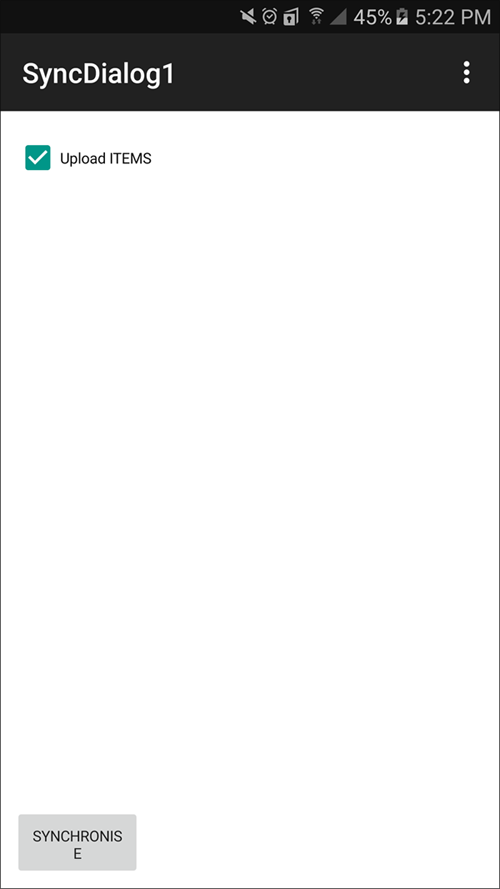
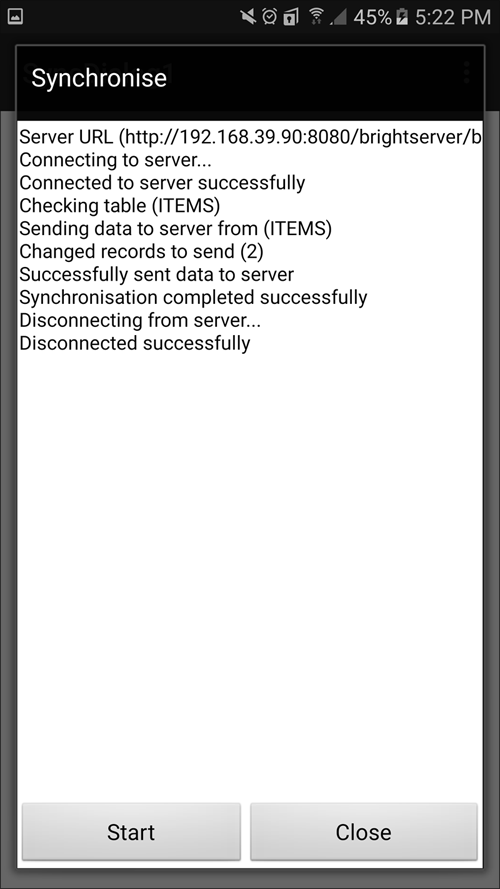
Once the application is executed, synchronisation can be carried out through the sync dialog. By opening the sync dialog form when the application is running, the user has the ability to enable and disable the sync requests desired to run when synchronisation is executed. Within sync dialogs, users can tick the checkbox on the form indicating the sync request is now enabled or untick the checkbox showing the sync request is now disabled. Once all sync requests are enabled and/or disabled as required, then an action button with type, 'Synchronise', can be tapped to start synchronisation to carry out the enabled sync requests. Initially the sync dialog form will open with all sync requests with their default values that is instantiated during the development of the application (Within sync dialog editor, requests can be enabled by default).
It should be noted, the sync requests enabled will stay enabled even when the sync dialog is closed and persisted throughout the application. Through this behaviour, action buttons can be defined in other form dialogs to carry out synchronisation of the currently enabled sync requests within the application.
Exercise
Using the beginning BXP project (SyncItemsStart.bxp) open the project within BrightBuilder.
Change the project so that the project can download data from the text file, ITEMS.txt and place them into the ITEMS data table through synchronisation. This can be done by creating, a sync dialog with one sync request and by allowing access to the sync dialog through a form link. Alongside this, the Data Flow must be defined within the Data Flow element of the BXP project.
Test your application by deploy the project onto a BrightServer (since App Server cannot carry out synchronisation) and compare against the finished project, 'SyncItemsFinished.bxp'.