How to Capture Signatures
Contents Hide
Description
This tutorial details how to add fields in the Business Application Designer application which may be used to capture signatures on the device. These records may be saved to the device's database and synchronised to the server.
Edit Dialog 
The Edit Dialog is designed to show or capture user data on the device. This is achieved by using Fields in the Edit Dialog, which may be configured for display purposes, calculations and/or have their value saved to/loaded from the database. As with other dialogs, it is created by dragging and dropping the Edit Dialog icon onto the application canvas of the Applications node in the BXP project.
The 'Signature' field is used to display, save or load signature data on devices within the Edit Dialog. Tapping the 'New Field' button, and specifying the 'Signature' type in from the drop box in the opening dialog will add a new signature field to the layout and component panels, where they may be further re-arranged and edited.
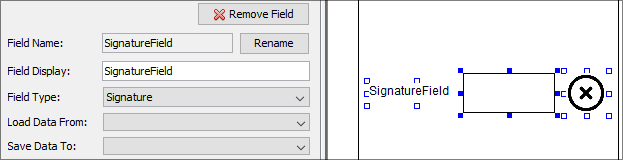
The field appearing in the layout will consist of a label, image control and button with a 'Clear' image. These controls may be resized, rearranged and/or set to be hidden to the user, if required.
Device
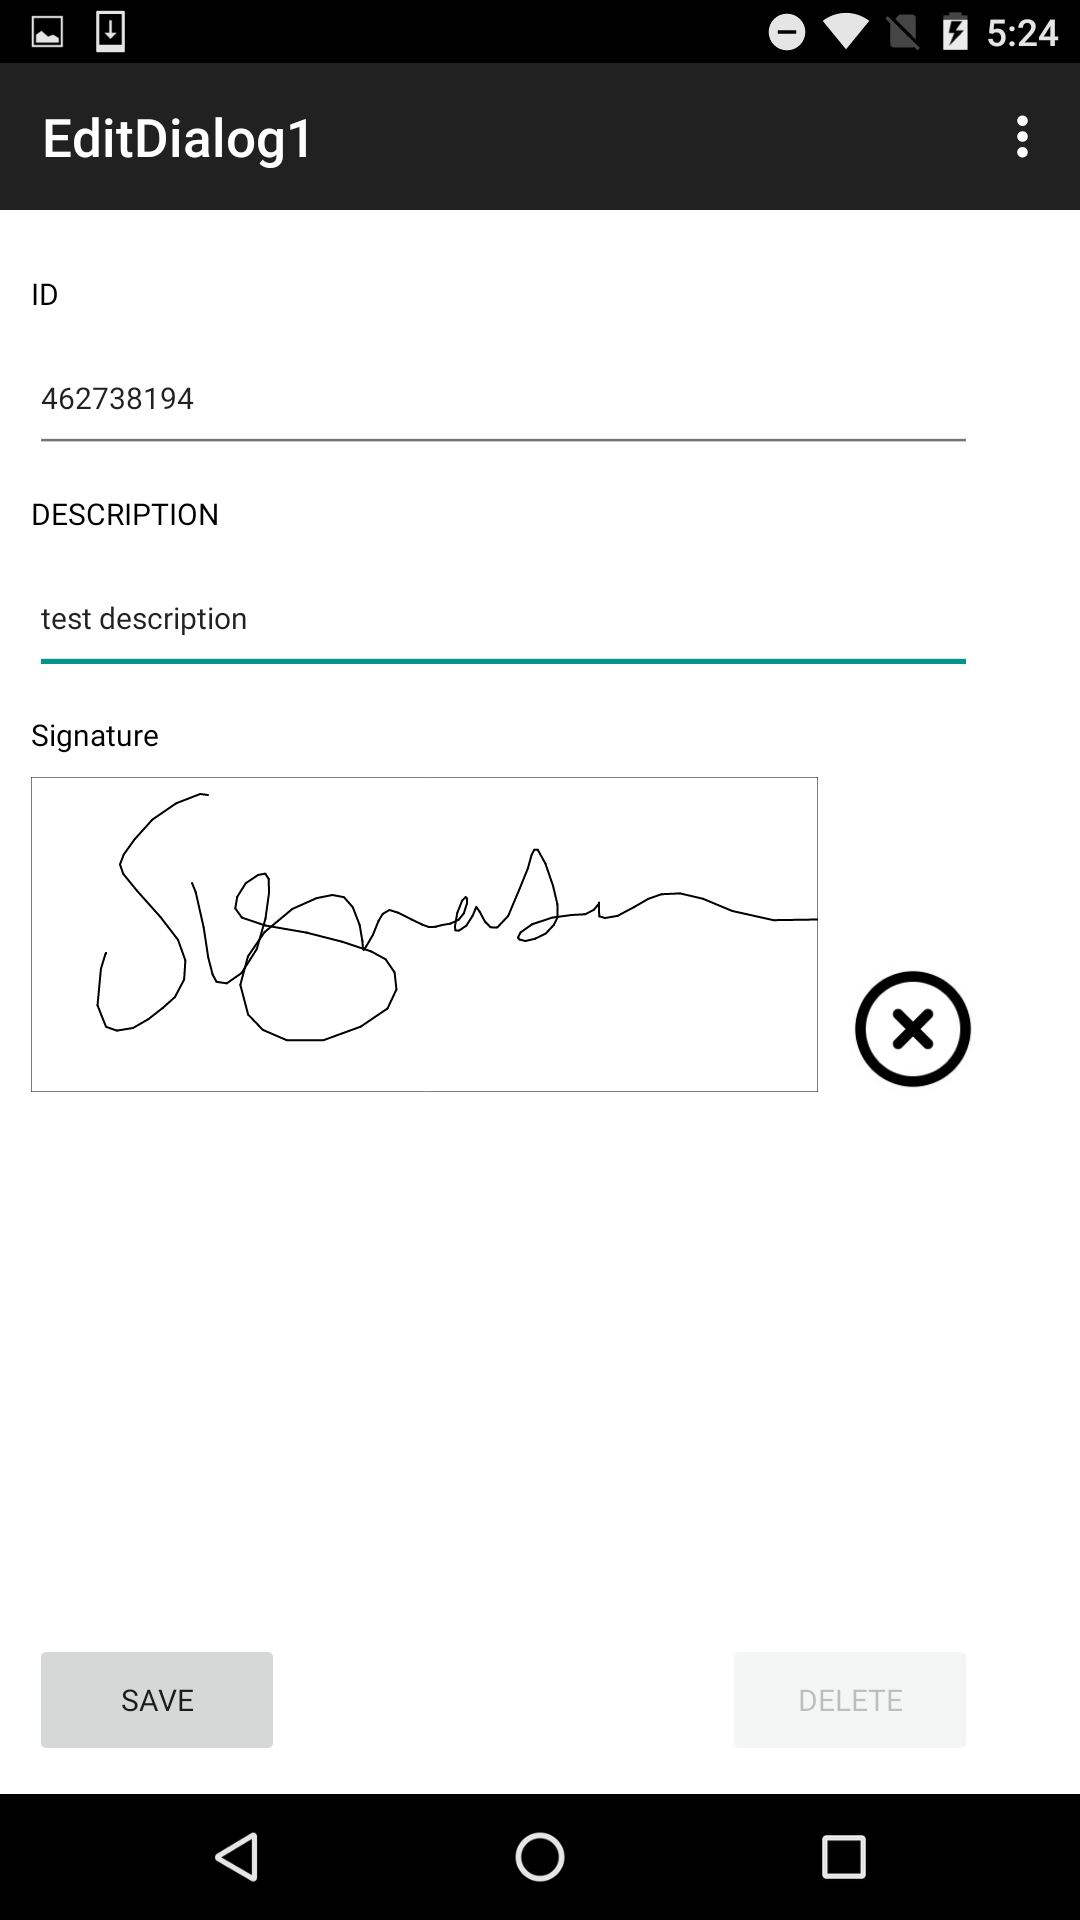
The signature field on the device by default will contain an empty rectangle with white background and black borders used for signing. Touching or drawing with the stylus within this area's bounds will create a black path until released.
In addition to this rectangle, a button will exist for each signature field. Tapping this button will clear the current value in the signing area.
Data
In a form bound to a table, data may be saved and loaded from the form using the Save To and Load From values of each Edit Dialog field. Saving signature data to the database is performed using the Base64 data type for the table.
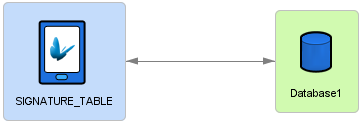
Data may be retrieved and sent via establishing a data flow in the BXP project which may be published to the server. This column may synchronise directly to or from binary columns in a connected data flow database.
Exercise
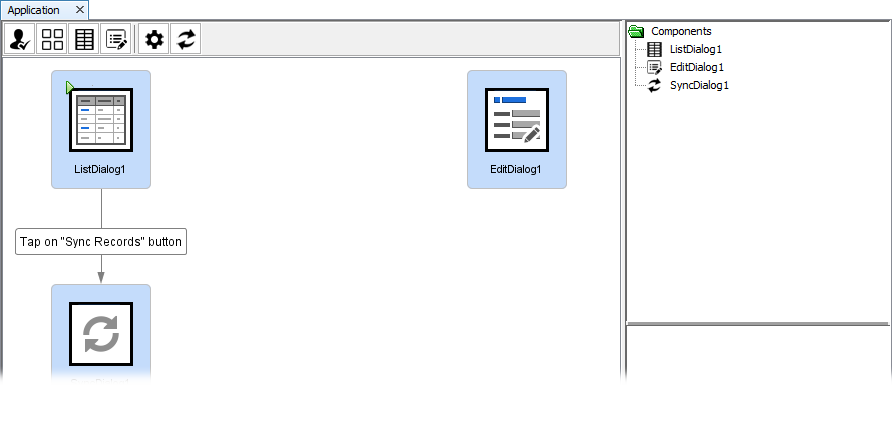
Initially, the project will have a main list of records, and link for synchronisation of a SIGNATURE_TABLE. Complete the project by creating and arranging a new Edit Dialog in the applications panel. Create a new form link between this new edit dialog and the list node, linking creation with the 'Add' button and modification via single clicking the listview rows.
In the Data Flow node, modify the data accessor with correct credentials, then use the 'Create Tables ...' method via the BXP's context menu to create sample tables in the back-end database. This will establish the table BrightServer will synchronise the photo records to and from.
With the database configured, publish the application to a BrightServer Instance. After publishing, retrieve the application, then add records on the device. Synchronise, observing sending and retrieving records after they have been cleared.
A sample solution completed with the Edit Dialog is provided with the BxpSignatureFinished.bxp file.