Dropbox Dialog
Contents Hide
Dropbox Dialog 
Dropbox dialogs provide a seamless and direct integration to files and folders stored in a Dropbox account. Using Dropbox integration, mobile devices do not have to synchronise data to and from a BrightServer instance. Instead the required mobile data can be sourced from files in Dropbox. Similarly the data collected on the device can be pushed to files in Dropbox. This may be a good option for mobile app solutions where a server instance is not required, especially for teams with very small number of users in the field.
The data exchange is handled through files in CSV (Comma Separated Values) format (https://en.wikipedia.org/wiki/Comma-separated_values). The files that are to be transferred from Dropbox are expected to be simple CSV files. In the other direction, the data captured on the device is sent to Dropbox as CSV files as well.
There are few simple rules that need be followed when the CSV files are consumed or created. They are as follows:
Field Separator : The field separator must be a comma.
Escape Character : Double quotes are used as escape characters. If a field value contains a comma, then it must be enclosed by double quotes. If the field value contains a double quote, then a double quote character must also be used to escape it.
Field Order : Fields in the CSV files must be exactly in the same order with the columns as defined in the table, and all of the field values must be present in each line of the file.
Null and Binary Blobs : Null or binary blob column values are represented as empty string values.
One Table, One File : Each file represents data from a single table. This means that table joins are not possible. Important to note that when receiving data from a Dropbox file into a table, the existing data in the table will be deleted before importing the file into the table. When transferring data, however, a subset of the table records can be sent to a Dropbox file.
Field Format : CVS fields can be formatted by using the table columns' Text Format attribute.
 Important Note:
The CSV field format of date-time column values must be in the
ISO yyyy-MM-dd HH:mm:ss
format when downloading data from Dropbox. HH
in the format indicates that the time component is in 24 hour
format. When sending date-time values to Dropbox, a format can
however be specified to create the CSV date-time fields in the
desired format. If date-time field values are not in the required
format, then the date-time values will be either a null value
or the current date-time depending on the platform.
Important Note:
The CSV field format of date-time column values must be in the
ISO yyyy-MM-dd HH:mm:ss
format when downloading data from Dropbox. HH
in the format indicates that the time component is in 24 hour
format. When sending date-time values to Dropbox, a format can
however be specified to create the CSV date-time fields in the
desired format. If date-time field values are not in the required
format, then the date-time values will be either a null value
or the current date-time depending on the platform.
A Dropbox dialog allows defining multiple requests on the same form. These requests are also known as "transfers". Each transfer specifies the direction of the data flow: Sending data to Dropbox is an "upload" action, and in reverse, receiving data from Dropbox is a "download" action.
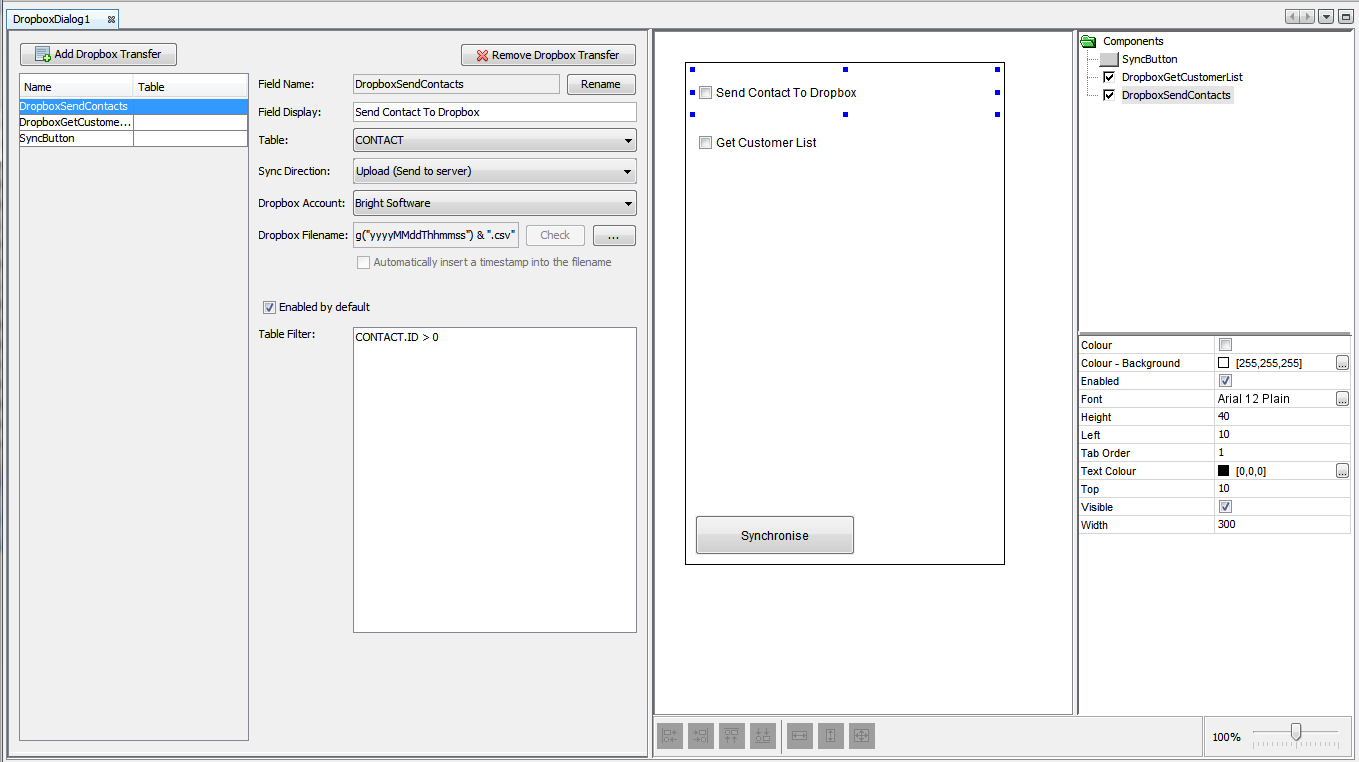
Dropbox Transfers
Dropbox transfers define the synchronisation of data between devices
and Dropbox accounts. They specify what table is to be synchronised
with, the sync direction (upload to or download from Dropbox) and
the data set to be sent or downloaded. The Dropbox dialog editor allows
Dropbox transfers to be added through the ![]() button
and can be removed by the
button
and can be removed by the ![]() button. By adding a Dropbox request it will automatically add a check
box control to the form. Clicking on a Dropbox request in the Dropbox
transfer list, allows for the transfer settings to be changed through
the options shown. These options include:
button. By adding a Dropbox request it will automatically add a check
box control to the form. Clicking on a Dropbox request in the Dropbox
transfer list, allows for the transfer settings to be changed through
the options shown. These options include:
Field Name: The name of the field/Dropbox transfer and the name of the control on the form.
Field Display: The caption text displayed next to the check box in the identifying label. The label control's name will be in the form '<Field Name>_<Field Display>'.
Table: A list of existing tables that can be used to choose the table to be used in the transfer.
Sync Direction: Specifies the direction of the Dropbox transfer. It can either be 'Upload (Send to server)' or 'Download (Fetch from server)'. The reason it is called the 'Sync Direction' is because, each transfer emulates the standard synchronisation process. When transferring data to Dropbox, only the changed data will be sent. Upon successful transfer the data will be removed from the local database. When transferring data from Dropbox, before importing the file content into the specified table, the local table content will be deleted, then the file content will be imported into the table.
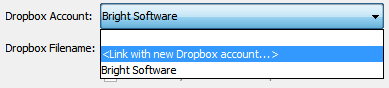
Dropbox Account : Specifies the Dropbox account to connect to. This option allows linking to a new Dropbox account by going through a set of wizard screens, or selecting an existing one that has already been previously connected to.
Dropbox Filename: Specifies the source or the destination Dropbox file name. The "Check" button can be used to verify the existing of a file in Dropbox folder. This is helpful for verifying the files be downloaded from Dropbox. However for the files to be uploaded to Dropbox, this functionality may not be as useful as they may not exist to start with. The file names specified in this field are generally static file names. However they can be dynamic and generated at runtime depending on various application parameters such as application settings configured in Settings dialogs, or the result of object method values such as current date or time on the device when the transfer is initiated. The below example shows a dynamic file naming where the user name and the current timestamp are being used to generate a file name at runtime in order to implement a unique file naming strategy.
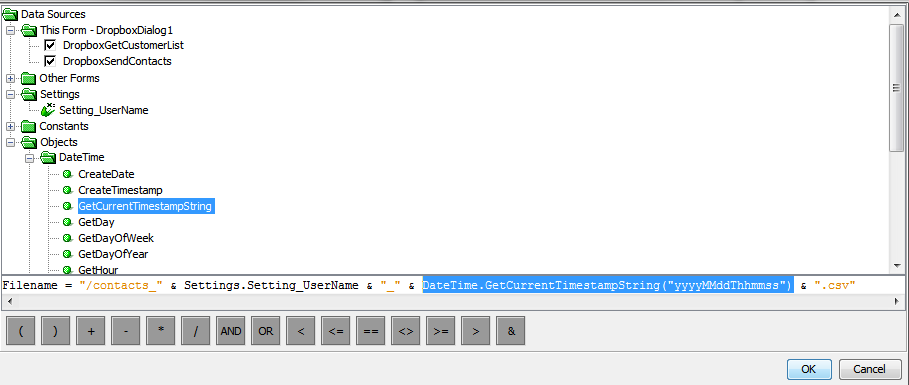
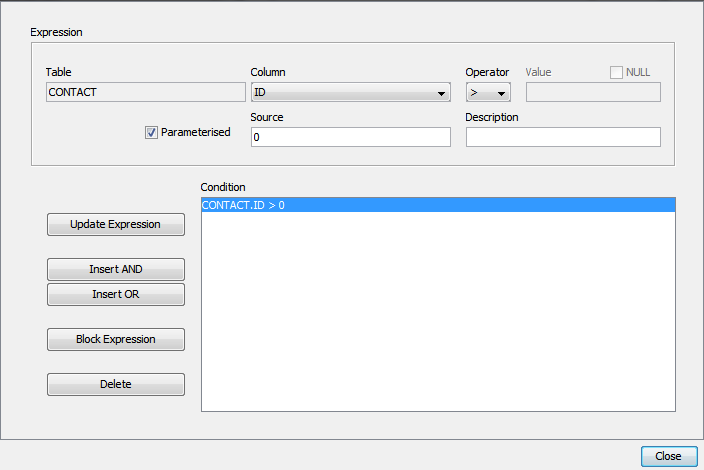
Table Filter: This option is available only when transferring data to Dropbox as the application may want to send the data only if it is in a desired state. By clicking on the table filter box, the 'Select the table filter condition' window will be shown. Through this window, the table can be filtered or "queried" by defining the condition/s for what records will create the data set to be transferred in the Dropbox request. If the filter is left empty, then all of the data in the table will be transferred meaning every record will be sent to Dropbox.
Enabled by default : A Dropbox transfer can be enabled by default by ticking this check box.
Form Values
| Form Value Name | Description |
| Checkbox values | Contains the current value of the checkbox. It will be a boolean where TRUE indicates checkbox is ticked and FALSE specifies checkbox has not been ticked. |